How to Remove Noise and Grain From Video in VEGAS Pro
No one wants to see a grainy, noisy video, especially today, when everyone is aiming for maximum video quality. Getting to the editing room and finding unwanted noise in a scene doesn’t have to be the headache that it was in the past; today we have many tools at our disposal: professional editing software, plugins, and even an AI video denoiser can help.
In today’s article, you’ll learn how to quickly denoise videos with Vegas Pro to create professional-quality videos.
Let’s dive in!
What is Video Noise?
Video noise is random, unwanted variation in brightness or color in a digital video image. It looks like fuzzy grain, speckles, or static, and it usually happens in low-light or high-ISO situations.
Shooting in low-light or dark scenes provides less light to the camera sensor, causing the most common type of noise: patternless, shifting specks and grain of color and brightness. Some recommendations to avoid video noise are:
Keep ISO settings at their base.
Use lower f-stop values to physically allow more light into the sensor, allowing you to lower the ISO.
Add additional lighting sources.
Step-by-Step: How to Denoise Video in Vegas Pro

To remove grain from a video, we need a good denoiser like the denoiser effect built into Vegas Pro. In this step-by-step tutorial, we'll learn how to denoise grainy and noisy videos in Vegas Pro. If you’re a brand new Vegas Pro user, you can download a free trial to follow this guide.
Step 1: Set Up Your Project
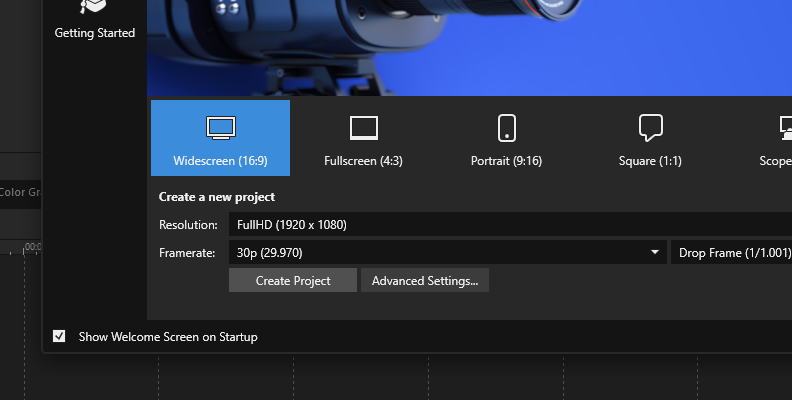
Open the project with the video clip you want to denoise, or create a new one and import a clip with video noise into the timeline.
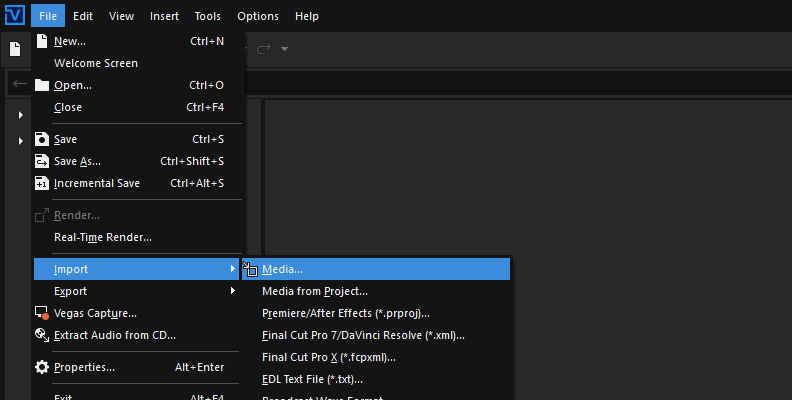
Step 2: Add Denoise Effect
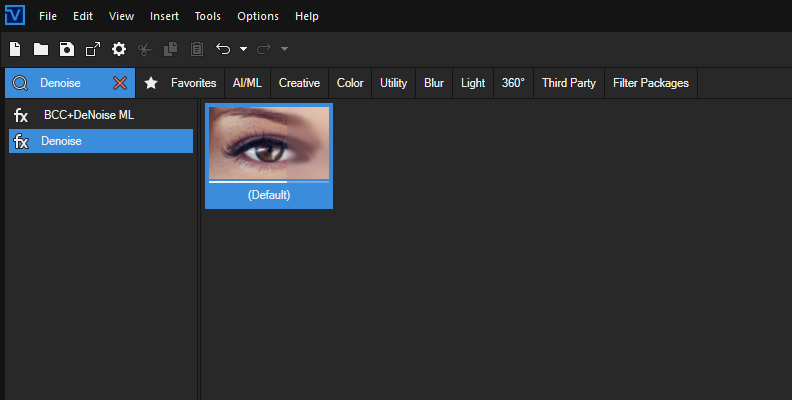
Go to the Video FX tab and type Denoise in the search box. Once the Denoise effect appears in the list, select it, and you’ll see there’s only one default preset. Click and drag it to the video event with noise in the timeline to apply the effect. The Event FX window will pop up when you drag the effect to the event.
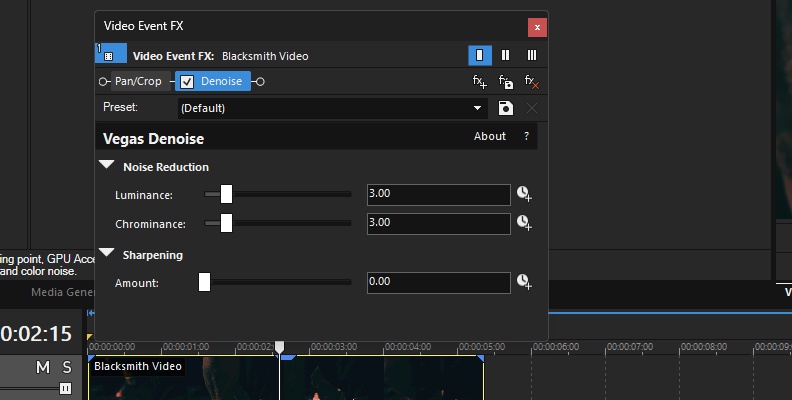
Step 3: Adjust Denoise Effect Settings
In the Event FX Window, you’ll see the Denoise parameters: Luminance, Chrominance, and Sharpening. Start by finding a frame with a lot of video noise and locating the grainiest part of that frame. Watch out for dark areas, which is where most noise is visible.
Next, adjust the Luminance and Chrominance sliders. Let’s review what each of these options does to your image.
The Luminance slider controls the reduction of brightness and light variations across pixels in the image that may look like film grain or fine monochrome speckles. Raising the Luminance amount will smooth the image, but pushing the slider to high levels can make the image in your video look like an oil painting, or waxy with no sharp details.
The Chrominance controls the reduction of color noise, which looks like color variations of red, green, and blue specks or patches. Raising the Chrominance slider removes rainbow-like noise without blurring or reducing sharpness in the image.
Our human eyes tend to be less sensitive to color detail than brightness detail, so you may end up with a higher level of Chrominance than Luminance if there is more color noise than brightness noise.
The tip here is to adjust both sliders until you reduce most of the visual noise in the image without losing too much sharpness. Play several frames of the video, as the visual noise usually moves position across frames.
Step 4: Adjust Sharpness
Sometimes, to reduce very visible noise, you need to increase the noise reduction to high levels, and you will lose a lot of detail from your image. It may not look too oily, but it is noticeable in the skin. There's a way to mitigate this effect using the Sharpening Amount slider in the Denoise effect in Vegas Pro to bring back some of that sharpness.
Increasing the Amount slider too much may bring back unwanted noise, so find a good balance between noise reduction and the detail you want to retain.
Step 5: Color Grading
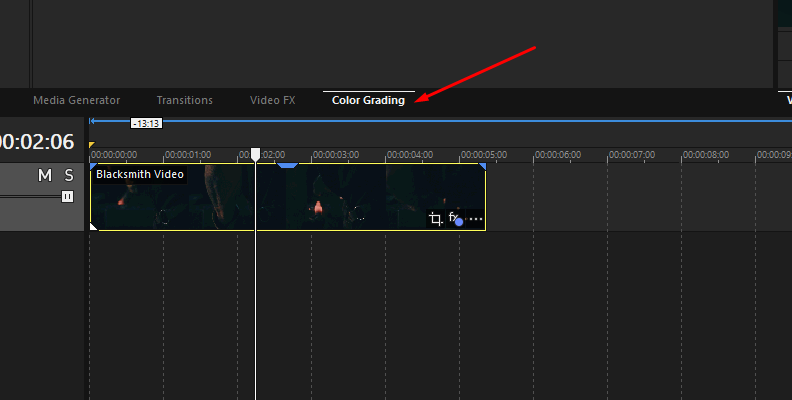
Because grain is typically found in dark zones, we’re going to use Vegas Pro color grading tools to make these zones darker to hide unwanted noise. Begin by selecting the video event and clicking the Color Grading tab.
Next, click Curves and ensure only the Brightness curve is enabled.
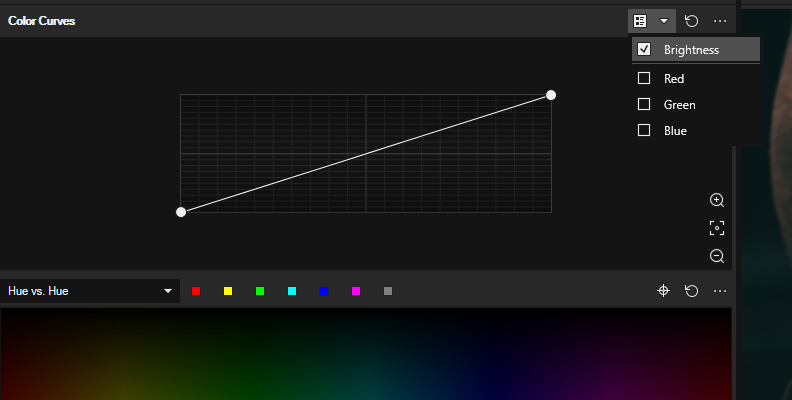
Now, double-click to add points in the curve and drag them to adjust the brightness levels of the image. To deepen the blacks, add a point in the lower-left region and pull it slightly down. You can reset your adjustments by clicking the Reset icon in the top right corner if you don’t like the results.
Again, finding balance between detail and noise removal is key.
Recommended Noise Reduction Settings
The settings for the denoise effect may differ from video to video. There is no magic number that fixes all types of video noise, but you can use these recommended settings as a baseline depending on the severity of your video noise and adjust as needed.
Starting Point
For typical high-ISO or low-light video noise, use the following settings in Vegas Pro video denoiser as a baseline.
Luminance: keep the default setting at 3 or increase up to 6 to gently smooth brightness grain while preserving skin textures and sharp lines.
Chrominance: set it to 8 and 12 to aggressively remove red/blue color static without softening the image.
Sharpen: 0.10 and 0.20 to reclaim subtle edge contrast lost in the smoothing process.
Light Grain
For videos with shallow darks and indoor-lit shots, our goal is a subtle cleanup that leaves sharpness intact.
Luminance: 2
Chrominance: 7
Sharpen: 0.05
Moderate Noise
For standard low-light camera footage, our goal is to clean shadow blotches while keeping face details looking natural.
Luminance: 5
Chrominance: 10
Sharpen: 0.15
Severe Low-Light Noise
For shots with very high ISO or small sensor clips, our goal is to remove noise, but it requires edge sharpening to prevent excessive blur.
Luminance: 8 - 9
Chrominance: 14
Sharpen: 0.25
Final Words
For video noise removal, Vegas Pro denoiser is a great tool. You can complement your cleanup work with additional plugins for sharpening and enhancement, like those available in the Continuum Suite and other third-party plugins. Learning how to approach and fix these video issues allows you to create more professional-looking videos.
Good luck!
FAQ
What Causes Video Noise?
The most common causes of video noise are:
Low light: the camera sensor receives less light when shooting in dark and low-lit environments.
High ISO settings: increasing ISO amplifies the hidden background noise in the picture.
Sensor heat: heat inside the camera sensor can cause damage that creates random color dots.