
How to Make a Storyboard: Step-by-Step Using Vegas Pro
So you've got a great idea for a video sitting in your head, and every time you try to explain it out loud, it comes out as a mess. That gap between what you picture and what other people actually hear is the exact problem a storyboard solves. It takes the film playing behind your eyes and drops it onto paper where everyone else can see it too.
This step-by-step guide covers the whole thing: what a storyboard is, what goes into one, why so many people still swear by them, and how to build one inside Vegas Pro. You don't need to be a great artist for any of this. Seriously. Plenty of boards used on real sets are nothing but simple stick figures and a few scribbled notes crammed into the margin.
Learning how to make a storyboard is one of those skills that pays you back every single time you shoot. It cuts down on wasted takes, keeps your team pointed in the same direction, and turns a fuzzy concept into something you can hand to anyone without a ten minute explanation attached.
Without further ado, let's get into it.
What Is a Storyboard?
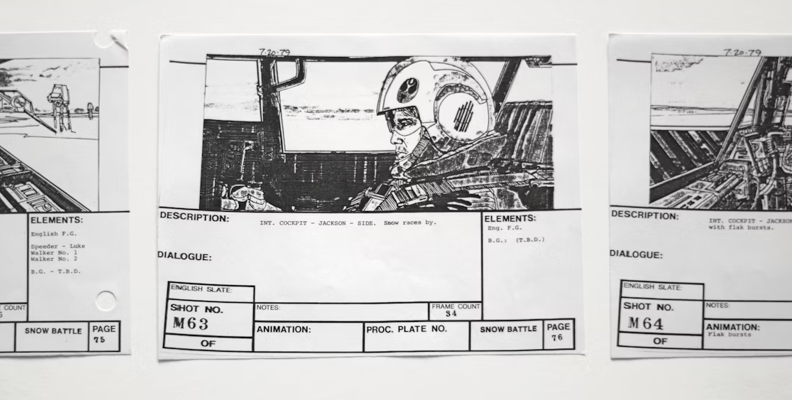
A storyboard is a visual plan that maps a story or workflow frame by frame. Much like a comic book page, it lines up rough drawings or photos with notes about dialogue, camera moves, and action so a video, animation, or user journey takes shape before filming starts.
The idea traces back to animation studios in the 1930s, where artists pinned sketches to a wall so the whole crew could follow the story at a glance and spot the dead spots early. That basic setup hasn't really changed since. Whether you're working with a pencil and a stack of index cards, a printed template, or a digital storyboard maker, the goal stays identical: get the pictures out of your head and in front of other people.
Think of it as a rough draft for anything visual. Sketching should focus on clarity and simplicity, but clarity means things explained very easily, not in a confusing way. A storyboard isn't meant to be pretty, and nobody's going to hang it on a wall. It's a working document, and honestly the messy ones often do a better job, because they get made fast and tossed out without anyone feeling precious about them. The value is in the thinking, not the linework.
It also helps to know what a storyboard isn't. It isn't a shot list, which is just text. It isn't a script, which handles words rather than pictures. And it isn't a finished animatic either, though a board is usually the thing an animatic gets built from.
A board sits in the middle: more visual than writing (though it should incorporate notes about dialogue scenes and sound effect ideas), less committed than footage (though it should provide a brief explanation of the continuity of characters and props, as well as some transitions between scenes), and cheap enough to throw away twice before lunch.
Main Elements of a Storyboard
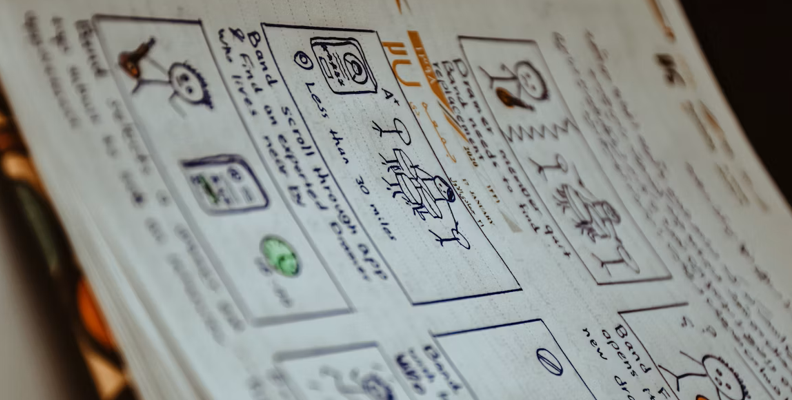
Boards look wildly different depending on the project, but nearly all of them share the same handful of parts.
The Storyboard Panel
Each storyboard panel is a single box holding one shot. Draw inside it, paste a photo inside it, whatever gets the point across. The layout usually runs three to six panels per page, numbered so nothing gets shuffled out of order when the pages get separated. Most storyboard templates come pre-boxed for exactly this reason, so you can break down a script into scenes and organize them into sequences easily, without spending half an hour before doing any real work.
Scene Descriptions
Under or beside each box, you write short scene descriptions. One or two lines, no more. What's happening, which characters are in frame, and what changes by the end of the shot. "Main character opens the door, sees the empty room, freezes." That's plenty of detail. Long paragraphs defeat the whole point, because if people have to read a wall of text they'll stop looking at the drawing.
Camera Movement and Framing
This is where a board really earns its place. Note the framing (wide, medium, close-up) plus any camera movement you want, and mark the perspective you're shooting from if it isn't obvious. Arrows are the standard shorthand, so add arrows freely: one pointing right for a pan, a fat one for a dolly push, a curved one to trace a character walking across the frame. Shot composition notes belong here as well, since where you place your subject inside the box tells the crew an enormous amount.
Dialogue, Sound, and Timing
A line of dialogue, a sound effect, a music cue, a rough duration in seconds. These little notes are what turn a stack of drawings into something you can actually time out. If your piece has to land at a specific length, this is where you keep track of it, and it's usually where you discover you've planned forty seconds of material for a twenty second slot. Depending on your format, though, a storyboard panel is usually meant to be read vertically; write your dialogue notes under each panel, or next to it if you've chosen different formatting.
Shot numbers and sequence
Number everything. When you're on set, and somebody asks what's next, a number beats a description every time. Numbering also makes it painless to reorder an action sequence later without losing your place in the entire storyboard, and it gives your editor a clean reference when the footage comes back.
A quick note on how much to include: two or three panels for a simple conversation is fine, while a chase might need fifteen. Board the parts where the visuals are doing the heavy lifting and stay loose everywhere else. Boarding every second of a talking head interview is a waste of an afternoon nobody thanks you for.
Why Storyboards Are Used Nowadays
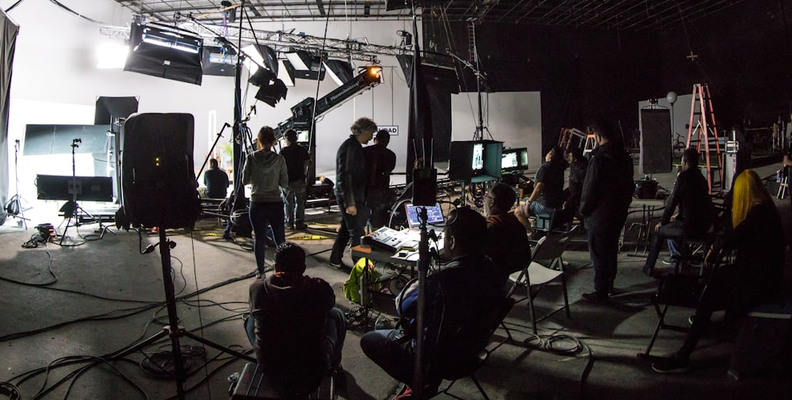
Cameras got cheap, and editing got fast, so you'd think planning would matter less than it used to. The opposite happened.
They Save Time on Set
Every minute spent figuring things out on location burns real money and real patience. A board answers most of those questions in advance. Filmmakers who board their work almost always shoot faster, and the hard work you put in beforehand quietly disappears into a smoother, shorter shoot day.
They Keep the Team on the Same Page
A director, a camera operator, and an editor can read the same script and picture three completely different films. A visual representation kills that ambiguity. Everyone looks at the same images and argues about them before a single frame is shot, which is dramatically cheaper than arguing about it in the edit suite afterward.
They Protect the Creative Vision
Ideas get watered down as they pass through a group. A board acts as a record of the director's vision that survives contact with schedules, weather, and everybody's opinions. When someone proposes cutting a shot to save an hour, you can point at the panel and show exactly what the sequence loses without it. There's a reason why movie masterminds such as James Gunn and Alfred Hitchcock used storyboards to plan their scenes.
They Help You Communicate Ideas to Clients
Try describing a thirty second ad over email. Now try sending six drawings instead. Clients approve faster when they can see the concept, and you dodge the nightmare of delivering something nobody was expecting. It works the same whether you're pitching a music video, a short film, a training course, or an app walkthrough.
They Work Far Outside of Film
Marketers board social clips. UX designers board user flows. Teachers board lessons. Visual storytelling stopped being a movie-only thing a long while back, and the same approach helps any time you need to show a sequence of events rather than describe one.
They Make Problems Cheap to Fix
A weak shot costs you an eraser at the board stage. The same weak shot costs you a reshoot once it's been filmed, and possibly the whole day if your location is gone. Catching a pacing issue or a confusing cut while it's still a pencil mark is the single best return on effort in the entire pipeline, and it's the reason experienced crews keep boarding even on tight schedules.
How to Make a Storyboard in Vegas Pro
Vegas Pro includes storyboard features that connect directly to your timeline, so your plan and your edit live inside one project instead of in two places that slowly drift apart. Here's the storyboard process from start to finish.
Step 1: Break Your Script Into Shots
Before you touch the software, run through your script and mark where one shot ends and the next begins. Every break becomes a panel. If a moment can't be described in a single sentence, it's probably two shots. This is the part a storyboard artist spends the most time on, and it's worth doing on paper first with a pen, where changing your mind costs nothing.
Step 2: Create Your Panels
Now make the pictures. Rough sketches, stick figures, phone photos of a friend standing roughly where the actor will stand, screenshots pulled from a reference film, all of it works. Save them as image files. If drawing genuinely isn't your thing, storyboarding tools and online storyboard creator apps will generate usable illustrations from a few dropdown menus, and nobody on your crew is going to ask where the storyboard images came from.
Step 3: Set Up Your Project
Open Vegas Pro and create a new project using the settings that match your final delivery: resolution, frame rate, aspect ratio. Getting this right at the start means your panels sit correctly on screen and you're not fighting framing problems three days later.
Step 4: Import Your Storyboard Images
Drag your files into the Project Media window. Vegas Pro keeps stills, video clips, and audio in the same pool, so you can mix hand-drawn panels with real footage as your shoot progresses and swap them out one by one. Give every file a clear name that matches its shot number, otherwise you'll be squinting at thumbnails all afternoon.
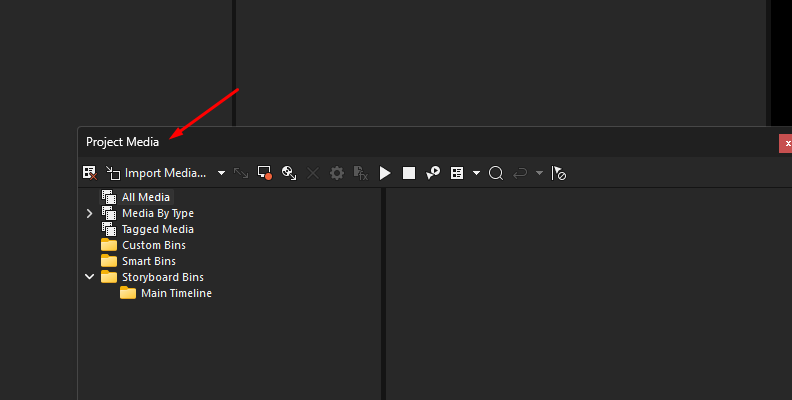
Step 5: Build the Storyboard
Open the Storyboard tab and drag your media in, in order.
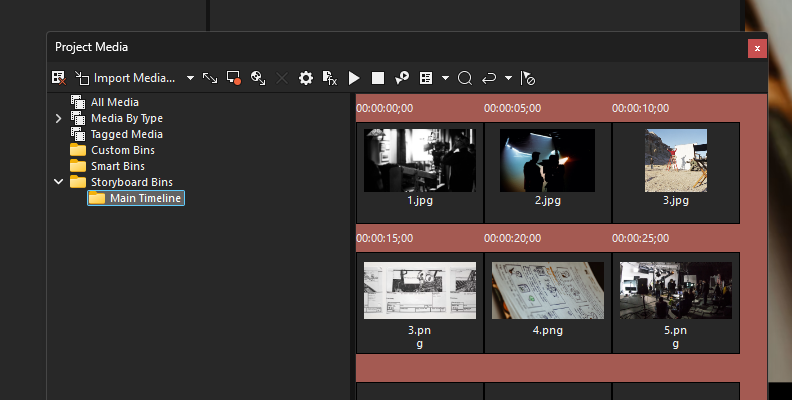
Each item becomes a card you can shove around freely, and the timeline updates to match whatever you do. Reordering an action sequence is a matter of dragging one card past another. You can also keep several boards inside one project, which is handy when you want to compare two versions of the same scenes side by side.
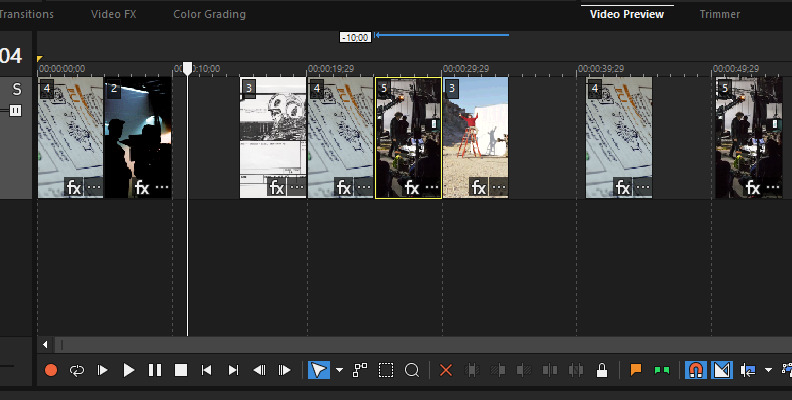
Step 6: Set Timing and Add Motion
Trim each card to the length you want that shot to run. Then use Pan/Crop to fake camera motion on your still panels, pushing in slowly or drifting sideways so a reviewer can feel the intended move instead of reading a note about it. Add text overlays for dialogue or reminders wherever they help. For example, a slow push on a reaction shot tells people far more than the word "push" written under a box.
Step 7: Preview, Export, and Share
Play the whole thing back. An animatic like this exposes pacing problems that a stack of paper will never show you. Export a small file and send it out so your team can collaborate on the one version that matters, and keep your focus on the beats that feel slow.
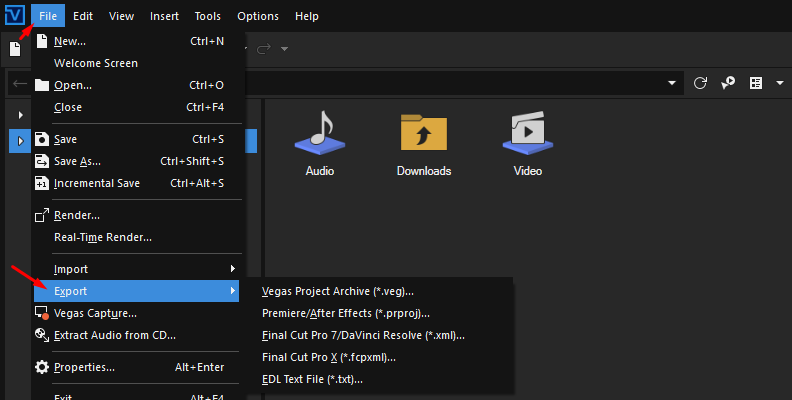
Update the board as real footage replaces your sketches, and the same project carries you from first plan to final cut.
That last part is the real advantage of boarding inside your editor rather than in a separate app. There's no export, no re-import, no version six of a PDF floating around in somebody's inbox. You swap a sketch for a clip, the timing holds, and the edit grows out of the plan instead of starting over from an empty timeline. By the time your shoot wraps, half the assembly is already done.
Final Words
A storyboard is about the cheapest tool available to anyone making something visual, and one of the very few that improves nearly every project it touches. You don't need talent with a pencil. You need a willingness to think through your shots before the camera starts rolling. Ten rough boxes beat a brilliant idea that nobody else can see.
Start small. Create a storyboard for a single scene in your next video and notice how much smoother that shoot goes. Then do the whole piece. Once you've made a storyboard or two inside Vegas Pro, the workflow stops feeling like homework and starts feeling like the moment your project finally comes to life for an audience.