
What you’ll learn:
Getting high-quality sound recording
- Basic 1: Choose a good microphone for voiceovers
- Basic 2: Other voiceover recording musts
- Basic 3: Recording technique
Record voiceover directly
There could be any number of reasons why you’d want to record a voiceover for one of your VEGAS Pro projects. Maybe you want to add narration or a funny commentary track. Maybe you want to include additional voices you didn’t record with your video. Maybe you want to re-record an existing voice in the video. Whatever your reason, with a few fundamentals of how to record voiceovers and following the proper steps in VEGAS Pro, you’ll record great-sounding voiceovers right from your own home or office.
First, we’ll cover some basics of getting high-quality sound recording:
BASIC 1: Choose a Good Microphone for Voiceovers
BASIC 2: Other Voiceover Recording Musts
BASIC 3: Recording Technique
Then, we’ll look at how to record your voiceovers directly in VEGAS Pro.
We’ll follow these steps:
STEP 1: Arm for Recording
STEP 2: Record Your Voiceover
STEP 3: Finish Up Recording
STEP 4: Edit as Necessary
When we’re finished, you’ll be well on your way to recording great voiceovers for your VEGAS Pro projects.
Read on to find out more!
Recording high-quality voiceovers isn’t as easy as you might initially think, but it’s also not as hard as you might fear. You need some basic equipment, but more importantly, you need to follow proper recording technique, and practice it over and over. You can have the greatest microphone in the world, but if you don’t follow good technique, your recording will likely not be very good.
Don’t worry; we’re here to explain what you need to do to get started recording great voiceover audio.
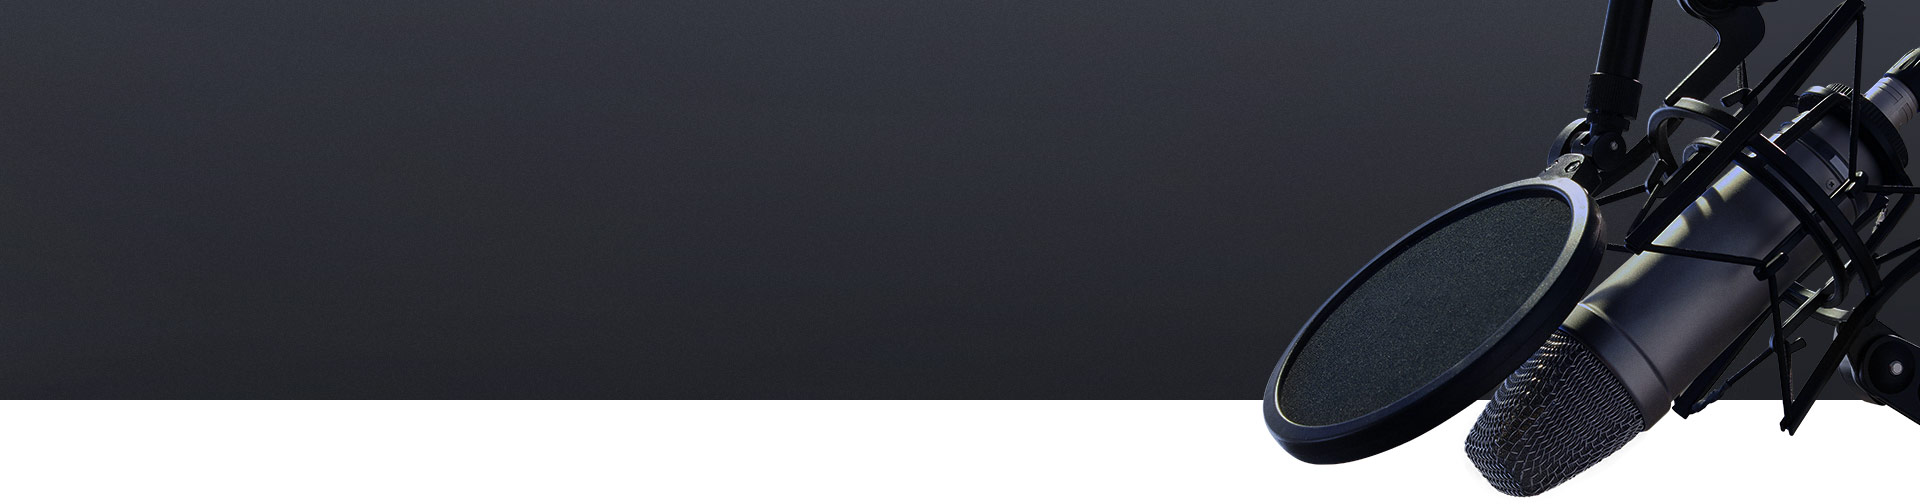
You need a microphone suited to the task of voiceovers. While there are plenty of microphone options available, and you may even have a few of them on hand, if you want pro-quality recordings, you need the right tool for the job. Basic pencil-type microphones, built-in laptop microphones, gaming headphone microphones, or smartphone microphones will all record audio, but they won’t give you the full, rich spectrum of the human voice, and they may well let in a lot more unwanted background noise than you expect.
You want a condenser microphone rather than a dynamic microphone. Condenser microphones use a live current rather than just the energy of your voice against their diaphragms, so they are more sensitive and more likely to capture the full range of frequencies in your voice.
You also want a microphone with an appropriate pickup pattern. Different kinds of microphones pick up sound from different directions. Omnidirectional microphones pick up sound from every direction. Other pickup patterns like cardioid, hypercardioid, and supercardioid reject sound outside of their pickup fields. That means if your voice is in the pickup pattern, but unwanted sounds like background noise or traffic noise from outside aren’t in the pattern, then the microphone is more likely to pick up only your voice and not the sounds you don’t want. For voiceovers, it’s often best to use a microphone with a cardioid or hypercardioid pickup pattern, because it will have enough leeway to make sure you’re well within the pattern, but also have those areas of rejection where it won’t pick up other sounds.

You need a pop filter, which is a small screen placed between your mouth and the microphone. When you pronounce certain letters, especially Ps, you push a little more air a little more forcefully than you do when pronouncing other letters. If that extra little burst of air hits the microphone diaphragm directly, it can produce a pop or a low thump in your recording, and you want to avoid that. The pop filter catches the burst and minimizes pops or thumps.
Dress your environment properly for voice recording. One of the enemies of good recording is echo. If you record echo, it’s very difficult to deal with in post, and you’ll often be stuck with it in your recording. Echo happens when sound bounces back from a hard, reflective surface, much like when you see your own reflection in a mirror. To avoid echo, eliminate as many hard and parallel surfaces in your environment as you can. Put blankets or quilts on top of your recording desk. Cover nearby walls with foam, especially the jagged-shaped sound foam designed to absorb and scatter sound so it doesn’t return to you as an echo. Believe it or not, an ideal sound recording environment can be a closet full of clothes. But you don’t have to be that drastic – just cover your environment with as much soft, non-parallel surface material as you can.
Use a sound box to record. This is a box you place around your desk-mounted microphone, lined with cloth or sound foam, designed to keep unwanted sounds out and to prevent echo inside it. With your microphone in the box and you speaking into it, the microphone is far more likely to pick up only your voice without background noise or echoes.
Minimize any potential intruding sounds. Find a place to record which doesn’t have much background noise to begin with, like outdoor sounds of kids playing or planes flying over or heavy trucks going by. You can’t always choose your location, especially if you’re recording at home, but pick a room that’s as far away from outside noises as possible.
Make sure household or office noise makers like air conditioning or refrigerators are turned off while you record. There’s nothing worse than listening to your recording later and hearing the air conditioning kick in or your refrigerator turn on, which you didn’t notice while recording.
More important than the microphone you choose is how you use it. A great microphone can still give you poor results if you use it poorly, and a so-so microphone can give you better results than a much more expensive model if you use it properly but don’t use the expensive one properly.
The biggest mistake beginners make is to place the microphone too far away. Often this happens with video bloggers who mount their microphones on their cameras which are a few feet away from them. Don’t do that. Keep your microphone as close as you can to your mouth. Your voice should overpower any possible background noise. If you keep the microphone too far away, your voice ends up not much louder than any other background sound, and then you’re stuck with that background noise. But when your voice is much louder than any other noises, you can lower the volume in post. Your voice will still be strong, but the background noises fall away.
Don’t talk directly into the microphone. Stay within the microphone pickup pattern but keep the microphone slightly to the side or above the direct line of your mouth to help prevent those pops or breath sounds. It also helps prevent your voice from overpowering the microphone and distorting the sound.
But you’ll know if that happens, because of course you’ll monitor your sound through a good set of headphones, and you’ll catch any problems as they crop up. Don’t use earbuds or cheap foam headphones. Use a large diaphragm set which covers your ears and lets you hear the full range of exactly what you’re recording, without outside sounds intruding.
VEGAS Pro packs the power of a full-blown digital audio workstation and offers multitrack recording capability unmatched by any other NLE. Recording directly to VEGAS Pro is extremely convenient because you can record directly to an audio track in your project, allowing you to see and hear your project play in real time as you record. When you’re finished recording, your voiceover is already there in your project on the audio track you chose.
Let’s go through the simple and easy process for recording audio in VEGAS Pro. Let’s assume you have your microphone on and connected to your computer, and you’re listening through your headphones and not your computer speakers.
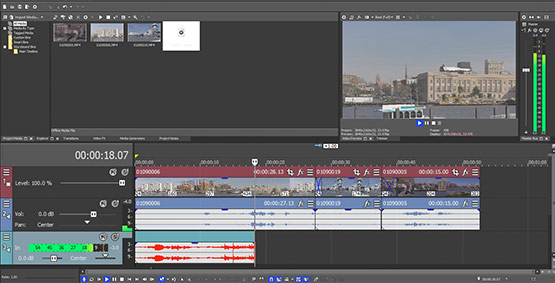
✓ Open your project. Right-click underneath the bottom track on the timeline and choose Insert Audio Track from the context menu. A new audio track appears at the bottom of the timeline.
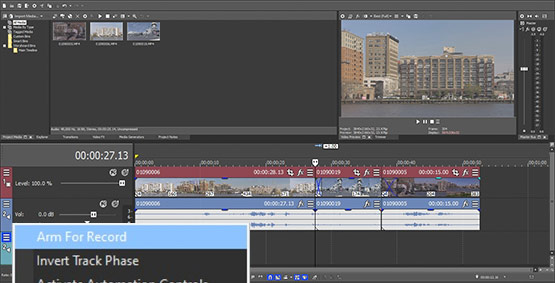
✓ Click the hamburger menu button on the new audio track’s header.
✓ Choose Arm for Record. The Project Recorded Files Folder dialog box opens. Define the folder where you want the recorded audio file saved. Click Browse to navigate to the folder or type it in manually. Click OK.
Horizontal and vertical audio meters appear in the track header. As you speak, you see the meters cascade to your voice.
✓ Speak naturally a few times and watch the meters. You want your vocal range to average about -12, without going below -20 at the quietest or above -6 at the loudest. If your voice hits the yellow or red ranges, it’s too loud, and your recording will clip. Try to keep your normal voice between -9 and -15.
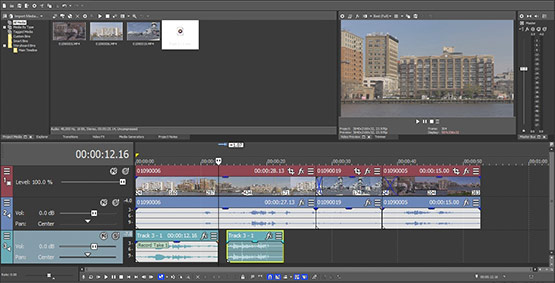
✓ Once you’re comfortable with your voice range and are ready to record, click the Record button on the timeline toolbar, the microphone icon at the far left.
Your project plays through the timeline, and in your recording track, a new audio event forms behind the timeline cursor. As you speak, you can see the waveforms of your voice form in the new audio event. A new audio media file appears in the Project Media window.

Continue recording for as long as you need.
✓ When you’re finished, click the Record button to stop recording. The Recorded Files dialog box opens.
✓ If you’re happy with the recording and want to change the file name, click Rename and type in the new file name.
✓ If you’re not happy with the recording, click Delete or Delete All if you have several recorded files. Whether you keep the recording or delete it, click Done.
Your voiceover audio file is now right there in your project. Play through the project to see if you’re satisfied.
Sometimes, you won’t get the timing down exactly right as you record, or you might have added unwanted ums or taken noisy breaths. That’s OK. Just edit the audio as normal. Split and adjust it to make it fit and remove any unwanted words or breaths. And if all else fails, you now know how easy it is just to record it again!


What's the difference between VEGAS Pro Edit, VEGAS Pro Suite and VEGAS Pro Post?