
What you’ll learn:
How to use a noise gate, equalizer, and compressor
VEGAS Pro offers world-class audio editing tools, the best of any non-linear editor. You don’t need to leave your project to go to other software for professional-level sound editing, or even go to a different special audio mode, because VEGAS Pro gives you a complete digital audio workstation right there on your main timeline.
It comes with a huge array of audio effect (FX) plugins ready for use on your audio. Some popular FX include reverb, distortion, and echo; you can also apply a ;pitch-shift filter and change the pitch of a sound or of someone’s voice. There’s so much more available, too -- the creative possibilities are endless!
Let’s take a look at three of the most commonly used professional FX, the plugins added by default to every VEGAS Pro audio track: the noise gate, the equalizer, and the compressor. As with all audio effects, you can apply these plugins at the event, track, bus, or master levels.

Let’s say you have a dialogue track, and every time the voice stops, there’s a hiss or other background noise, like the general room tone. It might be easy enough just to trim the audio clip to cut out the gaps between dialogue, but that noise also appears between words and much smaller gaps, too. Every recording has a “noise floor”. That's the noise or hiss you hear when no desired material is playing, for instance, room noise, air conditioner hum, and the noise generated by your computer equipment itself. A properly recorded audio track has a very low noise floor. But for those times when noise was unavoidable during record, you can use the noise gate to help eliminate that noise floor automatically across the entire track.
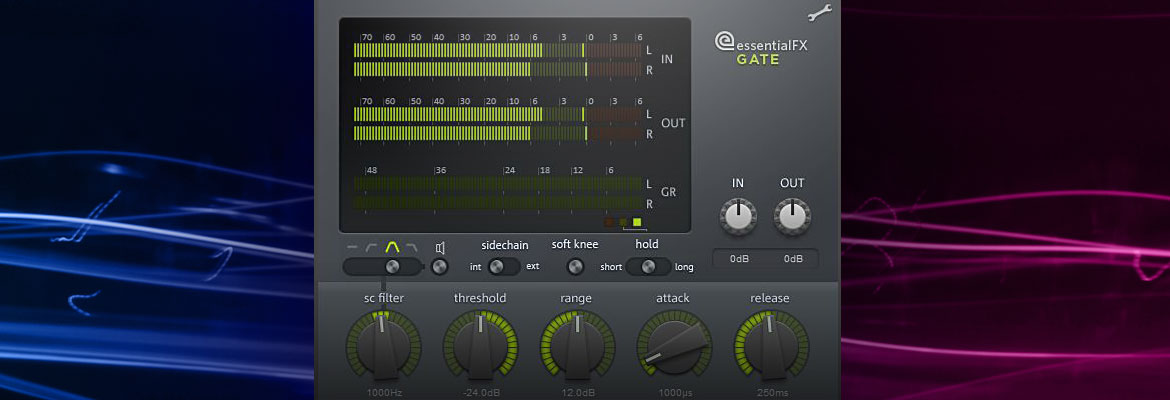
The noise gate cuts off everything below a certain volume, known as the threshold volume. For example, to remove noise at -50 dB, set the noise gate threshold to -45 dB or so. The effect automatically drops the volume to zero whenever the sound's natural volume drops below the threshold, and the noise disappears.
Sounds simple, right? Maybe, but keep a few important considerations in mind. First, the noise gate can affect your desired sound material. A good, robust recording--especially of the human voice -- contains audio material at virtually every volume level between absolute silence (that's “minus infinity,” or “-Inf” in digital audio terms) up to your loudest volume peak. When you use the noise gate, you can't avoid cutting out a portion of the sound you want. You must set the threshold in the perfect “sweet spot” where it cuts out enough of the sound you don't want without cutting out too much of the sound you do want. Sound complicated or difficult? Well, it can be, but with experience you'll get better at it.
Second, as your desired sound begins and ends, the noise gate has to react. If reaction time isn't right, the gate might cut off the beginning and end of your desired audio. This can make your audio sound choppy and cut off parts of words or other material you need. This can happen not only between words, sentences, or paragraphs, but even within words themselves.
To help counter this, you need to adjust the gate's attack and release settings. The attack slider controls how quickly the effect lowers the volume when sound goes below the threshold. Think of it as turning a volume knob down quickly or slowly. If you set the attack time longer, the effect won’t drop the volume as quickly, and little volume drops in the middle of words won’t get caught in the gate, and thus be eliminated. At the ends of words or sentences, the drop-off will be more gradual, and the very ends of words won’t cut out.
The release slider does the same thing, only in reverse. It dictates how long the gate stays engaged after the audio rises back above the threshold setting. If the release time is too long, the beginning of a sentence or word might get cut off by your lingering noise gate. A quicker release time lets the volume go back to normal more quickly, so the very first parts of words remain intact.
Keep one more consideration in mind: if your noise floor is too loud, the gate may not give you good results. For instance, if you record an interview in a big room with a loud air conditioner running, you could set the gate to remove that air conditioner noise when your subject isn't talking. But if you can hear the air conditioner noise clearly while she speaks and you remove it when she's not speaking, that noise is going to jump in and out of the recording. That often makes for a worse final result than just leaving the noise in. In a case like that, you need a sophisticated noise reduction plug-in.
Used well, the noise gate can be a great tool for helping to achieve a noise-free audio mix, but you can see that it requires a bit of careful adjustment and experimentation, as well as critical listening ears.

The equalizer (EQ) gives you control over volume at different frequencies. In other words, you can make higher-pitched sound louder or quieter while you leave all the other pitches alone. You can adjust any of the available pitches (frequencies) all independent from each other. Think of the Bass and Treble controls on your car radio or home stereo as a simple EQ with control over two frequency ranges, known as frequency bands, or simply bands. Some equalizers give you control over many distinct frequency bands, while others give you control over the general highs, mids, and lows.
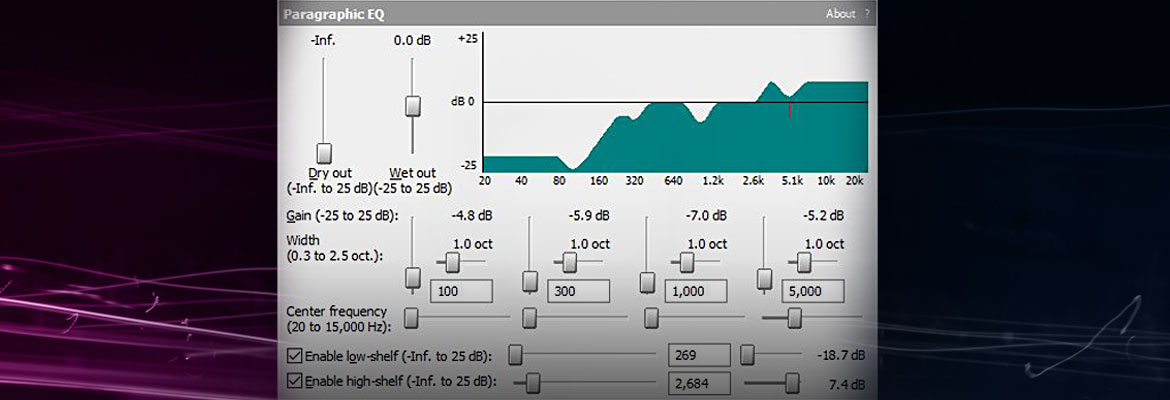
Editors often use equalizers to punch up sounds. Bring up the bass for a more full sound, or “fatten the middle” while tightening the top and bottom. Lower some of the highs to bring down a bright-sounding room and possibly mitigate some echo, or you might lower some of the lower end to mitigate some bass distortion.
Because equalizers let you enhance, soften, or eliminate specific frequencies, you can use them to eliminate specific problems in the sound while you leave the rest of the sound alone. If you have a high-pitched tone or hiss prevalent in your audio, you may be able to use the equalizer to eliminate only the frequency of that tone, which would remove that sound. Be careful, though, because any other sound (even desirable ones) may also contain that frequency and you'll alter those sounds with your EQ adjustment too.
Or, if you have a low-pitched rumble, possibly from wind noise, you may be able to eliminate those frequencies, too. But again, be careful; the good sound, especially the human voice, exists over a wide spectrum of frequencies, so when you eliminate specific frequencies, you’re also eliminating parts of the voice or sound you want. Eliminate too wide of a frequency range, and you might adversely affect your desired sound or voice.
You can use equalizers for effect, too. Lower the upper frequencies and increase the bass to make a voice sound like it’s coming through a wall from another room. Or, if you’d like an old-time radio feel or a sound like a voice on a telephone, you can take off the lower frequencies and punch up the highs, because small speakers often don’t have much bass, leading to the tinny sound associated with those devices.
Experiment with equalizers. Manipulate frequencies and see what kind of beneficial and creative effects you can find. But, as usual, watch out for a couple common pitfalls. As mentioned already, you might affect the sound you want while removing a sound you don't want if they share the same frequency. Another frequent mistake is to raise the volume of a frequency to such a high level that you begin to cause distortion in your audio. It's important to keep an eye on the EQ's overall output peak volume while you adjust individual frequencies so you can avoid digital audio clipping and distortion.

The compressor lets you keep your sound’s dynamic range – the difference between the lowest volume and highest volume – within limits, so that the sound will never go higher or lower than a set volume. Good use of the compressor eliminates any clipping distortion from the volume going too high, and brings out sound detail which otherwise might have been too quiet to hear.
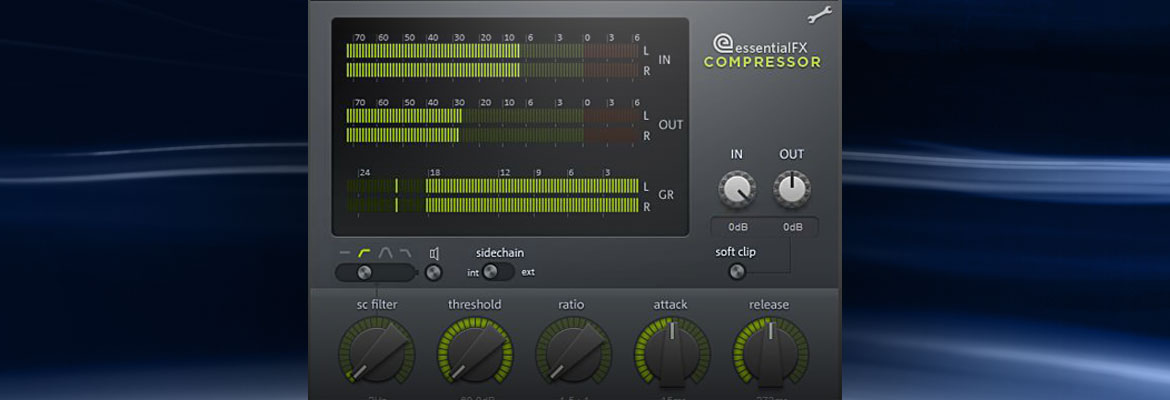
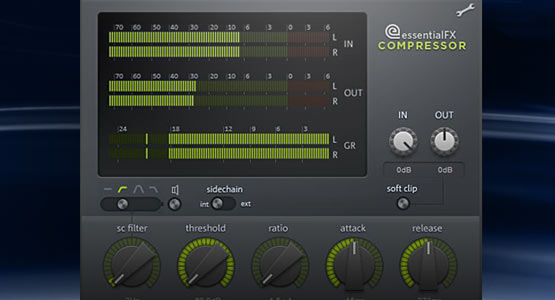
Editors often use the compressor to be sure the sound will fit within the dynamic range of the equipment the sound will be played on, or to meet broadcast standards. Some speakers, like earbuds or TV speakers, have a limited dynamic range, so a compressor makes sure there won’t be any distortion or lost details when viewers listen to their sound over those kinds of speakers. Broadcasters often require compression so that their audience doesn’t hear distorted sound, and so that all of their programming comes across at a consistent volume level instead of one program being very quiet and then the following commercial blasting your eardrums out.
But compressors allow for creative effects, too. Apply different parameters to change or enhance the sounds of musical instruments, for example, or to control crowd walla (that hum sound of a large crowd) or background sound effects. Because you can use compressors on individual sounds or groups of sounds independently from each other, you can come up with many different creative combinations. You can manipulate each separate instrument in a music program for a whole range of different sounds for the same song, or you can manipulate individual voices and put them together as a group for unlimited creative potential.


- 2-for-1 deal: Buy one and get one for free!
- Buy a VEGAS product today and get the new version of the same product for free!
- 2-for-1 deal: Buy one and get one for free!
- Buy a VEGAS product today and get the new version of the same product for free!

- 2-for-1 deal: Buy one and get one for free!
- Buy a VEGAS product today and get the new version of the same product for free!
- 2-for-1 deal: Buy one and get one for free!
- Buy a VEGAS product today and get the new version of the same product for free!
- 2-for-1 deal: Buy one and get one for free!
- Buy a VEGAS product today and get the new version of the same product for free!
- 2-for-1 deal: Buy one and get one for free!
- Buy a VEGAS product today and get the new version of the same product for free!
What's the difference between VEGAS Pro Edit, VEGAS Pro Suite and VEGAS Pro Post?