
What you’ll learn:
Add unique text, titles, & roll credits to your video productions
Modern videos often leverage creative use of text to help tell their stories. With the increasing popularity of social media and streaming platforms like Facebook and YouTube for delivering video directly to audiences, exciting animated text has become more and more popular as a creative tool. Now, using different styles of text and even animated text is more and more a part of the art and craft of making videos.
VEGAS Pro offers some exciting tools for using text creatively in your projects. Its two main text generators, Titles & Text and Credit Roll, make it easy to create fun and effective text and credits for your video projects.
In this tutorial, we’ll go over some general guidelines for using text, and then we’ll go step-by-step through the process of generating different kinds of text.
First, we’ll look at some built-in guides which make using text in VEGAS Pro much easier:
Step 1: Enable the Guides
Step 2: Choose the Grid
Step 3: Customize the Grid
Step 4: Choose the Safe Areas
Step 5: Customize the Safe Areas
Then we’ll look at generating text with the Text & Titles generator:
Step 6: Drag a Preset to the Timeline
Step 7: Customize Your Text
Finally, we’ll explore the Credit Roll generator:
Step 8: Choose Your Credit Roll
Step 9: Customize Your Credits
Step 10: Import or Export A Credit Roll
Step 11: Save a Credit Roll Preset
Read on for an in-depth guide to the text generators in VEGAS Pro!
As we said above, text has become much more a creative tool in modern times. But even so, keep a few things in mind.
As with any video medium, too much of anything can distract and tire out an audience. Don’t overload your audience with walls of words and keep them reading through the entire video. It’s still better to show rather than tell. You’re making a video, not writing a book, so let the video tell the story and use the text to enhance what the audience sees.
Crazy colors and fonts can also overload an audience, and many times won’t look very professional. Every project is different, and some video projects may benefit from a wilder style, but be judicious. Getting too “crazy” can often look amateurish. Also, the point of text is that it be read, so make it easy to read and not distracting. Often, white text with a sharp, non-serif font works best, is the most readable, and looks more modern and professional.
That said, if your project really does warrant it, such as a high-energy extreme sports video, feel free to change up the style. Just be sure your font style matches the tone of your project.
Also, have a plan for your text. Use it consistently throughout your project. Be mindful of where you place it. If you use text to display someone’s name, then it’s a generally a good idea to use the same text style and position every time you display anyone’s name. Use colors which match the color palette of your project. Be consistent with how you make the text appear and disappear. If you use a two-second fade in, always use a two-second fade in. If the text drops in from the top of the screen, then most of the text should do the same. Using text randomly can look haphazard and, again, amateurish. Make it look like you thought it out – be consistent!
With all that in mind, let’s explore using text in VEGAS Pro!

Before we talk about the text generators, let’s go over some tools in VEGAS Pro which assist you in keeping your text consistent, readable, and professional.
To help you place text accurately, especially if you are going to use multiple instances of text and want to be sure they all occupy the same space on the screen, the VEGAS Pro Preview Window comes equipped with different guides.
The Grid is an overlay of a grid pattern on your Video Preview. Use it to align your text or any other image or graphic. With a grid in place, you can be sure you’re placing text in the same location over multiple instances of text.
The default grid displays 10 blocks horizontal by 10 blocks vertical, which is often enough, but if you want more or fewer reference points, you can change the number of grid blocks.
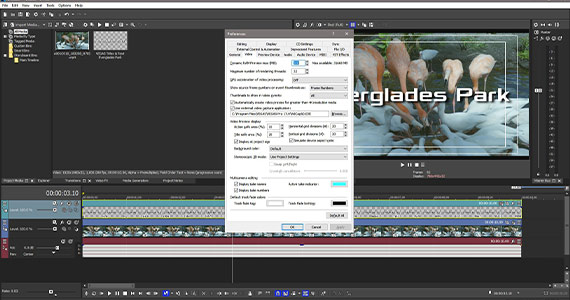
Change the Grid properties in the Preferences window.
✓ Go to Options>Preferences. The Preferences window opens.
✓ Click the Video tab. Under Video Preview Display, find Horizontal Grid Divisions (#) and Vertical Grid Divisions (#). Set the numbers to create the grid of your choice.
Safe Areas come from an earlier era of video, when CRT screens exhibited overscan – that is, the edges of the CRT screen were covered by the bevel, so the entire image wasn’t always visible; the edges were cut off. Safe Areas show you where it’s safe to assume the image is visible and thus it’s safe to place text or graphics without worrying about it being cut off when viewed.
The Safe Areas overlay displays two concentric boxes. The outer box is the Action Safe area; anything within the box should be visible on the screen, thus any action happening should be visible even if there’s overscan. The inner box is the Title Safe area. While the Action Safe area represents the visible area, it’s not necessarily safe for text. If you place text at the edge of the Action Safe area, while it should be visible, it will still be right on the edge of the screen no margin, so it won’t look very good and may not be optimal for reading. Also, with the curved shape of legacy CRT screens, some of the text may actually be cut off. So, keep text within the Title Safe area, so that it won’t only be visible, there will be a margin, and your text will be more readable.
Overscan isn’t the issue it used to be. Modern 16:9 displays usually do not display with overscan. But some do. And even when they don’t, you still usually don’t want your text right at the edge of the screen with no margin. So, it’s good to check the Safe Areas and make sure your text is at least within the Action Safe area, if not the Text Safe area.

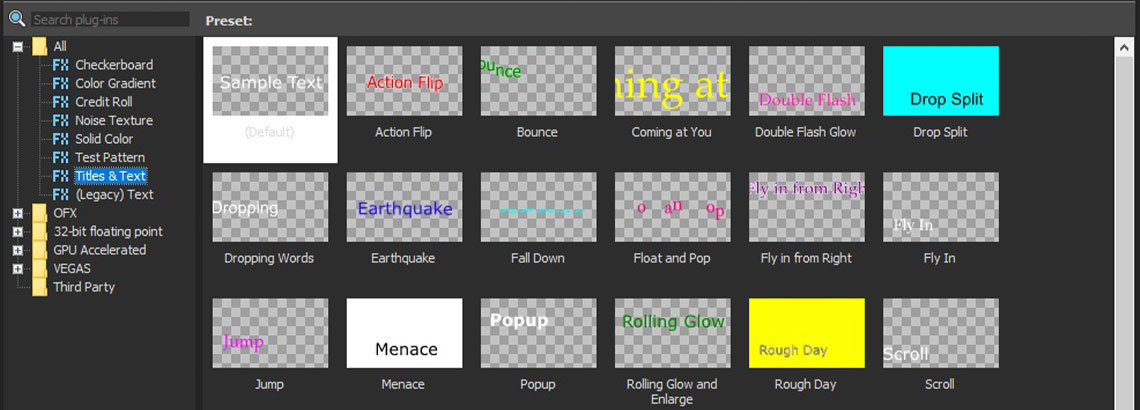
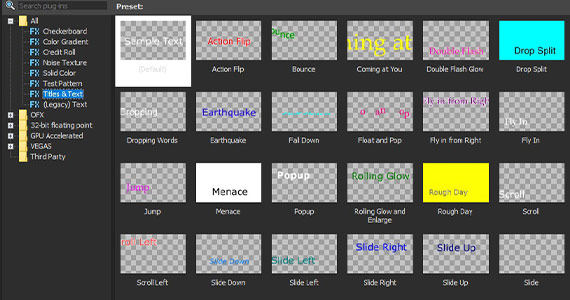
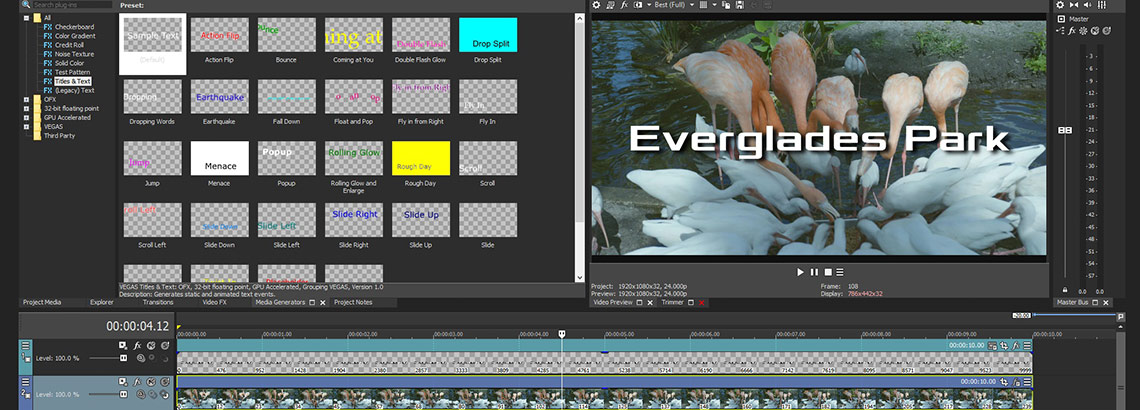
✓ In the Media Generators window, click Titles & Text.
You will find many different presets of different styles of text and titles. Hover your mouse cursor over a preset thumbnail for an example of what the preset does. The default preset is a simple, motionless text, and one preset is optimized for subtitles. Many of the other presets offer a wide range of different types of animated text.
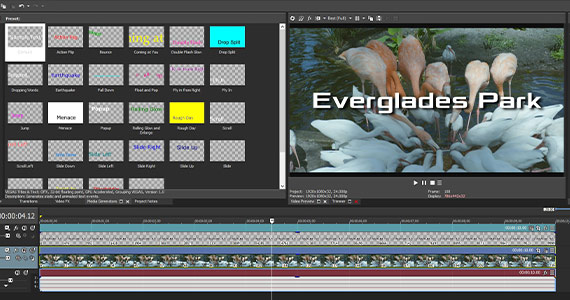
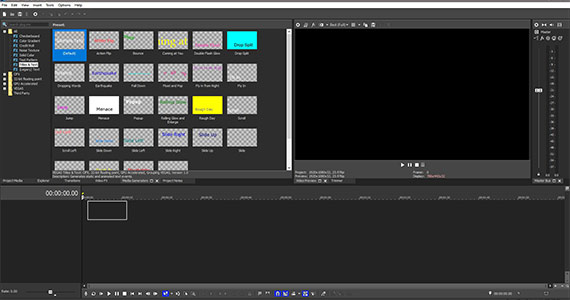
✓ Drag the preset which suits your project it to a track on the timeline.
The VEGAS Media Generators window appears with the VEGAS Titles & Text controls open.
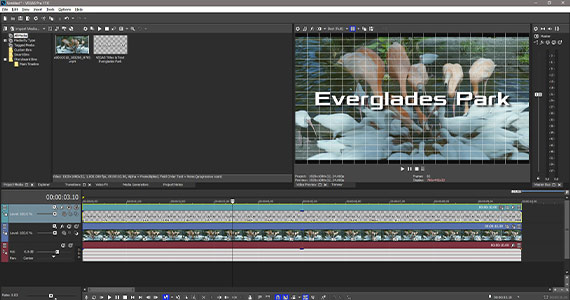
The text appears in the Video Preview window with a box around it. There are control points on the corners of the box. You can directly manipulate the text right inside the preview window. Drag the box to change the text location. Drag a corner point to change its scale, which will adjust proportionally.
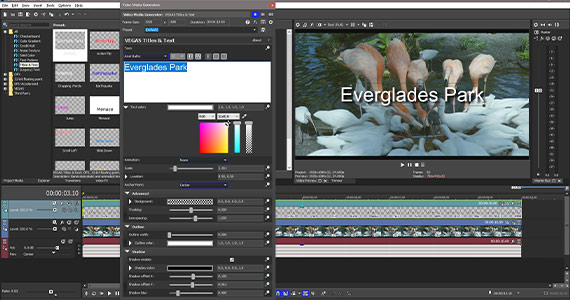
In the Video Media Generators window, you can change the font and font characteristics, alignment, and color.
✓ Move the Scale slider to adjust the size of the text.
The Scale is independent of the font size, but you can also set the font size larger or smaller. You can also highlight different words or letters in the text and change font, font size, bold, and italic for only those words or letters, so you can create a single text event with several different styles and sizes within it. However, color, outline, shadow, and alignment adjustments apply to all of the text in the event.
✓ Under Outline, you can control the color and width of the text outline. A width of 0 indicates no outline.
✓ Under Shadow, click the Shadow Enable box to create a drop shadow. Use the controls to define the color, position, and blur of the shadow.
✓ The Advanced controls let you set the background color, including transparency.
If the text has a solid background color, no video will be visible under it. You can also manipulate the tracking and line spacing to change the distance between individual letters or lines of text.
✓ Choose from numerous preset animation styles in the Animation drop-down menu.
You can create a huge variety of different types of text, with different animation styles. You can keyframe and animate the text properties and define how they change over the time. Experiment and find a style which fits your needs. The only limit is your imagination!

The Credit Roll generator does just what it says – it creates long, scrolling credit rolls suitable for the end credits of movies, TV shows, or other videos. Create casts lists, credit your producers and special effects guys, thank everyone who helped you make your movie, and everyone else who needs credit.
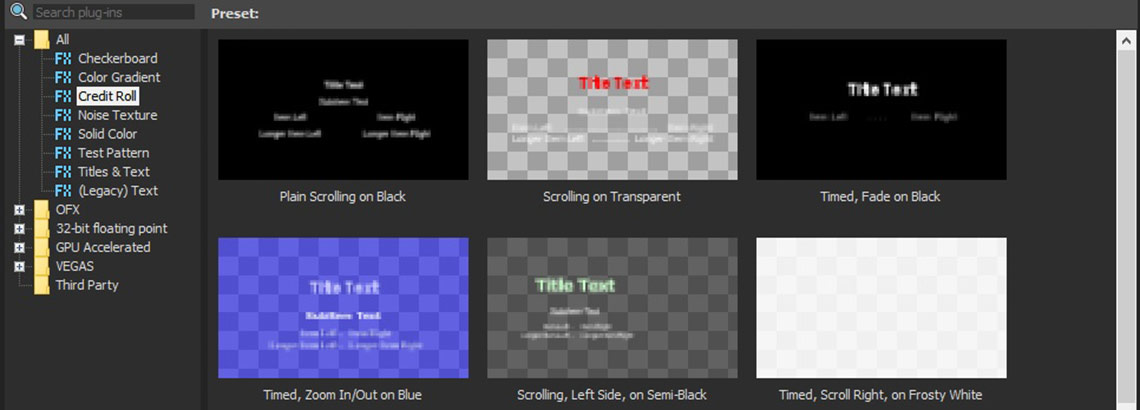
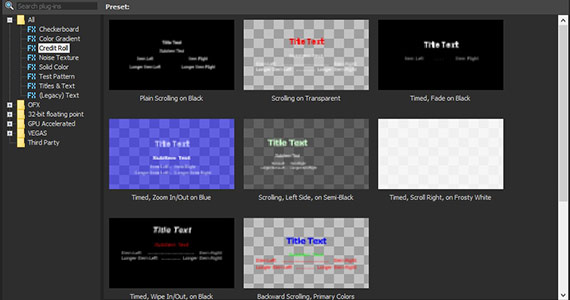
✓ In the Media Generators window, click Credit Roll.
✓ In the Preset pane, presets for various kinds of credit rolls appear. As with the Titles & Text generator, hover your mouse cursor over a preset thumbnail to see the preset in action.
Some presets behave like traditional credits and scroll bottom to top. Others scroll from top to bottom or slide in from the side. Some don’t scroll, but fade in and fade out pages of credits, like television end credits. Some scroll up only one side of the screen to let you run video on the other side as credits roll. And still more display your credits in other ways.
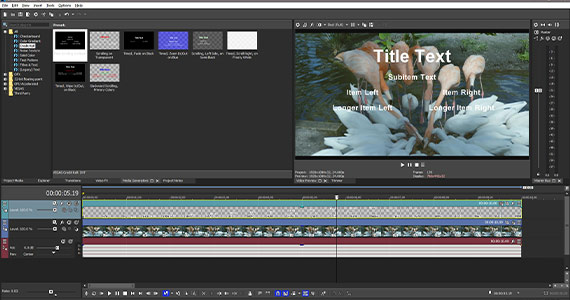
✓ Drag a preset to a track on the timeline. The VEGAS Media Generators window opens and the Credit Roll controls appear.
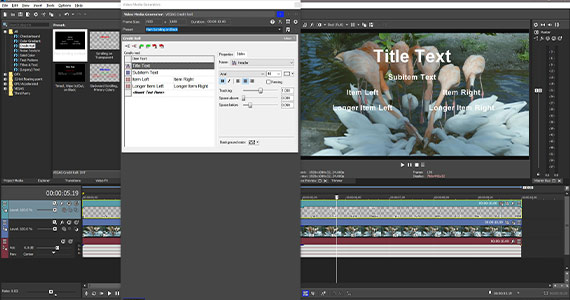
Credit rolls are a lot more complex than other types of text; you usually have a long list of credits. The Credits Text pane is divided into boxes, each representing a different type of text. The top box is for the main title of the project, though you can use it for anything you want. The next box is for a subitem, so you would place section headers like “Cast” or “Executive Producers” in that box. The next several boxes are divided, with a sub-box on the left and sub-box on the right. Here, you would enter a character name or a crew position in the left sub-box, and then the name of the actor or crew member in the right sub-box.
✓ Under the Styles tab, you can set the font styles for each individual box, so you can use different fonts, colors, sizes, and styles for each box. You can also include dots between your left and right sub-boxes.
✓ If you need more boxes, click the type of box you want more of, then click Insert A Row. A new row of that type of box. You can move boxes up and down to position them where you want.
✓ Click Background Color to choose a background color for your text, or make it transparent so the text rolls over video images.
✓ In the Position box, drag a control point at the corner of the blue box to reposition the text area.
Here, you can define exactly where the credit roll appears on your screen. Drag the left corner point to the right so that the blue box occupies only the right half of the Position box. Your credit roll will only appear in the right half of the screen, making it possible for you to continue showing video, such as a blooper reel, on the left half of the screen. Mind your Safe Area guides, however. If the blue box goes all the way to the edge of the Position box, your text may be cut off the right side of the screen.
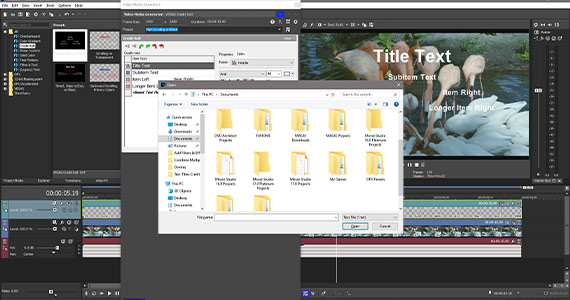
You can enter all of your credits manually. Type directly into the boxes in the Credits Text pane. But you’ll usually have a long list of credits, so you can also import text.
✓ Click Import Text From A File to import a credits list.
You can also export your credits as a text file to use as a template or in other projects, or to share.
✓ Click Export All Or Selected Text To A File.


- 2-for-1 deal: Buy one and get one for free!
- Buy a VEGAS product today and get the new version of the same product for free!
- 2-for-1 deal: Buy one and get one for free!
- Buy a VEGAS product today and get the new version of the same product for free!

- 2-for-1 deal: Buy one and get one for free!
- Buy a VEGAS product today and get the new version of the same product for free!
- 2-for-1 deal: Buy one and get one for free!
- Buy a VEGAS product today and get the new version of the same product for free!
- 2-for-1 deal: Buy one and get one for free!
- Buy a VEGAS product today and get the new version of the same product for free!
- 2-for-1 deal: Buy one and get one for free!
- Buy a VEGAS product today and get the new version of the same product for free!
What's the difference between VEGAS Pro Edit, VEGAS Pro Suite and VEGAS Pro Post?