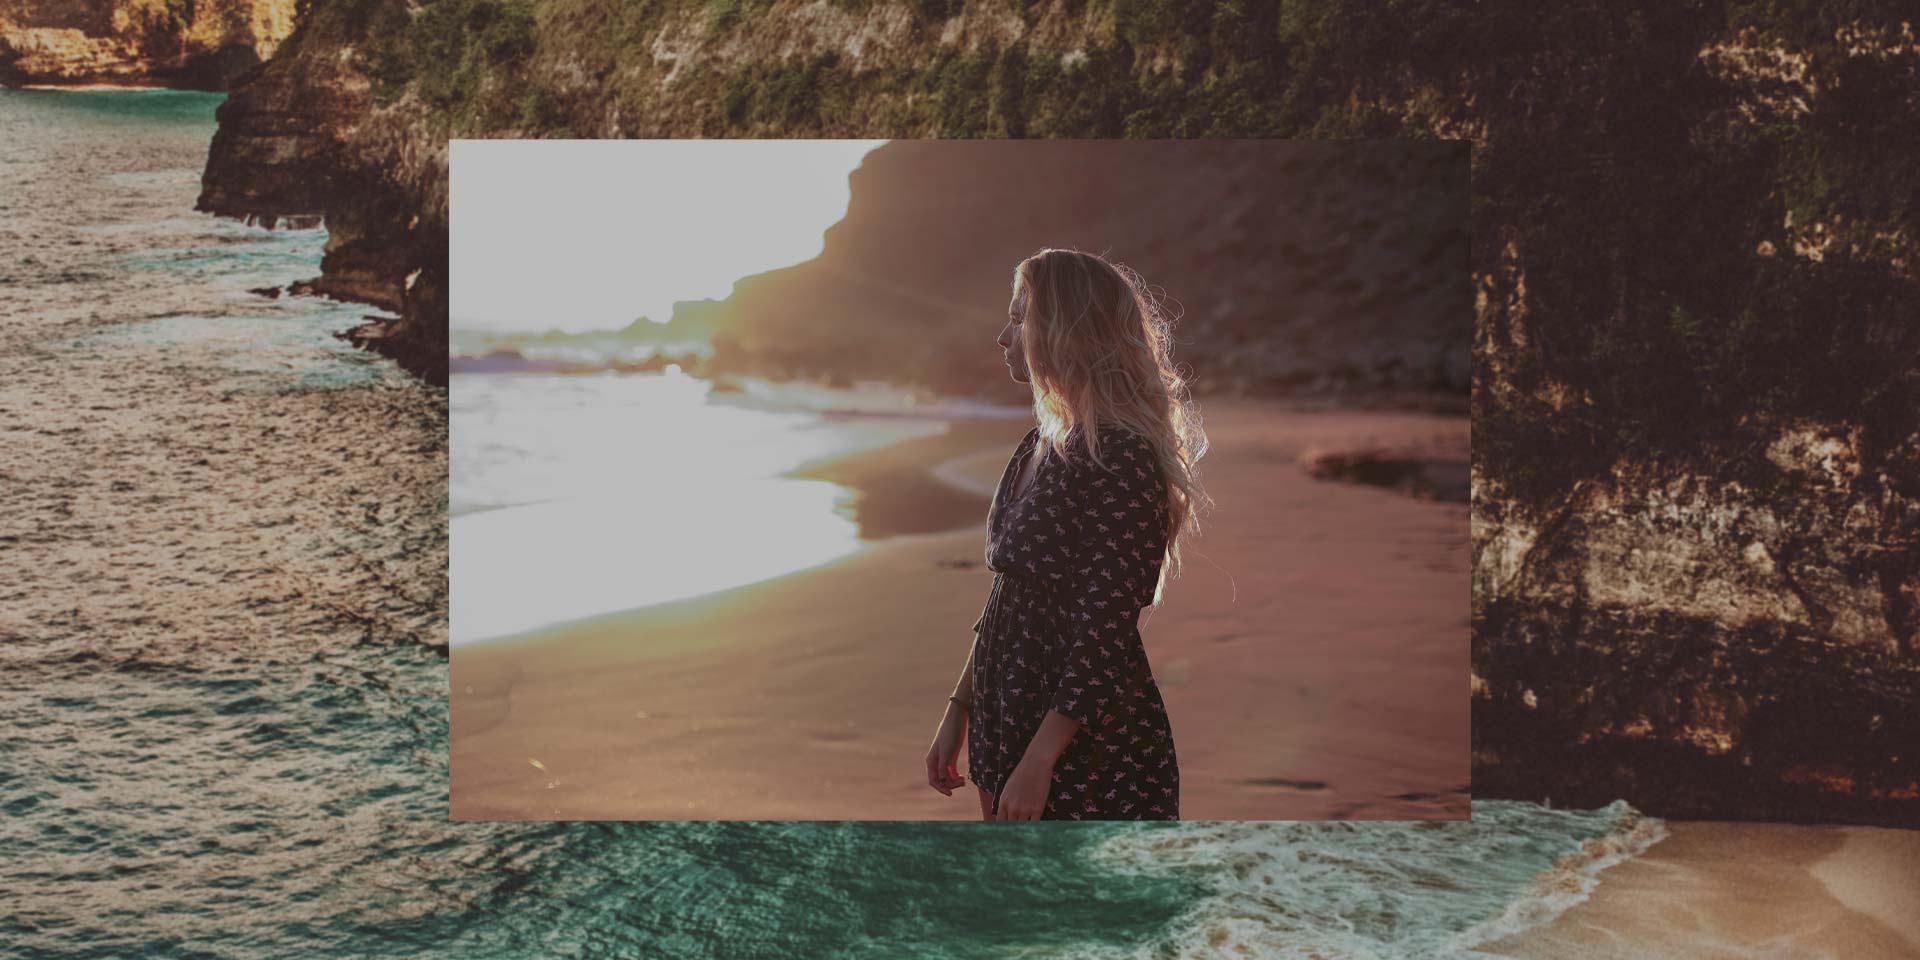
Using VEGAS Pro, create amazing video overlays, superimposing video or photos over another video to make a stunning composite image! Imagine the possibilities – video slideshows, newscast-style setups with clips playing next to the person explaining it, pop-up inserts in a video tutorial, vivid live-action digital scrapbooks, lower thirds or runners in news reports, or digital poster like you see in fantasy movie, or anything your imagination can come up with. The possibilities are endless!
Come along with us while we take you through the steps of using some very powerful tools and effects built right into VEGAS Pro.
We’ll start by showing you how to:
Step 1: Choose Your Video
Step 2: Create a New Track
Step 3: Place Images You Want on Upper Track
With the Picture In Picture effect, we’ll:
Step 4: Resize the Image
Step 5: Move the Image
Step 6: Rotate and Reshape the Image
In the Event Pan/Crop tool, we’ll:
Step 7: Resize the Image
Step 8: Move the Image
Using Track Motion, we’ll:
Step 9: Resize the Image
Step 10: Move the Image
Step 11: Add a Drop Shadow or Glow
Read on to take a deep dive into video overlays in VEGAS Pro!
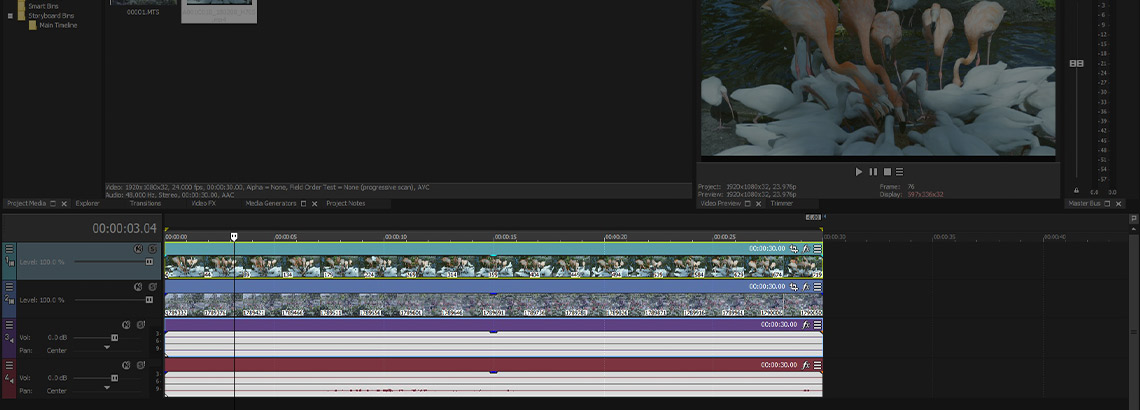
✓ Drag the video or image file you want to use as your background image from the Project Media window to the timeline.
In VEGAS Pro, a new track will be created.
✓ In both, a pop-up asks if you want the project properties to be the same as the video properties. Click Yes.
You need more than one video track to create an overlay.
✓ In VEGAS Pro, go to Insert>Video Track.
A new video track appears over the first video track. Double-click the track header just to the right of the hamburger menu. A type box appears to name the track. Name it Overlay.
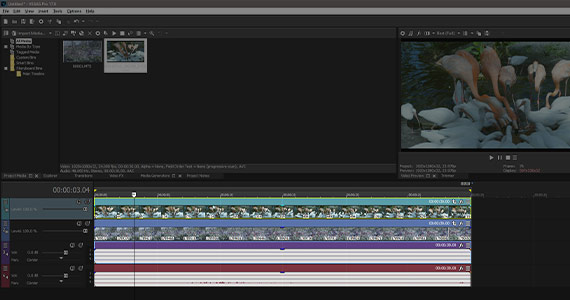
In the Project Media window, choose the image or video you want to use as your overlay.
✓ Drag it to the Overlay track and place it directly above the video event on the track below.
In the Video Preview window, you’ll only see the image on the Overlay track, because VEGAS treats images in video tracks like a stack of photographs – only the top photo is visible.
✓ To see the background image, we’ll have to move, crop, or reduce the size of the image in the Overlay track. We can do that with any of several powerful tools and effects.
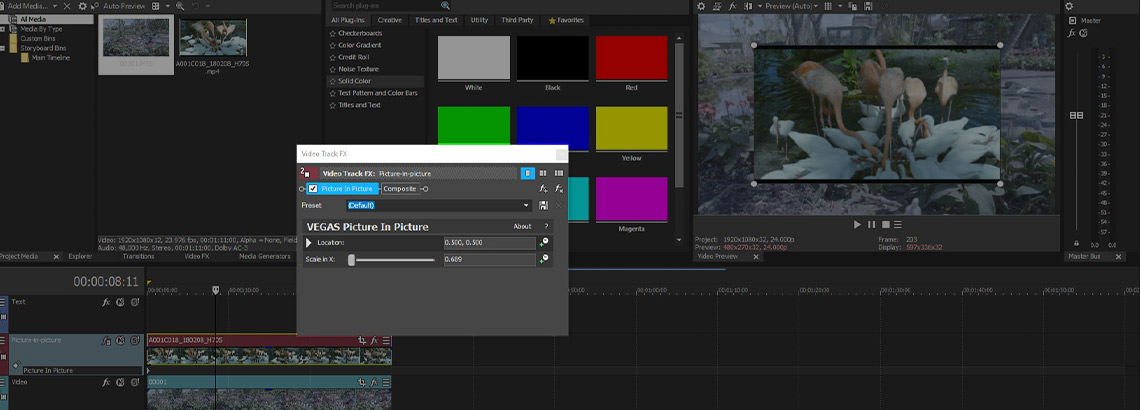
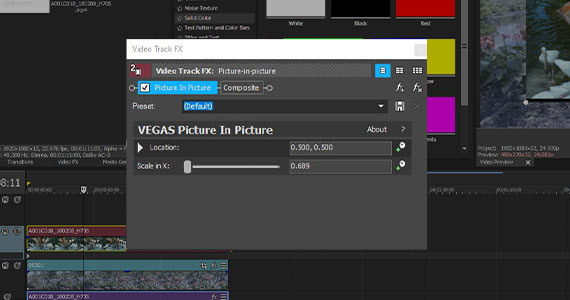
Let’s start with the Picture In Picture effect, the easiest way to create an image overlay.
✓ In VEGAS Pro, drag the Picture In Picture effect from the Video FX window and drop it on the event in the Overlay track. The Video Event FX window opens and the effect controls appear.
When the effect is applied, by default, the image in the Overlay track reduces to ¼ size, centered in the Video Preview window. You’ll see yellow dots on all four corners of the image. These are control points you can drag.
✓ Grab a yellow control point and drag it in or out. The overlay image shrinks or expands, keeping the same proportions. You can resize the image directly this way, or you can use the slider or sliders in the Video Event FX window.
✓ In VEGAS Pro, you have sliders for Scale in X and Scale in Y. While the Mode is set to Fixed Shape, the sliders are locked to each other and sliding one of them slides both, so the shape changes size proportionally.
Now we’ve resized the image and we can see the background image underneath, but it’s in the center of the screen.
✓ Grab the image in the Video Preview window and drag it to the upper right corner. Or, in the Video Event FX window, twirl the triangle next to Location down, then move the cross in the Location box.
Move the image to where you want, and you’ve made your first overlay.
In VEGAS Pro, you can do more than just resize and move the overlay image; you can also rotate and reshape it.
✓ In the Video Preview window, grab and turn the circle inside the image.The image rotates as you drag. You can also use the Angle slider in the Video Event FX window, or enter a rotation angle value directly.
✓ To reshape the image, you have several options. In the Mode drop-down menu, choose Fixed Parallelogram. Now, the Scale in X and Scale in Y sliders are independent. Sliding Scale in X controls the size on the X axis, or side-to-side. Scale in Y controls the Y axis, or up-and-down, so you can make rectangles of any proportions.
The Shear slider changes the angles of the corners from right angles to acute or obtuse angles, depending on which way you slide, creating parallelograms of many different shapes. Dragging the corner points while in Fixed Parallelogram mode also affects Shear.
✓ Choose Free Form in the Mode drop-down menu. Now you can move the control points completely independently and fix the corners of the image to any points in the background image, changing the shape of the image so that you can, for example, make your overlay image look like a poster hanging on a wall.
You can also keyframe and animate the Picture In Picture effect, and link it to Planar Motion Tracking for amazing compositing possibilities; we cover those topics in another tutorial. But the power of Picture In Picture is limited only by your imagination!
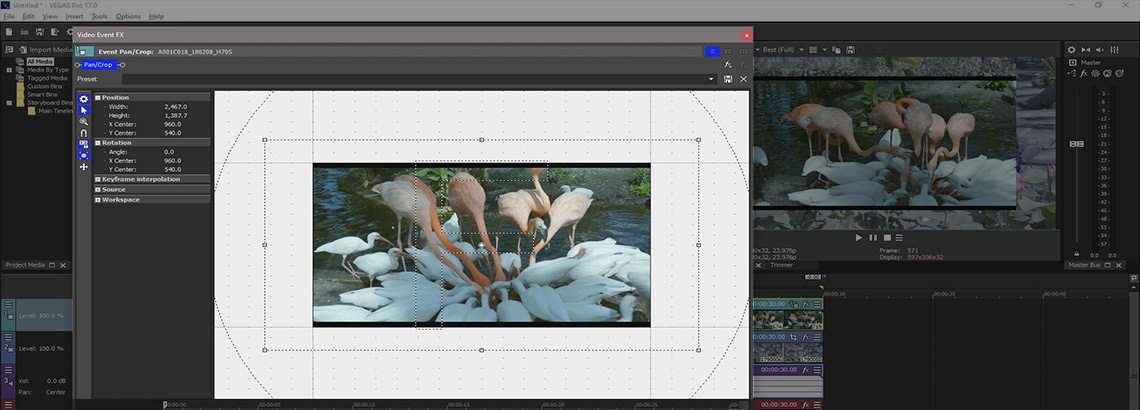
Event Pan/Crop is a very powerful tool, designed to do what its name says -- to crop images to different sizes and shapes, and to pan across them in a “Ken Burns” effect, or in a “pan and scan” style, such as with video that’s shaped different from your screen, like a widescreen movie on an old-style 4:3 TV. But for our purposes, it can resize and move an image around on the screen, making it a great tool for the kinds of image overlays we’re going for.
✓ Click the Event Pan/Crop icon on the event in the Overlay track. The Video Event FX window appears with the Event Pan/Crop tool active. But first, click the Picture In Picture effect at the top of the Video Event FX window.
✓ Then click Remove Selected Plugin to remove the Picture In Picture effect. The Pan/Crop controls reappear in the Video Event FX window. The image now returns to its default size and shape, and once again, we can only see the overlay image in the Video Preview window.
Again, we’ll have to resize it. In the white pane of the Event Pan/Crop controls, you see the image surrounded by a dotted rectangle, with control points on the corners and at the center of each side.
✓ Make sure Size About Center is enabled on the left side of the window, then drag any of the control points outward.
The dotted rectangle gets bigger, but in the Video Preview window, you’ll see your image get smaller and the background revealed underneath. In the white pane, you’ll see that the dotted rectangle represents the frame of the Video Preview window. You enlarged the frame relative to the image, so your image appears smaller inside the frame. The size and location of your overlay image in the Video Preview window corresponds to the size and location of your image within the dotted frame in the Video Event FX window.
✓ Drag the control points until your image appears the size you want in the Video Preview window.
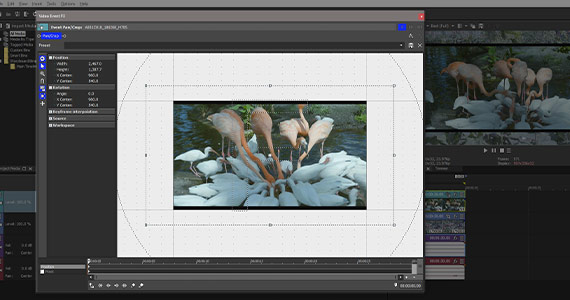
✓ Your overlay image is still in the center of the screen. In the Video Event FX window, grab inside the dotted rectangle and drag it.
Remember the relationship – you’re moving the project frame relative to the image, so moving the rectangle seems to move the image in the opposite direction as your mouse. In effect, you’re dragging the frame of the project around the image.
✓ So, if you want your image in the upper left corner of the Video Preview window, you need to drag the upper left corner of the frame to the image. Grab the rectangle in the upper left corner and then drag your cursor to the image. Line up the dotted rectangle corner and sides with the image corner and sides. You’ll now see that your overlay image is in the upper left corner of the Video Preview window.
✓ You can also rotate the image. Grab the dotted circle surrounding the dotted rectangle and turn it. The image rotates in the Video Preview window. Again, you’re rotating the frame relative to the image, so the image appears to rotate in the opposite direction from your turn.
It takes some practice, but once you understand the relationship between the frame and the image, you’ll have no trouble moving your overlay images where you want them.
It’s also possible to keyframe and animate your overlay image in the Event Pan/Crop tool, but we’ll cover that in a different tutorial.
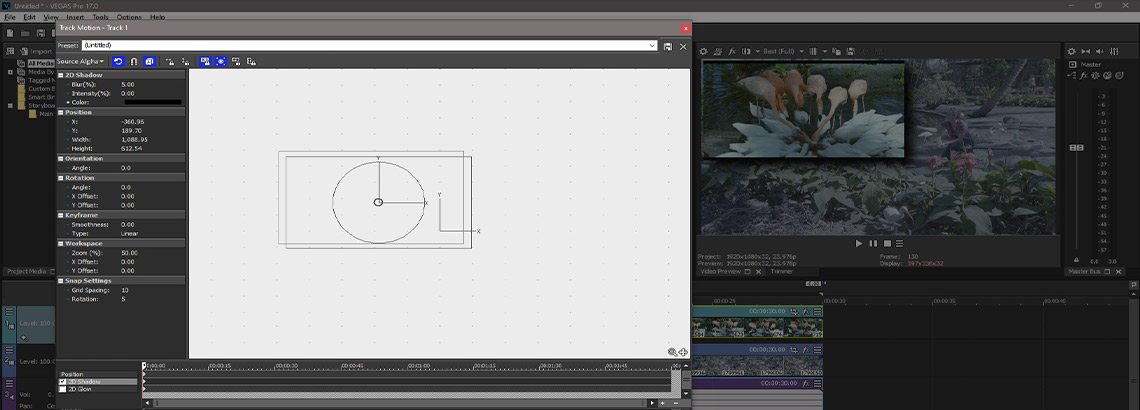
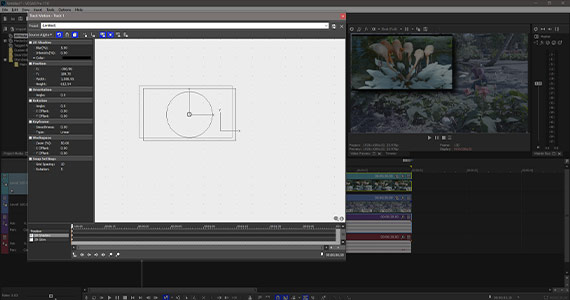
Track Motion is an incredibly powerful tool resizing and moving images, and thus is ideal for creating video overlays. Unlike the Event Pan/Crop tool, you directly control the size, shape, and rotation of the image, so the controls behave intuitively, the way you’d expect.
✓ To get started, first, let’s reset. In the Event Pan/Crop tool controls, right-click the dotted rectangle and choose Restore, resetting everything back to the beginning. Close the Video Event FX window.
✓ Right-click the hamburger menu on the Overlay track header. Choose Track Motion. The Track Motion window opens and the Track Motion controls appear.
Useful Tips: Create Stunning Video Collages
Like with the Event Pan/Crop tool, there’s a box at the center of the white pane of the Track Motion window. However, this box represents the frame of the track relative to the project instead of the frame of the project relative to the image.
✓ Drag a corner of the box inward.
The box gets smaller, and the overlay image also gets smaller in the Video Preview window. You’re directly controlling the image -- sort of. You’re actually controlling the track, and the image, sitting in the track, goes along for the ride. But for our purposes here, that’s close enough. The control box controls your image.
✓ Drag the box corner until the image is the size you want.
As we saw with Picture In Picture and Event Pan/Crop, the resized image sits in the center of the Video Preview window.
✓ Drag the box to the upper left.The image moves to the upper left of the Video Preview.
✓ Grab and turn the circle inside the box to rotate the image.
With Track Motion, you’re free to resize and reposition your overlay at will.
You also have an option in Track Motion you don’t have in the other tools and effects.
✓ Click the 2D shadow checkbox to apply a drop shadow under your image, which can be helpful for setting your overlay apart from the background image, making it easier to see. You can control the size, color, intensity, location, and blur of the drop shadow, so you can make it as harsh or subtle as you want.
✓ Click the 2D Glow checkbox to apply a glow around the edges of the image. You can also adjust the size, color, intensity, location, and blur of the glow.
As with Picture In Picture and Event Pan/Crop, you can keyframe and animate your image overlay in the Track Motion tool, but we’ll look at that in another article.
Those are some of the ways to create video overlays in VEGAS Pro. Play with them, experiment, and even combine them for effects no one else has thought of. The only limit to what you can do is your imagination!
Try it today!


What's the difference between VEGAS Pro and VEGAS Pro Suite?