
What you’ll learn:
Understanding LUTs
How to Create and Export Your Own Luts
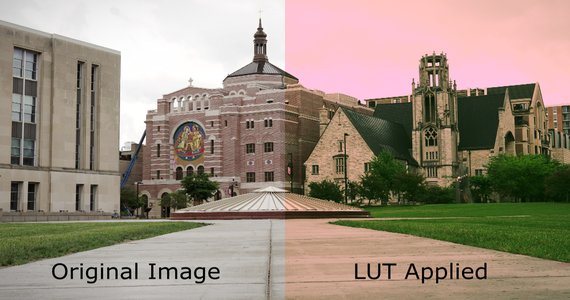
LUTs (Lookup Tables) are a kind of color filter you use to alter the colors in your image. They apply predetermined sets of mathematical formulas to your video’s existing colors to change those colors and achieve a desired result. They make adjustments to gamma, contrast, saturation, luminance, and hue, essentially taking the original set of colors and changing them into a new set of colors. And they do so completely automatically. Simply put, LUT are powerful tools you can use to elevate your color correction and color grading work. They are similar to color presets you may create and save, but much simpler, as they contain much more information and can apply adjustments to many different properties of color all at once, whereas presets are often much more limited. They’re also more versatile than typical color presets, because you can use them in any software which understands the format, not just the software you created it with, making it easy to share color looks between projects in many different programs.
Read on to discover what LUTs are, how to use them, and even how to make and export your own custom LUTs!
Not all LUTs are used in post production. Some LUTs help you make sure your monitoring equipment gives you the information you need to do your work accurately.
A calibration LUT helps calibrate a monitor so that it displays the most accurate image, ensuring that what you see while you work is what you deliver.
Video productions use viewing LUTs on set. Not the same as a calibration LUT, a viewing LUT adjusts the video feed coming from the camera. RAW or LOG footage doesn’t look very good by itself – it’s usually dark, low-saturation, and low contrast, so it looks grey and washed out until color corrected.
Without a viewing LUT, video from such cameras would not look good on on-set monitors, sometimes making it hard to see if you’re really getting the image you want.
The viewing LUT adjusts the picture on the monitor so it looks more like the final post-grading image will, helping the cinematographer, director, and producers make sure they’re getting their proper image.


There are different types of LUTs used for color correction and color grading during post production.
Useful Tips: Understanding What Color Correction And Color Grading Are – And Aren’t
First, there are two LUT formats, which work differently from each other. A 1D LUT (usually .lut format) controls a single parameter, generally the gamma. A 1D LUT takes kind of a blanket approach; the adjustment applies to everything in the image without much flexibility. The one parameter affects all colors, saturations, and contrast. A 3D LUT (usually .cube format) has three axes that adjust hue, saturation, luminosity, gamma, and contrast separately and can change as conditions in the image change. As such, a 3D LUT is much more flexible and powerful, and really the only way to achieve a truly cinematic color grade using a LUT.
The next two types of LUTs can be either 1D or 3D LUTs, but are most generally 3D LUTs these days. The difference between them is when you use them in the process and for what purpose.
An input or camera LUT, used at the beginning of the color-correction process, adjusts the footage so that the color-correction tools work properly. Color-correcting footage that needs an input or camera LUT without one may lead to unexpected and unsatisfactory results.
Conversely, you usually apply a look LUT after you’ve done color correction and have moved on to the color grading phase. You use it to dial in the exact artistic look you want. The look LUT contains instructions to create a pre-determined desired look in your footage, which can be an incredible time-saver in the color grading process.
Always color correct before you apply a look LUT, because look LUTs assume baseline natural color. If you don’t, you may not see the results the LUT is designed to give you.
LUTs are specifically engineered for different types of footage – LOG, RAW, Rec.709, Rec.2020, HDR, and more. You can use any LUT on any footage, but if you apply a LUT meant for a specific type of footage on a different type, you may get a look very different from what you expected. But then, it may also give you a result you like, so you’re free to experiment as much as you want. LUTs are non-destructive, so you can load and delete them at will.
Many camera manufacturers, software companies, and independent producers offer downloadable LUTs or LUT packs. They often design these looks for specific purposes, like color correcting footage shot by their cameras, or for emulating the distinctive looks seen in movies and TV shows. These looks can give you exactly the color grade you want, or your can apply them and continue tweaking and adjusting to dial in that absolutely perfect look.
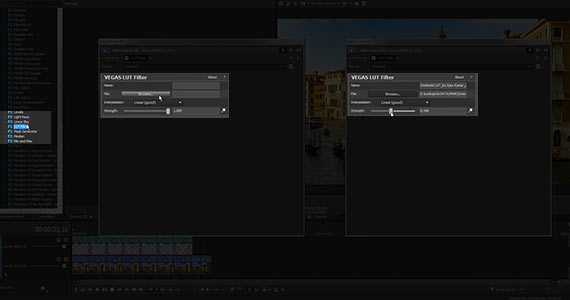
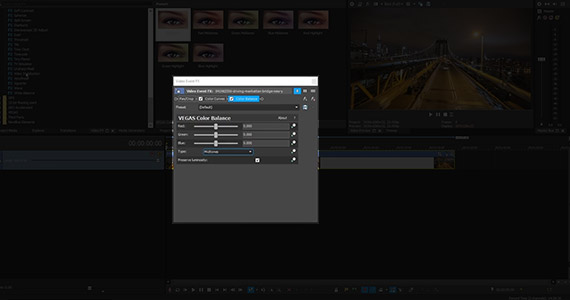
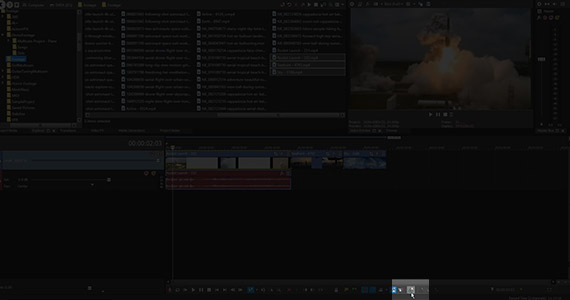
✓ From the Video FX window, drag the LUT Filter effect and drop it onto the event.
The Video Event FX window pops up and the VEGAS Pro LUT Filter controls appear.
✓ Click the Browse button, and in the Open dialogue box, navigate to the folder containing the .cube file of the desired LUT. Click on the .cube file, then click Open.
The LUT is now applied to the event.
✓ Use the Strength slider in the effects controls to adjust the ratio between the original image and the effect. At zero, there is no LUT applied. At 1.000, the LUT is applied 100%.
✓ Drag the LUT Filter effect to the track to apply a LUT at the track level, or drag it to the Preview Window to apply it to the entire project.
✓ Apply a LUT at the media level so that a video clip automatically carries the LUT whenever you bring it to the timeline, or so that the LUT automatically applies to any video event containing the media.
✓ Select the clip in the Project Media window.
✓ Click the Media FX button in the window toolbar to bring up the Plug-In Chooser – Media FX window.
✓ Choose the LUT Filter effect from the tree. Click Add. Follow the steps to apply the LUT in the VEGAS Pro LUT Filter control box.
VEGAS Pro allows you to create effects chains for applying VFX to video. You can create and apply these chains at the media, event, track, or project levels, and any effects applied at a higher level will also apply to all lower levels, meaning an event on the timeline can have up to four layers of effects chains applied to it.
You can save an effects chain as a .cube file and use that LUT on other clips in the project, or in any project in any software which uses .cube files.
However, you can only save an effects chain from a single level, so if you have effects chains applied at the media, event, track, and project levels, you can only save one of those effects chains as a LUT.
The LUT will not include the effects in the other chains.
✓ Bring the video event you wish to color correct or color grade into the timeline.
✓ Drag the footage you want to edit from the file browser and drag it into your project.
✓ Now, apply your color effects to the desired level. Drag and drop effects presets, or click on the appropriate FX icon to bring up the effects tree menu and choose from there. Choose all the effects you wish to apply, and make your adjustments.
While you can always add any effect to a chain, a LUT only contains effects related to color, exposure, levels, or contrast. Any effects which manipulate the image in other ways, such as blurs or vignettes, will not carry through properly and may make your LUT very unpredictable. Deselect any non-color effects before moving on to the next step.
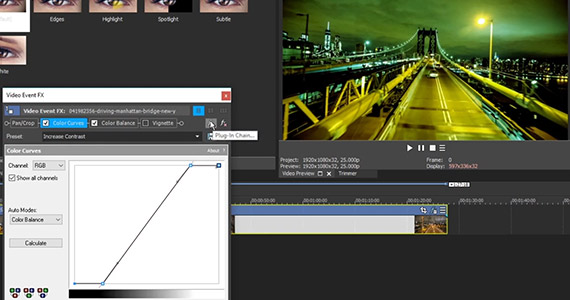
✓ With the Video Event FX window open, click the Plug-In Chain Button to bring up the Plug-In Chooser – Video Event FX window. Find the column of buttons on the right side of the window.

✓ At the bottom of the buttons column, find the Save LUT button. Click it, bringing up the Save Plug-In Chain As LUT dialog box. Choose the desired file folder and then type in the desired file name. Click save, and VEGAS Pro saves your plug-in chain as a LUT in .cube format.
Now let’s explore how to create and save LUTs from the Color Grading panel. Unlike effects chains, any adjustments you make the Color Grading panel, except for the Bézier mask, will pass through to the saved LUT.
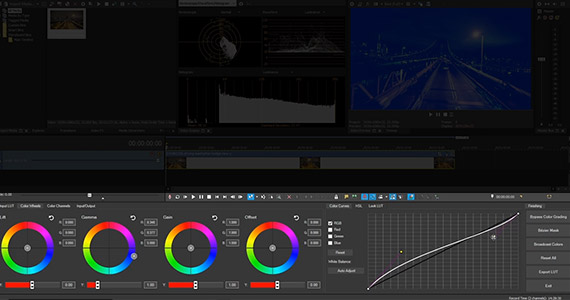
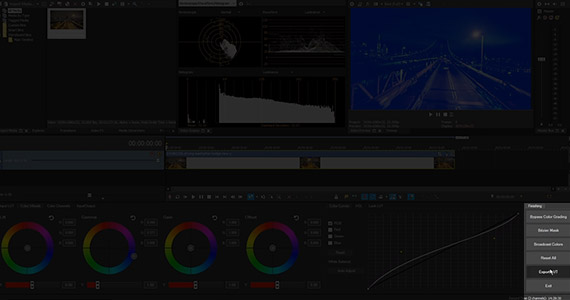
✓ At the bottom right of the Color Grading panel, find the Export LUT button. Click it to bring up the same Save dialog window and follow the same steps as before.
Whether you saved an effects chain or the adjustments from the Color Grading panel, your LUT is now saved and available for import into any VEGAS Pro project, or any project in any software which uses .cube format.


What's the difference between VEGAS Pro and VEGAS Pro Suite?