What you’ll learn:
The Color Grading Panel
- Set project properties to work with HDR, if needed
- Bring clips into the timeline
- Open the color grading panel
Color Correction
Color Grading
One of the most important jobs of editing is correcting and grading color. There’s a difference between color correction and color grading. In color correction, you fix the image to get a proper, natural, baseline image, and in color grading, you manipulate color for artistic effect. Color correction is the technical step, and color grading is the artistic step. The Color Grading Panel in VEGAS Pro puts a great set of tools for doing both at your fingertips, whether you’re working in standard color or with High Dynamic Range (HDR) footage. Read on to find out how to color correct and color grade using the Color Grading panel!
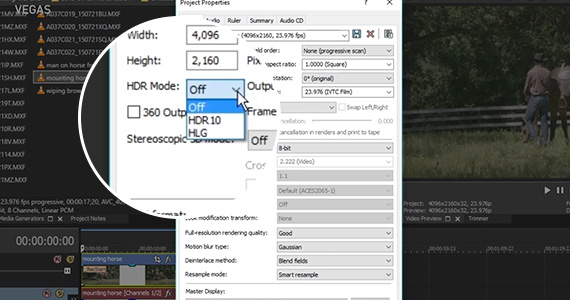
Step 1: Set project properties to work with HDR, if needed
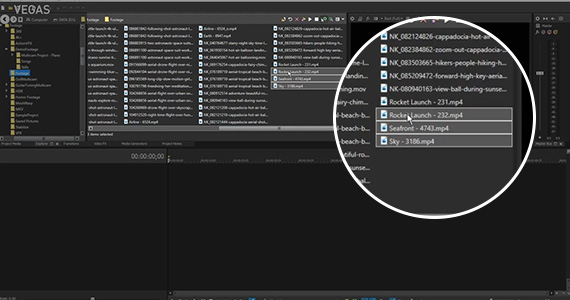
Step 2: Bring clips into the VEGAS Pro timeline
Step 3: Open the Color Grading panel
Step 4: Import a camera LUT
Step 5: Correct exposure
Step 6: Correct white balance
Step 7: Correct contrast (Gamma)
Step 8: Import a Look LUT if desired
Step 9: Use color grading tools to dial in the look you want
The Color Grading panel is an essential tool for any video editor that values efficiency and efficacy. This panel readily makes all of your most important tools available in one convenient place. You can access all of your most important color grading tools with a single click.
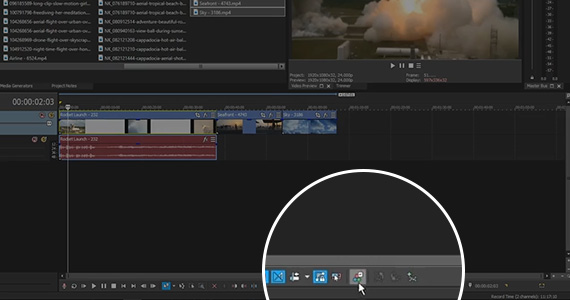
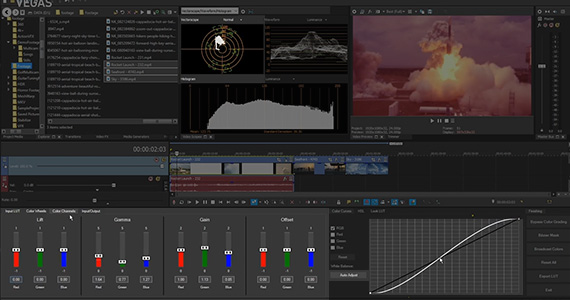
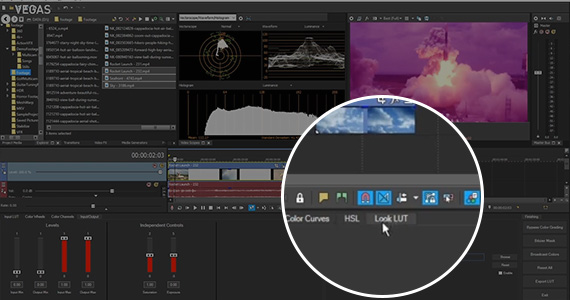
Click the Color Grading button on the timeline toolbar to open the Color Grading panel at the bottom of the main VEGAS Pro window, under the timeline. Note, too, that the Video Scopes window also opens. But keep in mind that if you previously closed the Video Scopes window while working in the Color Grading panel, it will not automatically reappear the next time you open the Color Grading panel, and you will have to open it manually under the View>Window drop-down menu.
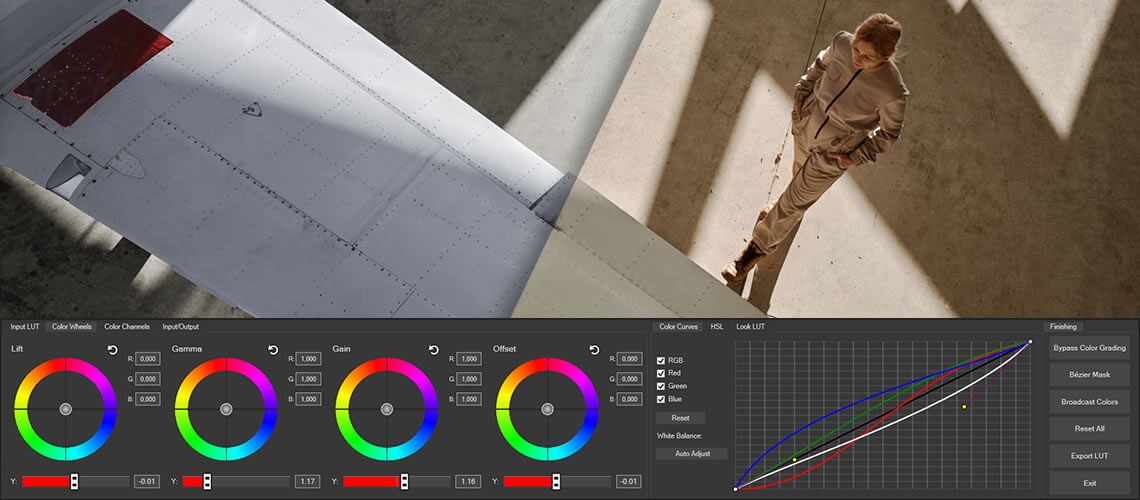
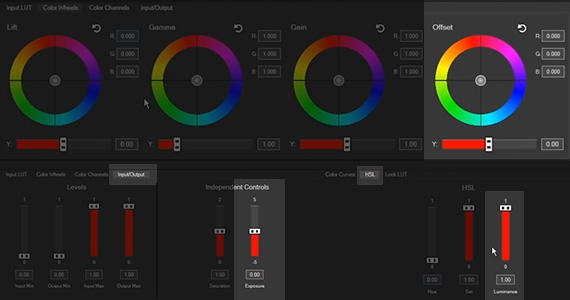
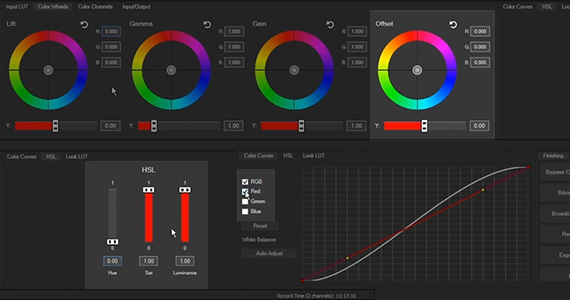
The Color Grading panel contains three sections with various color controls. In the default configuration, the first section displays color wheels, the second displays color curves, and the third displays an array of buttons.
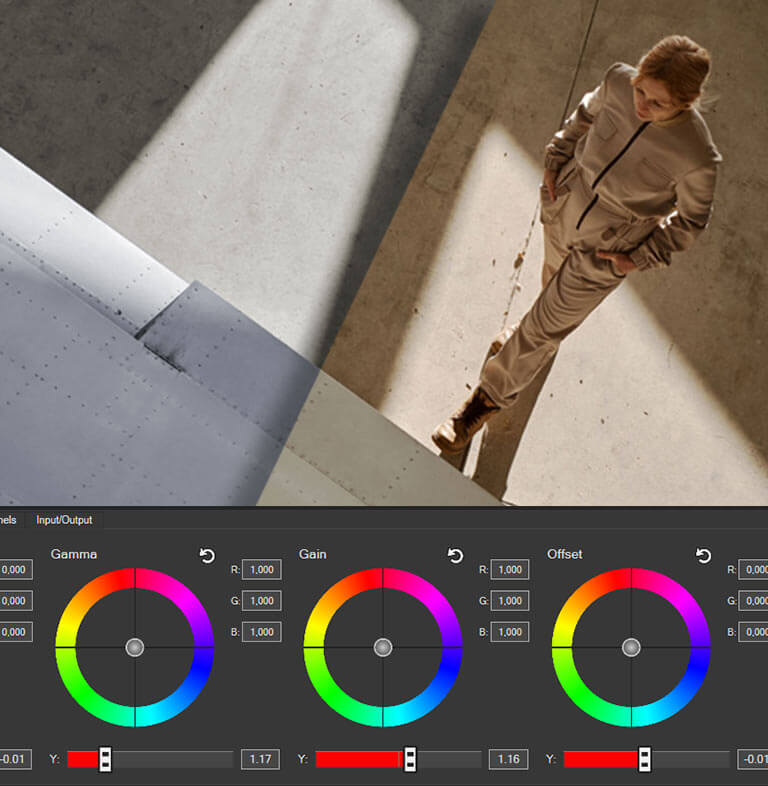
✓ The first section contains several tabs which lead to different types of inputs and controls. Under the first tab, Input LUT, you have the option of loading a camera LUT if necessary, or any other LUT file in .cube format. Under the second, you have four color wheels for adjusting the entire image or for adjusting the Gamma, Gain, and Offset separately. Under the third, you’ll find slider controls for the red, green, and blue components of the same four color areas. Under the fourth tab, you’ll find slider controls for input and output, and also for saturation and overall brightness (exposure).
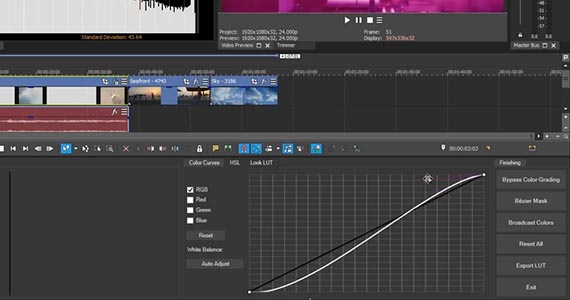
✓ The second section contains color curves and also an automatic white balance button. The second tab brings up HSL sliders, and the third tab lets you load a Look LUT for your color grade. As with the Input LUT tab, you can load any .cube file you like.
✓ The third section has only one tab, Finishing, but it contains buttons which lead you to several different functions. You can bypass the color grading to see your image without the color work you’ve added. You can add a Bézier mask to limit your correction to only a certain section or object in your image. You can add a Broadcast Colors filter if necessary for your project. You can reset all color controls back to default. You can export your color correction work as a LUT for use elsewhere in the project, or for use in any other project or in any other software which accepts LUTs in .cube format. Or, you can exit the Color Grading panel.
Using the panel, you can take color correction and color grading in the usual order. First, color correct to get a natural baseline image, then color grade for artistic style and effect.
Here’s how to go through the steps in the Color Grading panel.
Color correction, or fixing exposure, white balance, and contrast in order to present an image which looks natural to the human eye, is usually done in a particular order (though you may go back and adjust previous steps at any time). This isn’t the artistic stage; this is about fixing problems in the image and getting a proper baseline.
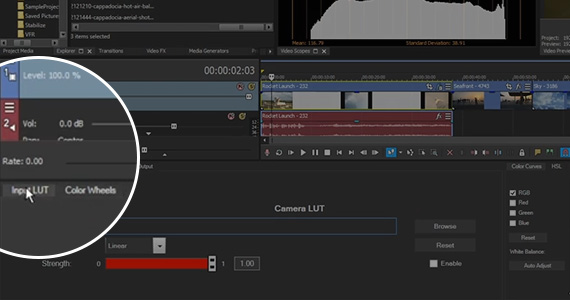
Certain cameras, or certain formats such as LOG, may sometimes require a camera LUT for the image so that you start off with a correct baseline from which all the color correction controls will work properly. If that’s the case, load the camera LUT in the Input LUT tab.
✓ Click Browse, then navigate to the folder containing the .cube file you want.
To bypass the LUT so you can compare your footage with it and without it, deselect and reselect the Enable checkbox. To remove the LUT, click the Reset button.
Now you’re ready to color correct. Let’s adjust exposure. Exposure is about setting the proper brightness in your image.
✓ You can use the Y slider under the Offset color wheel to adjust the brightness of the entire image, or
✓ you can use the Exposure slider under the Input/Output tab, or
✓ the Luminance slider under the HSL tab, to do the same.
The Y sliders under the Lift, Gamma, and Gain wheels adjust the brightness of the darkest, middle, or brightest parts of the image individually.
Use the color curves for more precise adjustment of different areas of brightness.
Keep an eye on the Waveform in the Video Scopes. A properly-exposed image will generally have robust signal throughout the entire range, with blacks at the bottom and the brightest whites at the top. Often, adjusting exposure so that people’s faces are properly exposed will set the entire image properly, with adjustments made to the brightest and darkest parts of the image individually if necessary.
Next, set the proper white balance. Even though you white balanced the camera when you shot the footage, the white balance may still be a little off, so correct that now. Or, maybe the camera didn’t have a proper white balance and you need to set it now.
✓ You can click the Auto Adjust button under White Balance in the Color Curves tab, and VEGAS Pro will adjust the curves for proper white balance.
Or, you can do it manually and make finer adjustments than the auto white balance.
Use your Vectorscope here. Is the color in the image bunched toward a certain direction on the color wheel, like blue or orange?
✓ If so, you can adjust the color wheels to bring the color vectors more toward the center of the Vectorscope.
✓ Or, you can use the individual red, green, or blue color curves, or the RGB sliders under the Color Channels tab -- whichever you prefer.
Often, you can use the Auto Adjust to give you general idea of what needs adjusting and then do your white balance adjustment manually to get the best results.
Setting proper contrast or “gamma” is about adjusting the brightest brights and darkest darks. If an image looks washed out or cloudy, then the contrast is too low. If the image looks too harsh, with a lot of crushed darks and blown out brights, then the contrast is too high.
You can use the Y sliders under the color wheels to adjust contrast, but for the most precise adjustments, use the color curves. You’ll generally be working with the full RGB curve, but you can also make adjustments to the individual red, green, and blue channels.
✓ Use the control handles, or tangents, in conjunction with other, or right-click the points to unlock the tangents and use them independently.
Again, use the Waveform to see exactly what you’re doing in the darks and lights. Avoid flat lines at the top or bottom. If you adjust individual color channels, you can use the RGB Parade scope, basically a Waveform for each color channel, to monitor each channel separately.
Once you have your image corrected, and set to a natural appearance, you have a proper baseline to add artistic effect, or color grading.
Many Hollywood-style productions have specific looks, like the green tint of The Matrix or the orange hues of movies set in the tropics. Often, you can find LUTs designed to emulate these popular looks, whether free or in or in paid LUT packages.
✓ To use one of them, load it in the Look LUT tab.
Remember, these LUTs are engineered to work with a natural baseline image, so doing proper color correction first is very important to getting the specific color grade you want from the LUT.
You can then enhance the look the LUT gave you, or do your own color grade using the controls in the Color Grading panel.
✓ Use the Offset wheel, for example, to shift the overall hue of the image into the green range. Use the individual wheels for fine adjustments.
✓ Use color curves with individual color channels. Add as many points as you want to the curves for finer adjustments.
✓ Use the Saturation slider on the Input/Output or HSL tabs to adjust your color saturation, whether to make all the colors vibrant or to desaturate, even to black and white.
You can always use the Bypass Color Grading button to see the original image, but remember that if you leave that button on when you render, the video will render without the color effects.
You can save your own color work for use on different events in the project, in other VEGAS Pro projects, or in any other software that uses .cube format.
✓ Click on Export LUT and save it to the folder of your choice.
Finally, click away from any event to deselect all of them. With no event selected, the controls are still visible but disabled. They will become available again as soon as you select any video event. When you're done with your color grading task, click the Exit button to close the Color Grading panel.


What's the difference between VEGAS Pro and VEGAS Pro Suite?