
What you’ll learn:
Bit Rates - how they work, why they’re important, and how to choose them when rendering.
You might have heard about video bit rates, but what are they, really, and why are they important to video? Simply put, video bit rates are the amount of information a video player or video editing program needs to process to play back a video. The more information available, the better the image, but more processing power is needed to play it.
So what does this mean for you? Setting a video bit rate is all about a tug-of-war between video quality and file size, and there are times where one may be more important than the other. But how, and when, do you choose it, and can you change the bit rate of a video? That’s what we’ll cover in this tutorial.
First, we’ll talk about bit rates in general:
What is a Bit Rate?
Variable Bit Rates vs. Constant Bit Rates
Choosing Bit Rates
Converting Video Bit Rates
Then, in VEGAS Pro, we’ll follow these steps to familiarize you with how to set bit rates when rendering:
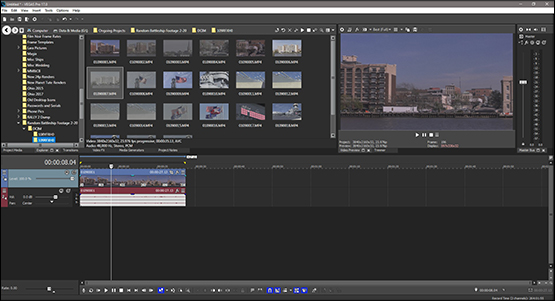
STEP 1: Import Your Video
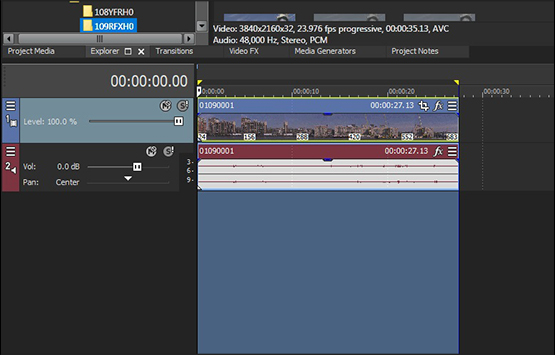
STEP 2: Create a Loop Region
STEP 3: Choose Your Render Format
STEP 4: Choose Constant Bit Rate
STEP 5: Choose Variable Bit Rate
STEP 6: Render
There’s a lot to cover, so let’s get to it! When we’re done, you’ll understand the basics of video bit rates.
Read on to find out more!

When digital video plays, instead of physical frames running through a projector, a video player processes massive amounts of data in the form of ones and zeros. The number of bits – each zero or one – processed per second is the bit rate.
The higher the bit rate, the more data gets pushed through per second, meaning the amount of information is higher, supporting higher resolutions, higher frame rates, and overall higher quality. It also means it’s more taxing on a computer or player to process more data, and the file size required for the length of the video is higher.
So, higher bit rate equals higher possible quality, but also higher file sizes. Lower bit rates can mean lower quality, but smaller file sizes per second of video. The upshot is that you can have the same video in a smaller file size, but the quality won’t be as high.
Which is better? It depends on your needs. If you need the very highest quality regardless of file size, then higher bit rates are better. But if the quality doesn’t matter as much the length, then lower bit rates are better. This can matter when recording video and you only have so much recording media space, or if you want upload video to the Internet very quickly.
If you have video of different resolutions, say one video is 720p, but the other one is 4K or UHD, then to maintain top possible quality, the bit rate of the 4K video needs to be much higher than the bit rate of the 720p video, because there are millions more pixels in the 4K video. If the two videos were the same bit rate, the 720p video’s relative quality would be much higher than the 4K videos, because the 720p video would carry more information per pixel than the 4K video.
The bit rate determines the file size. The amount of data in a file is a function of how much data is processed per second. So, if our two videos, the 720p video and the 4K video, are the same length and have the same bit rate, they will both have the same file size, even though the 4K video is higher resolution. But like we said, the relative quality of the 720p video, per pixel, will be higher.
Like the terms imply, a bit rate can vary within a file, where some data is processed faster than other data, or it can remain constant, with the same amount of data processed per second, every second.
The purpose of variable bit rates is to split the difference between file size and quality. Most data in video represents information changing because the picture constantly changes. But not every moment of video changes all that much from frame to frame. Sure, in a massive chase scene with lots of action, the imagery changes at a very quick pace. But in a slow, idyllic scene of the sun rising over a lake, only small elements within the scene change from frame to frame. Simply repeating the same data from the elements which don’t change and only pushing new data for the elements which do, instead of recording every bit of data for every frame, can save big on the amount of data needed. The result is that you don’t need to have as high a bit rate in a slower scene to maintain quality as you do in a scene with a lot of action.
So, a variable bit rate may be ideal for a program which contains both scenes with little motion and scenes with a lot of it. Lower the bit rate where there’s less motion, then increase it when there’s more. The result is high quality, with a smaller file size than you’d have if you simply processed the exact same amount of information every second. If it’s done well, a viewer will never notice the difference.
Seems like you should always want variable bit rates, right? Not so fast. Variable bit rates are excellent for saving space when all anyone will do with the video is watch it. It’s good for display. Virtually every program you’ve ever watched on DVD or Blu-ray was encoded with a variable bit rate, as are many streaming videos. But if you’re going to work with the video, if you’re going to edit it, add effects, adjust the color, or any of many other things you might do, you want as much information in every frame as possible. Your video needs to be robust as possible, so you want a constant bit rate.
A video file has a set bit rate, whether it’s variable or constant, and once the file is finalized, the bit rate can’t be changed. But there are two instances where you choose the bit rate for your video – when you record, and when you render new video. The choice for bit rate is always based on your needs, and a balance between quality and file size.
If you’re choosing a bit rate for recording, in general, the higher the better. But as we said, you may need longer recording times, especially if you’re going to record something like a play which goes on for hours, and you can’t or don’t want to switch out recording media, so you may choose a lower bit rate for that. Or, you might need to deliver footage quickly over the Internet, so a smaller file size might work better.
When rendering, keep your next purpose in mind. Are you rendering for delivery, for people to watch? Then you might be able to lower the bit rate, especially with very efficient codecs optimized for viewing, and leverage variable bit rates for even more size savings. But if you’re rendering with the intent to do more editing, effects, or color work on the video, you want a higher, constant bit rate.
Remember what we said earlier – higher resolutions need higher bit rates. While you might render a 720p video at 10,000,000 bits per second and achieve very high quality, you will need 24,000,000 or even higher to maintain high quality in 4K or UHD video.
As we said above, you can’t change the bit rate of a finalized video file. If you want a new bit rate for the video, bring the video into your video editor and then render a new file with the desired bit rate. Keep in mind, you can’t increase the quality of the video, because you only have the information available in it, but you can make the information which is there more robust and less likely to break down if you edit it or apply effects to it.
And of course, if you render at a lower bit rate, you can have the video in smaller file size, though the quality may be decreased.

There are no project settings for bit rates in VEGAS Pro. VEGAS Pro works with the video at its native bit rate.
Video with high bit rates requires more processing power, which affects real-time performance. A project with a lot of video at a very high bit rate may not play back at full frame rate, especially if you apply a lot of effects. Most often, that’s a function of resolution, where high-resolution footage like 4K naturally carries a much higher bit rate than 1080p or 720p footage.
The stage where you’ll choose video bit rate in VEGAS Pro is rendering. Let’s take the example above of rendering a new video at a different bit rate from the original video and go through the steps of choosing a bit rate for rendering from VEGAS Pro.
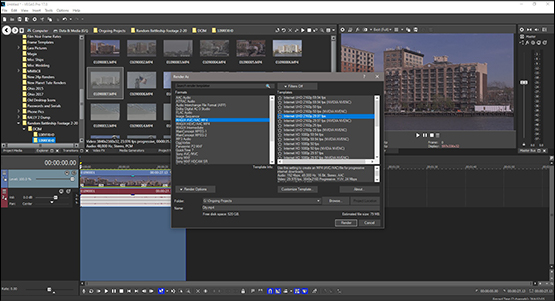
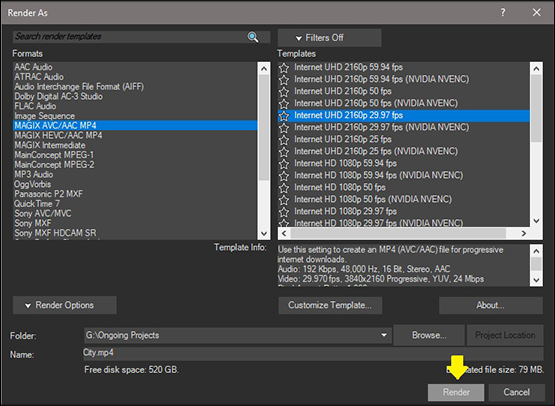
✓ Click Render As. The Render As window opens.
✓ Choose a format from the Formats list. For this example, choose MAGIX AVC/AAC MP4. Choose a template which matches your footage. In this example, we’ll use Internet UHD 2160p 29.97 fps. Don’t choose the NVIDIA NVENC version for this example.

✓ Click Customize Template. The Custom Settings – AVC/AAC MP4 window opens.
Near the middle of the window, you’ll find options for bit rate. The radio button for Variable Bit Rate is selected at default.
✓ If you want to render with a constant bit rate, click the Constant Bit Rate radio button to select it.
✓ The default bit rate of 768,000 will be far too low, so click the drop down arrow for a list of bit rates. For this 4K video, choose a bit rate no lower than 20,000,000, and preferably 28,000,000. You can choose 50,000,000 or much higher, but it’s almost never necessary to go that high.
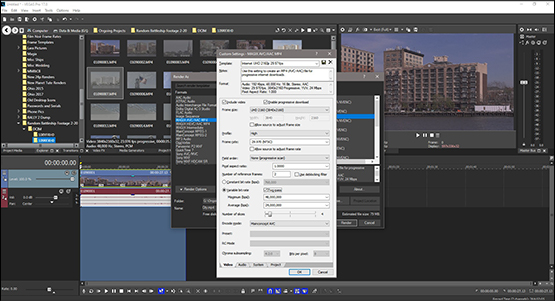
If this video is meant for display, then Variable Bit Rate might be appropriate.
✓ Click the radio button to select Variable Bit Rate.
Usually, the Two-pass box is unchecked. If you select it, when you start the render, VEGAS Pro analyzes the entire render area and maps out how to apply the variable bit rate before it begins the actual render. This can double (or more) the render time, but the result will be the best possible quality. Choose this if you want the absolute highest-quality render possible.
Maximum (bps) determines the upper limit for the variable bit rate. Average (bps) determines the baseline average bit rate. The bit rate will vary above and below this average, with sections without much movement falling below the average, and the high-action sections rising well above.
The template average of 24,000,000 is appropriate for 4K or UHD video. Lowering the Maximum will give you a smaller file size, but if you have sections with a considerable amount of motion, it’s best to keep it that high.


What's the difference between VEGAS Pro and VEGAS Pro Suite?