
What you’ll learn:
Jump cuts editing explained
Editors have long had to deal with one of the most common problems in editing – the jump cut. You’ve heard of it, but what is it, exactly? And how can you deal with it? Read on to explore what causes jump cuts, what creative ways editors have developed to work around them, and what new tools VEGAS Pro offers which can make jump cuts look like continuous shots!

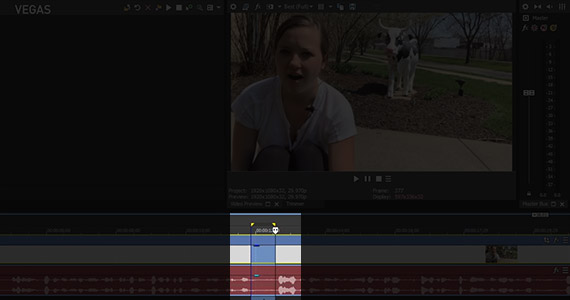
A jump cut usually happens when you remove a section from a clip and put the remaining portions together, causing any object which moves in the image to “jump” from one place to another, because all the intervening frames have been removed. You’ll usually also see a jump cut if you put different takes of the same shot together, such as different segments of interviews.
Jump cuts are generally bad because they’re jarring for the audience. As such, they’re seen as problems or mistakes, and most of the time that’s true. Not always, though, as we’ll soon see.

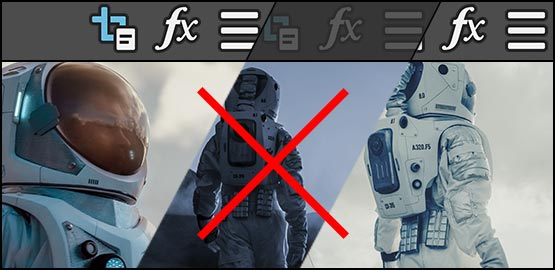
Perhaps the best and most-used method of dealing with a jump cut is to cut away to a different shot and then return, so there’s nothing seemingly amiss by objects having moved places. In a dialog scene, you could cut to the other actor and then back to the original shot. Or you could cut to what’s called a “cat in the window” shot, some other point of interest you insert specifically to cut away from the original shot so you can cover the jump. If the dialog from the first shot still runs under the insert, then the effect is totally natural.
Or, in an interview, cut to whatever the person interviewed talks about, or to a shot of the interviewer. Not only do you cover the jump shot, you provide your viewers with visuals and detail instead of just a boring talking head, making everything more interesting while you solve the problem of the jump cut.
While jump cuts are usually problems, you can still put them to creative use. That they’re jarring to the audience can work to your advantage if that’s the kind of mood you’re looking for in a particular scene. Hard jump cuts can heighten tension, or they can create planned confusion in your audience which might serve your storytelling needs. Every project is different; perhaps yours can benefit from the inventive inclusion of jump cuts.

For most of the history of film and video, the creative solutions were the only good editing options you had for dealing with jump cuts. But recently, editing programs have begun to add ingenious new tools which can make jump cuts seem to disappear entirely without having to cut away.
VEGAS Pro offers exciting options for making it look like the jump cut was never there.
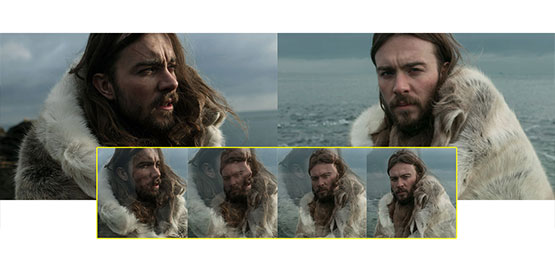
Jump cuts, as we said, cause moving objects in an image to jump from one place to another, because the frames in which the objects moved from place to place are missing.
The Warp Flow transition alleviates the problem by analyzing the clips on both sides of the jump cut, interpolating the difference between them, creating whole new frames based on that interpolation and inserting those frames into the sequence between the reference frames. The new frames give you a natural, seamless motion between the positions of the moving objects, making it appear as though it’s a continuous shot.
The effect works best when there’s only a little change in the jump, such as in an interview setting where the person interviewed moves a little, but most or all of the background remains the same. Or, it could work well in a similar, stationary dialog scene.
(Large changes will create unpredictable morphing effects, which won’t look like a seamless transition, but could be used creatively – let your imagination loose!)
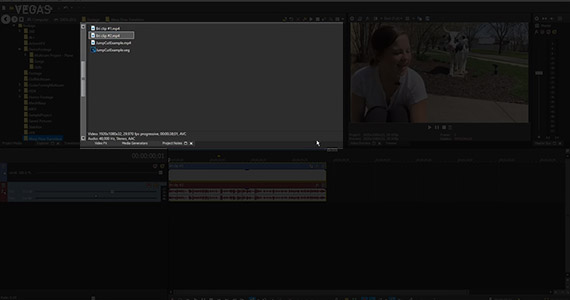
To use the Warp Flow transition on a jump cut, drag the ends of the clips involved in the jump cut to create a crossfade of about five to seven frames between them, and then drop the Warp Flow transition into the crossfade. The Warp Flow transition analyzes the cut and interpolates the necessary frames for a smooth transition.
Move the ends of the clips to adjust the duration of the transition as desired. Depending on the footage, the transition can benefit from being longer or shorter.
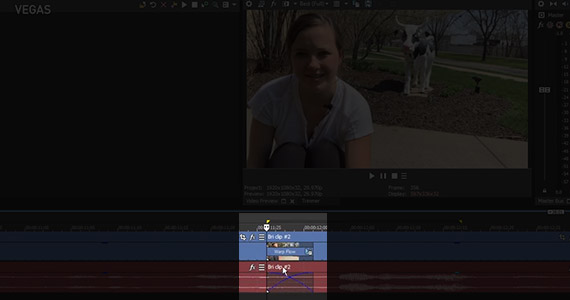
VEGAS Pro includes another tool for making the process of smoothing over a jump cut automatic. Using Smart Split, you can define an area of a clip you want to remove, and then Smart Split automatically deletes the section of the clip, brings the remaining parts of the clip together, and creates a Warp Flow transition between the two.
As such, just like creating a Warp Flow transition manually, the process works best when there’s a minimal jump between clips, especially in the background.
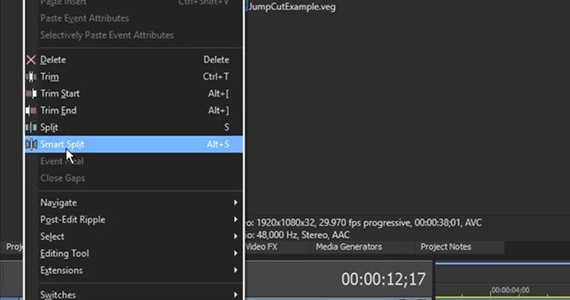
Go to the Edit Menu and choose Smart Split. When you do, VEGAS Pro automatically deletes the area of the event you defined in the loop region, overlaps the first five frames of the resulting second event with the last five frames of the first event, and then adds a Warp Flow transition between them.
Jump cuts can be problems, but with a little creativity, the Warp Flow transition, and the Smart Split tool offered in VEGAS Pro, you’ve got the power to solve them!


What's the difference between VEGAS Pro and VEGAS Pro Suite?