
What you’ll learn:
Color Grading & Color Correcting - the new feature which makes it easier even more powerfull.
VEGAS Pro includes an exciting new feature which makes color correcting and color grading both easier and far more powerful – the new unified Color Grading panel. With just a click on your toolbar or a keyboard shortcut, instantly access a set of new and improved color grading tools, optimized for, and ready to work in, HDR and ideal for use with touchscreens. Read more for tips on developing a color correction workflow like the pros!
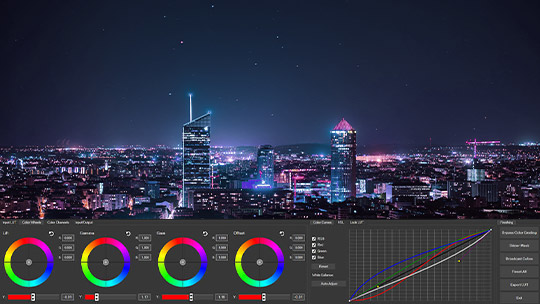
The Color Grading panel puts all of your most important tools in one convenient place. It provides a highly efficient alternative to adding numerous individual effects that you’d otherwise have access separately in an effects chain. Now, access all of your most important color grading tools with a single click.
More importantly, you can now more easily use the tools in relation with each other because they're all available at once.
The Color Grading panel gives you a wide choice of tools, so you can work using the tools according to your own preferences. Prefer to work more visually, through color wheels? Got ‘em. Like sliders instead? Got those, too. And the color curves give you precision control over all areas of brightness.
To get started color grading, keep in mind everything you do affects everything else, so the order in which you do it matters.
The panel opens with the color wheels visible on the first section. You’ll find a “Y” slider under each wheel. This slider adjusts luminance.
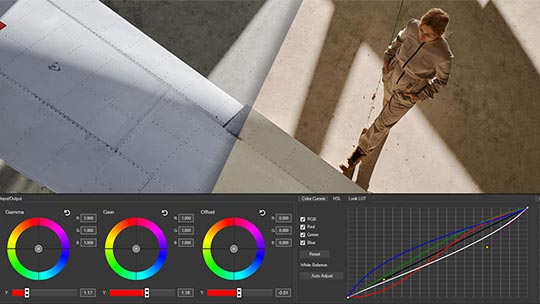
Each wheel controls an area or zone of darkness. Lift affects all areas. Gamma affects the middle or main area of your image. Gain affects the brightest highlights but leaves the middle and darks alone. Finally, Offset affects only the darkest areas or shadows.
Move the Y slider for Lift to adjust the full exposure area. As you slide it left or right, the entire image becomes darker or lighter, similar to adjusting the iris on a camera lens.
Use Gain to bring the highlights down or up. Use Offset to raise detail in the shadows or clip some of them to pitch black. Gamma brightens or darkens the exposure in between, but leaves the highlights and shadows alone.
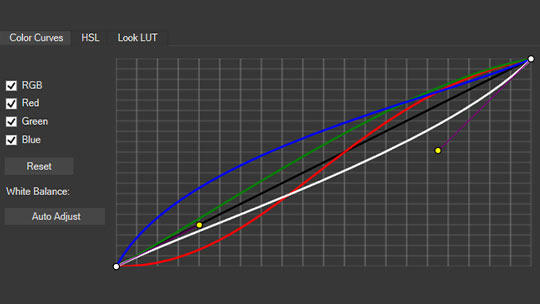
In the second section of the panel, you’ll find the most precise way to adjust and correct exposure – the color curves. Represented on a graph, the color curves let you control exposure to a level of precision beyond the sliders. Instead of controlling only general areas of exposure – highlights, middle, and shadows – the curves enable you to dial in exactly what you want, even within those areas, with incredible accuracy. Use the curve control handles and add control points along the curve as needed for even finer control and adjustment.
Flatten down the bottom left of the curve to darken the shadows, and flatten up the top right to brighten the highlights. You can make these adjustments simultaneously to control the contrast of your video. Raise or lower the curve's middle section to brighten or darken the main area of the image.


Whichever tool you choose, first get your middle levels set. Get the skin tones right and most of the middle area should be correct. Skin tones should range between 55-75 IRE on the waveform, with darkest skin tones around 55 and the lightest highlights around 75. Keep in mind that what looks good on your monitor may not look good on every screen, so it’s best to use your scopes and keep exposure within standards.
Next, adjust for contrast. Modern HDR, HLG, LOG or other footage starts out with very little contrast, as it’s designed to be recorded as very flat and corrected in post. Most of the time, you’ll need to increase contrast for a sharper, more detailed image. But if you want or prefer a foggier, more diffuse look, decreasing contrast will get you there.
Most of the time, your tool of choice will be the color curves, giving you the most precise control over every exposure area, but you can also adjust exposure using the Y-sliders or the Exposure slider.
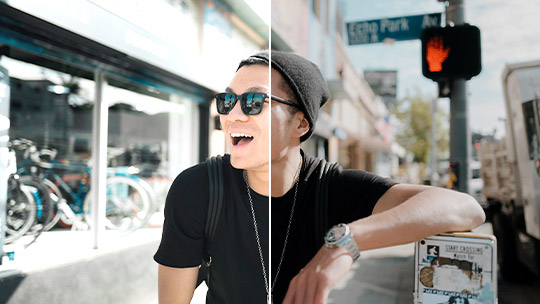
As mentioned, with modern HDR, LOG, or other footage, the colors in the raw media file appear muted and desaturated because the camera records them in such a way to preserve as much color information as possible with the intent of saturating and working with the color in post. Again, after you apply any required camera LUT, as a first step, increase the saturation with the Saturation slider under the Input/Output Tab.
As we mentioned, everything you do affects everything else, so after you’ve completed all or any of the steps, you may need to go back and fine-tune the earlier steps.
Raise and lower saturation as needed. Brighten or darken the areas of the image which need it. You can also use the sliders to fine tune exposure by color and make individual colors lighter or darker. Or you can really fine tune your colors on the color wheels. Use the Lift wheel to affect the entire image, or the other three to work on the specific exposure areas we already discussed. And of course the color curves still give you the most precise fine tuning of all.
White balance means getting the whites to proper white, and all the other colors to true.
The White Balance: Auto Adjust button next to the color curves will generally set whites properly. But it may not work well without much actual white in the image, so you’ll need to set things manually.
Outdoor footage provides a common example. Daylight casts a blue hue, and outdoor footage may have an overall blue tint, making whites appear light blue and muting the other colors. For proper white balance, lower the blue and strengthen the other colors.
Under the Color Channels tab, use the sliders to lower the blue level, especially in the Gamma and Gain controls. You can also raise the red and green sliders to punch up those colors; raising red and green together increases yellow. For a more visual approach, use the color wheels and drag the dot away from the color you want less of, in this case cyan or blue, and more toward the colors you want more of. Start with the Gamma wheel, then Gain, and then Offset. For highest precision, the color curves allow you to remove (darken) or increase (lighten) the colors you want along the lightness/darkness graph for outstanding control.
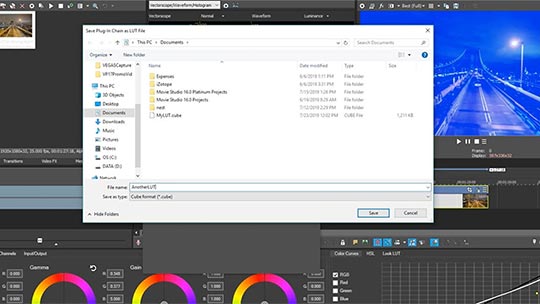
If you want to apply your color correction or grading to multiple clips in your project, or even in another project, export your own custom LUT. Click the Export LUT button and save your color work to the location of your choice in .cube format. You can then apply it not only to any clip in your project, or any VEGAS Pro project, but also in any software which uses LUTs in .cube format. It’s a fast and easy way to apply the same color correction or grading to many different clips, or to share your color work with others.
Take advantage of the Color Grading panel for a new, extremely powerful color correction and color grading workflow, with all the tools you need right there in a convenient panel, optimized for HDR, and perfect for use with touchscreens. Unleash the power at your command in VEGAS Pro!


What's the difference between VEGAS Pro and VEGAS Pro Suite?