What you’ll learn:
Audio Compression Explained

Compressors allow you to control, colour and manipulate the dynamics of audio. Making it more natural sounding and intelligible without adding distortion, resulting in a "song" that's more “comfortable” to listen to.
Having a good grasp of the basics will go a long way toward understanding how compression works, and confidently using it to your advantage. Additionally, having a full understanding of the sinuous details of a compressor will help you discern your sound goals.
If you're looking to have control over the compressors you use and understand how to use compression to make your mixes sound better, then this post is for you.
VEGAS Pro gives you a powerful array of audio plugins for audio-editing capability unmatched by any other non-linear editor. All of these tools are integrated directly into your main timeline so you don't need to change modes just to change your audio volume or anything else. Among these powerful tools, you’ll find some of the most common go-to tools for professional editors, including one which beginning editors may find opaque and confusing – the audio compressor. Read on to find out what compressors do, how they work, and when to use them as we demystify audio compression for you!

Audio compression quickly becomes a complex topic. At its core, the concept is simple: turn the quiet parts of the audio up while controlling the volume of the loudest parts to keep them from getting too loud. Of course, there is much more to mastering the art of effective compression than that simple statement, but it's a very important and useful concept and tool to understand.
Video has a dynamic range, meaning the difference between the brightest brights and the darkest darks. Within that dynamic range, you can distinguish image detail. Outside that dynamic range, you’re seeing only pure white or pure black, and no detail at all. We call this video clipping.
Sound also has a dynamic range, the difference between the loudest louds and the softest softs. Any sound outside of that volume range becomes either inaudible (too soft) or distorted (too loud -- we call this audio clipping). Either way, you lose any detail in the sound.
A compressor limits that dynamic range, in order to prevent distortion or to boost detail in the lowest lows or the highest highs.
Compressing sound is a lot like adjusting exposure in video to keep it within a certain dynamic range and preserve detail in the lowest lows and highest highs.
In one respect, a compressor works similarly to an audio limiter in that it limits the top volume level, keeping volume at or under a specified level to avoid clipping. But a compressor gives you more control than a limiter alone. As a compressor limits the top volume level, it can simultaneously bring up the lowest volume levels. This process of limiting the loudest levels while raising the lowest levels thus compresses the audio dynamic range. The entire range of sound volume now sits within modified minimum and maximum levels designed to bring out all audio while avoiding clipping.

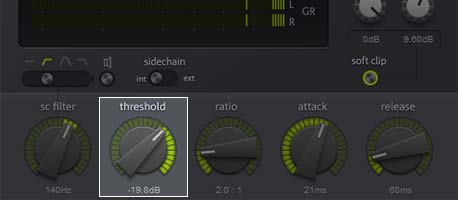
The volume level at which compression engages. The plug-in applies compression to any sound which exceeds the threshold, but leaves the rest of the sound alone. A tight compressor doesn’t let any sound get louder than this point; a looser compressor allows some flexibility. Threshold works together with the ratio, so adjust them together for best results.
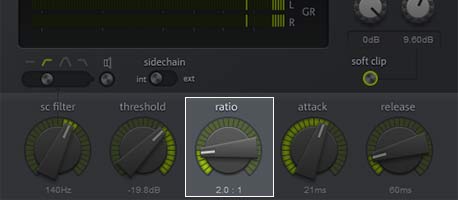
The amount of top compression applied, or how far down the compressor pushes the loudest sounds. A ratio of 1:1 basically means no compression. A ratio of 2:1 means the unaffected sound must rise 2 dB past the threshold in order for it to rise 1 dB after compression is applied. A ratio of 4:1 means it must rise 4 dB past the threshold in order to rise 1 dB after compression. The higher the ratio, the more compression, and the more it limits the top volume. Generally, go for a softer touch, and then apply more as needed. A light compression ratio like 2:1 often works best for rich sounds like human voices. A heavier ratio of 4:1 or 6:1 may be better for bass-heavy sounds.
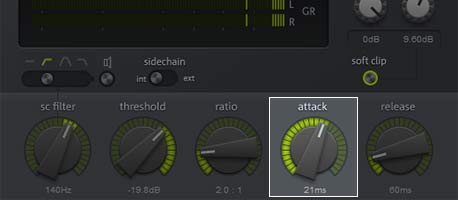
How quickly the compressor engages and lowers the volume. You can set this to near-instant lowering, or you can let the compressor lower the volume more gradually, just like if you turn a volume knob down really quickly or more slowly. Faster attacks work best on sounds or voices with sudden peaks, while slower attacks work better on smoother sounds, like string instruments.


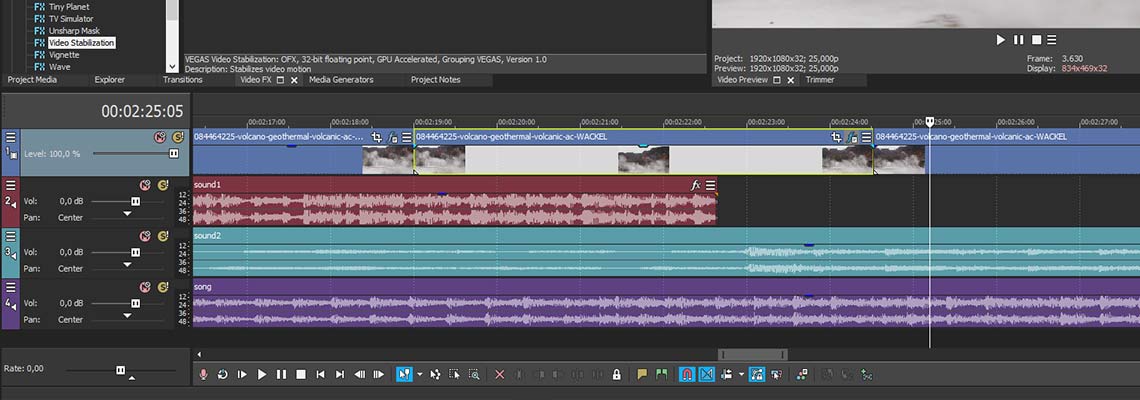
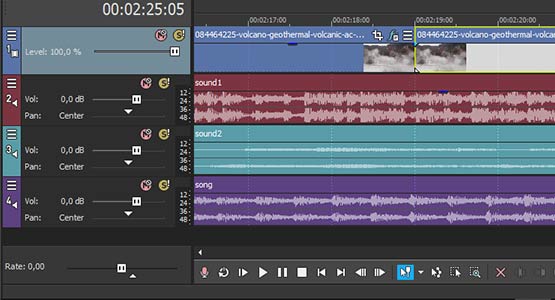
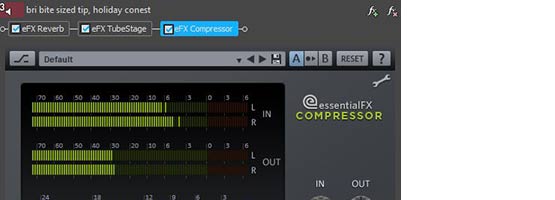
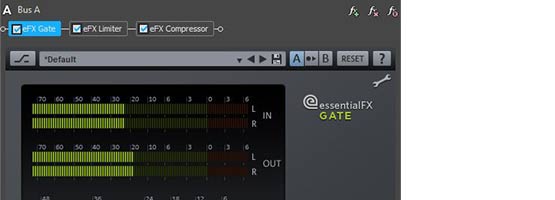
VEGAS Pro has several built-in compressor plugins which you can apply at the event, track, bus, or master level. where you apply compression might depend on whether you want to control a single voice, a specific instrument, a section of instruments, background sounds, chatter, vocals, or the entire program. Learn to use it however it makes the best sense for your project.
For final mastering of your video, do all of your other audio work first, including whatever individual compression you may need or want, then do a final compression pass on a master audio bus.
Often, you want to compress according to how your target audience will hear your video. Will most listen through larger speakers like headphones, bookshelf speakers, home theater systems, or larger computer systems? Will they listen through earbuds or laptop speakers? Each kind of speaker has its own dynamic range, and good use of compression keeps your audio within that dynamic range.
If you compress with earbuds in mind, you generally compress for tighter dynamic range, keeping the highs from slicing and the lows from distorting or disappearing altogether. Laptop speakers tend to have better dynamic range, but certainly not the dynamic range of headphones, bigger computer speakers, bookshelf speakers, or a home theater system.
But even if you don't intend for your viewers to listen on earbuds, it’s still a good idea to hear how your audio sounds on them and try to eliminate any problems, because some of your audience may well listen that way.

Be careful not to overdo it, because too much compression can make your audio sound harsh and monotonous. After all, dynamic range plays a very important role in making music and other audio sound interesting. Think about how the classical masters used the available dynamic range to underscore the juxtaposition between quiet sections and loud sections and create tension and excitement in their great works. By its nature, compression limits the dynamic range. Done tastefully it acts as a critical mixing and mastering tool. But overdone it can cause harsh, relentlessly loud audio material that causes ear fatigue for your listeners.

Since just like with video, VEGAS Pro edits audio non-destructively, your compression work will never affect your original audio files. That means you can fix mistakes easily. Just reset the parameters or remove the effect completely. You can’t destroy your original audio files, so experiment. Try anything you like! You may find an incredible sound that no one’s ever found before. At the very least, you'll soon learn to use compression carefully, strategically, and tastefully to improve the quality of all of your audio productions.


- 2-for-1 deal: Buy one and get one for free!
- Buy a VEGAS product today and get the new version of the same product for free!
- 2-for-1 deal: Buy one and get one for free!
- Buy a VEGAS product today and get the new version of the same product for free!

- 2-for-1 deal: Buy one and get one for free!
- Buy a VEGAS product today and get the new version of the same product for free!
- 2-for-1 deal: Buy one and get one for free!
- Buy a VEGAS product today and get the new version of the same product for free!
- 2-for-1 deal: Buy one and get one for free!
- Buy a VEGAS product today and get the new version of the same product for free!
- 2-for-1 deal: Buy one and get one for free!
- Buy a VEGAS product today and get the new version of the same product for free!
What's the difference between VEGAS Pro Edit, VEGAS Pro Suite and VEGAS Pro Post?