
What you’ll learn:
How to convert MOV files to MP4 format - fast & intuitive
These days, there are endless options for shooting video, from expensive professional video cameras to ubiquitous smartphone cameras. It’s awesome to have so many convenient choices for shooting; whenever you want to shoot video, you’ve got a camera with you. But a huge variety of cameras can also mean a variety of shooting formats. Some formats are better than others for editing and streaming from the web.
One of the most versatile formats for editing and streaming is .mp4. But your camera may record in .mov format, which can require more processing power to edit, especially if you’re working on a Windows computer,
and it’s not the ideal format for streaming.
In this article, we’ll teach you how to convert your .mov video files to .mp4 for easier editing and for ideal streaming.
We'll follow these steps:
Step 1: Import Your .MOV File
Step 2: Choose Your Render Format Properties
Step 3: Choose Your File Name and Location
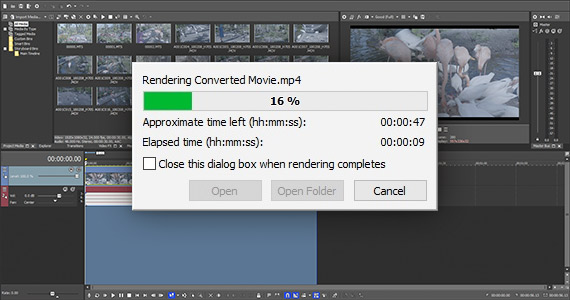
Step 4: Render
Now, let’s take a deeper look at how to convert your .mov files to high-quality MP4 files!

The conversion process is very straightforward; at its most basic level, you simply place the .mov file you want to convert to .mp4 onto the VEGAS Pro timeline. Make sure to match your project settings to the media you just added when VEGAS Pro asks if you want to do so. Now, immediately render an .mp4 file as though you’re rendering a final project.
The resulting .mp4 file will have the exact same content and video properties as the .mov file, only in a friendlier format that’s easier to work with. With less processing power required to work with the .mp4 file, you’re more likely to get full-frame rate playback, and your editing process will be much easier.
Converting file formats necessarily results in a generational loss; that is, some data will be lost in conversion resulting in a small degree of quality loss. The loss will usually be tiny and imperceptible, though, and we’ll take steps to minimize the loss even further, giving you as close to a lossless conversion as possible.
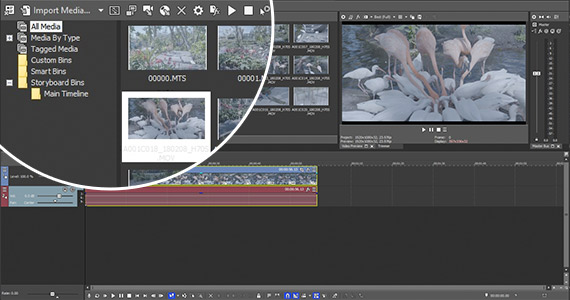
✓ Start a new project. Go to File>Import>Media. In the Import Media window, navigate to the folder containing the file you want. Choose the file and click Open. The file now appears in the Project Media window.
✓ Drag the file from the Project Media window to the timeline. A pop-up box asks if you want to set the project properties to match the video’s properties. Click Yes.
✓ Double-click the media event on the timeline to create a loop region.
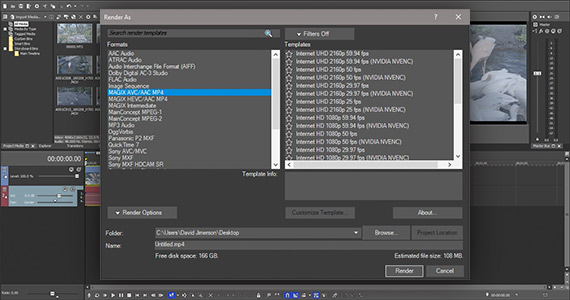
✓ Click the Render As button in the VEGAS Pro toolbar. The Render As window appears.
✓ From the Formats list on the left, choose MAGIX AVC/AAC MP4. The format’s Templates appear to the right.
Choose the template which matches the frame size and frame rate of the video. Choose an Internet format; do not choose a Blu-ray format. If there is no exact match, for example, if the video has a frame rate of 23.976 and there is no template option for 23.976, choose the closest match.
Do not choose a template which includes (NVIDIA NVENC) for these purposes. If you do, you will not be able to set a constant bit rate, which is important, as we’ll see later.
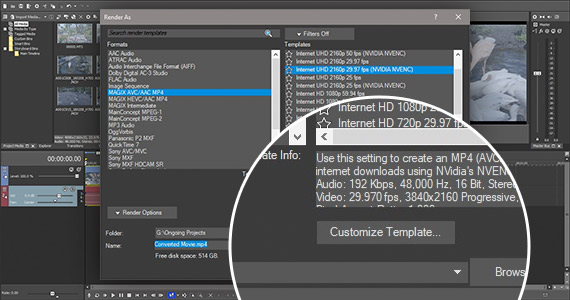
✓ Click Customize Template. The Custom Settings window appears. If you need to adjust your frame rate, click the down arrow next to the Frame Rate box and choose the frame rate which matches your video. If your frame rate doesn’t appear in the list, type the frame rate into the box directly.
✓ Toward the bottom of the window, click the button to choose Constant Bit Rate. In the drop-down menu for Constant Bit Rate, choose a number from 20,000,000 to 50,000,000, depending on your video resolution. If you have a lower resolution like 1280x720 or 1920x1080, you can choose a lower bit rate. But if your footage is UHD – 3840x2160 – or higher, then choose a higher bit rate like 50,000,000, or even higher. You can also type in a custom bit rate.
The bit rate is the amount of information per second the computer processes while playing the video. A high bit rate means a higher amount of processing. A high bit rate results in a large file size, but it also results in high quality video. We are trying to make this conversion as lossless as possible, so we want a high bit rate to preserve as much quality as possible.
A variable bit rate rises and lowers while the video plays, depending on the content. Efficient use of a variable bit rate can result in high-quality video with a lower file size. However, it can result in fluctuating quality. This is almost always fine for video playback; almost all DVDs and Blu-ray discs play video encoded with variable bit rates and you never notice any quality drops.
But editing requires a more robust, high-quality file with consistent quality for its entire length. Also, when you upload a video for streaming on platforms like YouTube, Vimeo, or Facebook, the streaming platform converts the file for optimal playback. Therefore, you need to start with a very robust file before the platform converts it, so a constant bitrate is ideal.
Remember, we are going for as close to a lossless conversion as possible, so we want the constant bit rate.
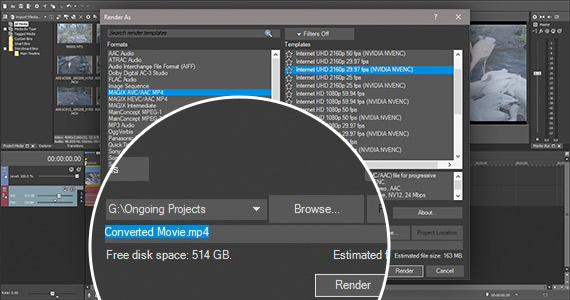
✓ Once you have your properties set, click OK. Now, in the Render As window, click Browse. The Save As window opens. Navigate to the folder where you want to save the video. Type in a file name in the File Name box. Click Save.
The render does not begin at this step; instead, you’re returned to the Render As window. In the Folder box, you see the address of your chosen location. In the File Name box, you see the file name you chose with an .mp4 extension.


What's the difference between VEGAS Pro and VEGAS Pro Suite?