
What you’ll learn:
Three ways to make slow motion videos
Slow motion is a classic effect in film, going back to the earliest days of movies. You’ve seen it used for heightened drama or romance, or to punch up action scenes and make them more intense. For example, you’ve seen the bad guy start to fall off a building in slow motion, and then the action ramps up to full speed for an exciting climax!
Want to make some slow motion of your own? From simple slow motion to changing speed right within a clip,VEGAS Pro has you covered.
Useful Tips: Consider These Before Changing the Speed of Your Video
In this tutorial, we’ll take you through three different methods of achieving slow motion in VEGAS Pro:
Method 1: CTRL-Trim
Method 2: Velocity Envelope
Method 3: Optical Flow Slow Motion Effect
When we’re done, you’ll have a good understanding of how slow motion works in VEGAS Pro.
Read on to find out more!

Before we start slowing down video, let’s take a moment to understand how slow motion works in video. Video is made up of frames, or still pictures which are displayed in rapid succession. Changes between the frames give the illusion of movement.
Slowing video means displaying the frames in a slower progression. But a finished video always plays back at the same frame rate, so it’s necessary to repeat frames to keep them on the screen longer.
Slow motion, then, is a process of repeating frames of video. Sometimes, to maintain the illusion of smooth motion, frames must be resampled, or blended together, to create a consistent motion speed. Resampled frames often show a double-image or ghosting, which is a natural effect of blending frames, but if slow motion is done well, it’s not very noticeable on playback.
VEGAS Pro has several different ways of slowing video. Most of these methods repeat frames and use resampling to work, so make sure resampling is enabled on the video events.
Useful Tips: How to Combine Several Clips into One
✓ Open a new project. Drag a video clip to the timeline. When VEGAS Pro asks if you want the project settings to match the properties of the video, click YES.
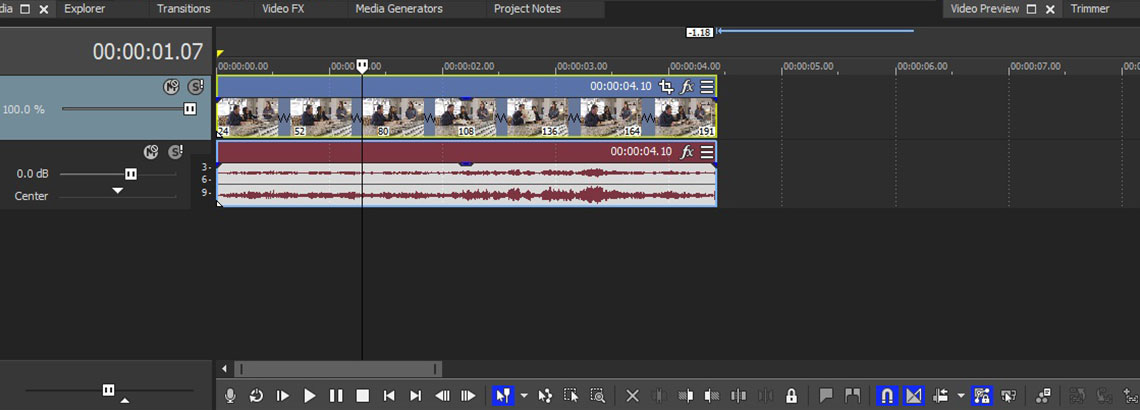
✓ On the timeline, hold CTRL while you trim the right edge of the video event to the right.
The video event gets larger, but note two things. A wavy line appears on the video event, which stretches out the more you expand the video event, and the waveform in the audio event stretches out too. Also, unlike a normal trim when you enlarge the size of the video event, no loop points are created. Holding CTRL expands the event’s duration.
✓ Click the left edge of the video event and press Play. The video plays back in slow motion, and the audio is slowed to match.
✓ Right-click the video event and choose Properties. Toward the bottom of the Properties window, note the Playback Rate. The default Playback Rate is 1.000, or normal speed. Expanding the media event with CTRL-trim has reduced the Playback Rate, maybe to 0.500 or some other number lower than 1.000.
You can enter values directly into the Playback Rate. For example, if you want ¼ speed, enter 0.250. Keep in mind that when you enter a value directly, you’ll need to do some work on the video and audio events on the timeline. The duration of the events won’t change, so you’ll have to trim the event duration to match the new Playback Rate, and the audio event isn’t affected, so the audio remains at the previous playback speed and is out of sync with the video.
✓ Click Ignore Event Grouping on the timeline toolbar. Trim the right edge of the video event left or right until it snaps at a loop point. Then, CTRL-trim the right edge of the audio event until it snaps to the right edge of the video event.
The maximum slow motion possible with CTRL-trim or by entering a value directly into the Playback Rate is 4x slow motion, or a Playback Rate of 0.250.

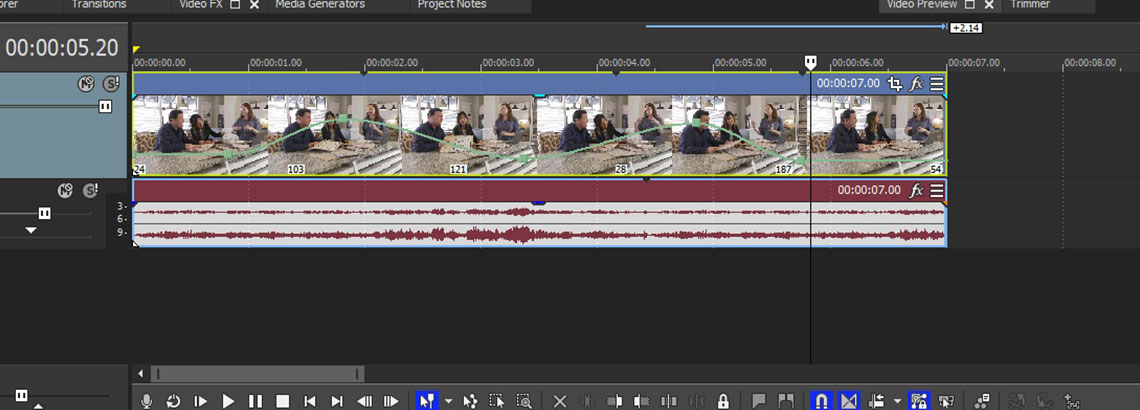
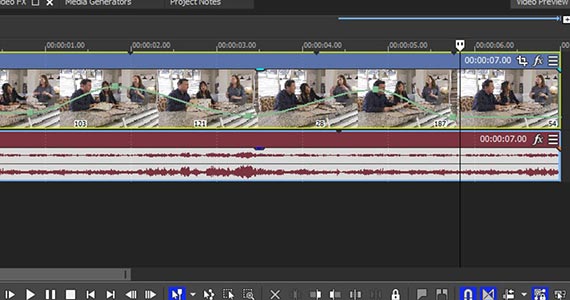
✓ Drag a new instance of the clip to the timeline. Right-click the video event and choose Insert/Remove Envelope>Velocity. The Velocity Envelope, a green line, appears on the video event.
✓ Click the line. A pop-up informs you that the current playback speed is 100%, or normal playback. Drag the line down, and the playback speed reduces. Hold CTRL while you drag, and the increment of change decreases so you can make more precise adjustments. Slow motion values range from 99% down to 0%, no motion or a freeze frame. Drag below 0% into negative numbers, and the video plays back in reverse.
✓ Set the Velocity Envelope to 25%. Right-click the envelope a little further down the video event and choose Add Point. CTRL-drag the point up to 50%. The Velocity Envelope becomes a curve between the beginning point and the new point, then stays flat after the new point.
✓ Click the left edge of the video event and press Play. The video starts playing at 25% speed, and then moves along the envelope, ramping up to 50% speed, and continues playing at 50% for the remainder of the video event.
Add more points and define their playback speeds. Play the video, and the speed ramps up and down as playback moves between the points.
Velocity Envelopes don’t affect the audio event. It’s usually best just to delete the audio event, because the sound will not be synced to the video.
✓ You can combine Velocity Envelopes with CTRL-trim or changes to the Playback Rate.
As we said, the maximum slow motion possible with CTRL-trim is 4x slow motion or ¼ speed. But if you insert a Velocity Envelope, the result is a multiplier. If you’ve reduced the Playback Rate of the event to 0.250 or 4x slow motion, you can apply a Velocity Envelope and reduce its velocity to 10%, giving you an effective 40x slow motion.

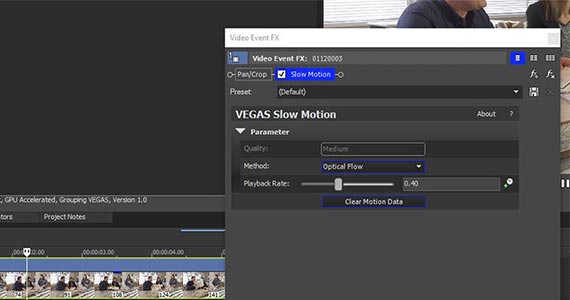
The Optical Flow Slow Motion effect delivers the most effective, smooth slow motion possible with VEGAS Pro. Optical Flow Slow Motion doesn’t simply repeat frames or resample video, it analyzes the motion in the video and creates brand new intermediate frames. Optical Flow Slow Motion makes it easier to get good, smooth slow-motion from slower frame rates like 24 fps and 25 fps, which are troublesome for slow motion because they don’t have enough frames for good slo-mo, and instead appear choppy because they frames they do have repeat for too long. Optical Flow Slow Motion creates the new frames needed for good, smooth slow motion.
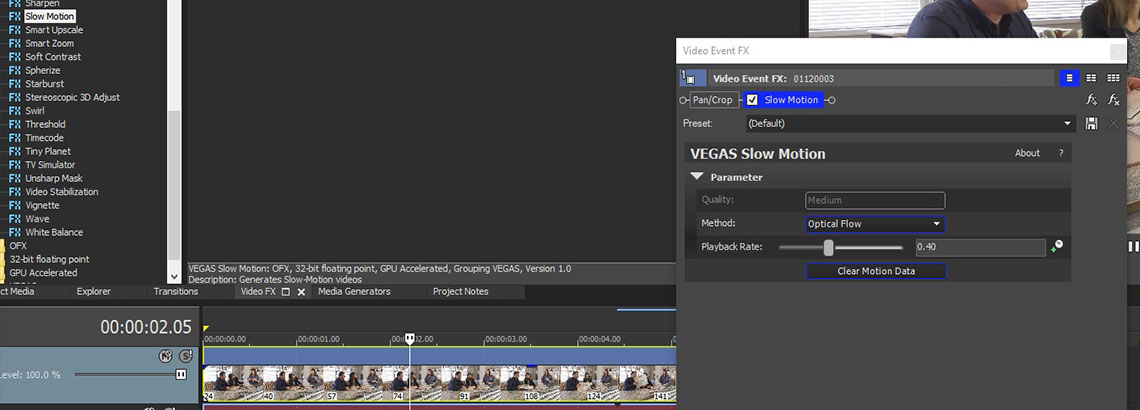
✓ Create a new project. Drag a 24p clip to the timeline. Click Yes when VEGAS asks if you want the project properties to match the video properties.
✓ Click Slow Motion in the Video FX window. Drag the Default preset thumbnail and drop it on the video event. The Video Event FX window opens and the Slow Motion effect controls appear.
✓ Click the Quality drop-down menu. Choose Coarse, Medium, or Fine depending how much motion is in your video. Coarse quality takes the least time to process, but Fine delivers the smoothest slow motion.
✓ Click Analyze Motion. VEGAS Pro analyzes the motion in the video. When it finishes, more controls appear. Use the Playback Rate slider to choose a playback rate, or type in a value directly. The values correspond to percentages of playback speed, with 0.40 being 40% velocity, and so on.
✓ Click the left edge of the video event and play the clip. If you’re satisfied with the slow motion, great! If not, click Clear Motion Data and start over.


What's the difference between VEGAS Pro and VEGAS Pro Suite?