
What you’ll learn:
Create stunning video composites from your photos and videos.
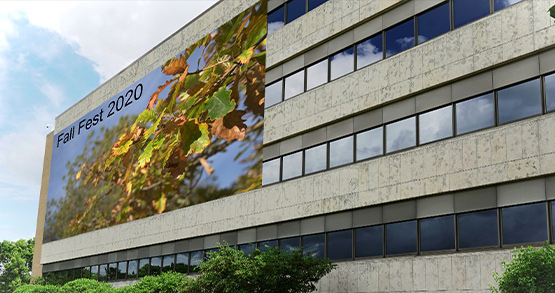
Today’s video editing software gives you the kind of power it used to take specialized effects software to achieve, and it’s easier than ever! Imagine inserting the images of your choice into other video, blending the images so well that your viewers would never know it’s really an effects composite. For example, you can hang the poster of your choice on the bare wall of a building, and no one will suspect you put it there in post!
Using the power of the Picture In Picture effect and the incredible Mesh Warp tool in VEGAS Pro, we’ll follow these steps:
STEP 1: Choose Your Video
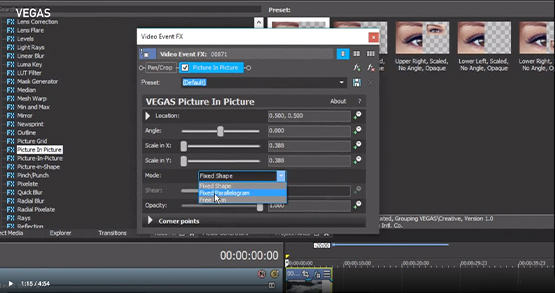
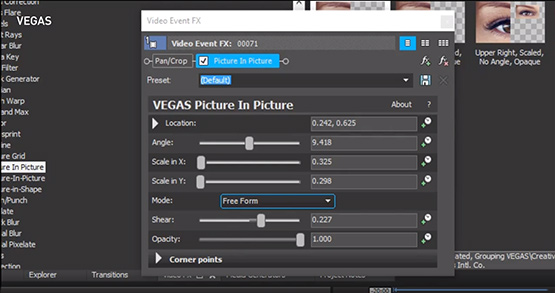
STEP 2: Add the Picture In Picture Effect
STEP 3: Change the Image Size
STEP 4: Choose Free Form
STEP 5: Place Corner Points Individually
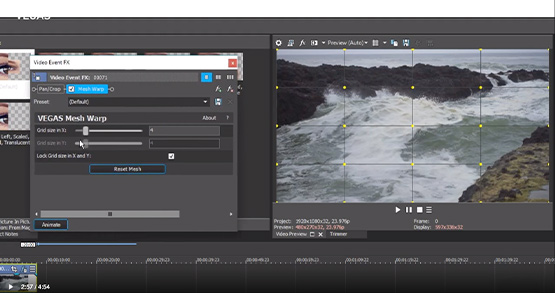
STEP 6: Add the Mesh Warp Effect
STEP 7: Change the Grid Size
STEP 8: Map the Corner Points
STEP 9: Map the Image Around a Corner
And when we’re done, you’ll know a great way to make amazing composites just like the pros.
Read on to find out more!

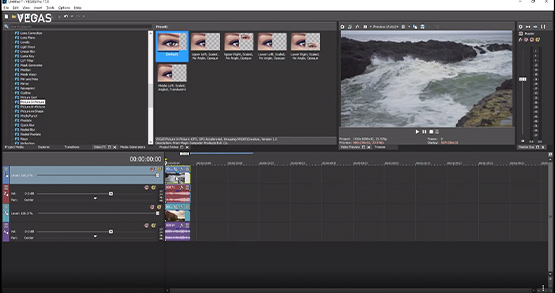
✓ Place the video of the building onto a track. Then create a new video track above the first track and place the image you want to use as a poster on it. A poster is usually a still image like a photo, but you can also use a video clip to create a “living” poster like you might see in a fantasy movie.
✓ Drag one of the corner points to change the size of the poster. You can also use the sliders in the Video Event FX window. When you drag the corner points or the sliders, the size of the image changes proportionally.
✓ In the Mode box drop-down menu, choose Fixed Parallelogram. Now you can adjust the height and width of the image independently, but your image still remains a parallelogram with fixed sides.
✓ Drag the image in the Video Preview window to the location of your choice.
✓ Slide the Angle slider or drag the circle in the center of the image to rotate it, giving you control over the angle of the image.
But that won’t really let you pin the image to the side of the building in a realistic way. You may get close, but to make it really conform to the side of the building seamlessly, you need independent control of the corner points on the image.
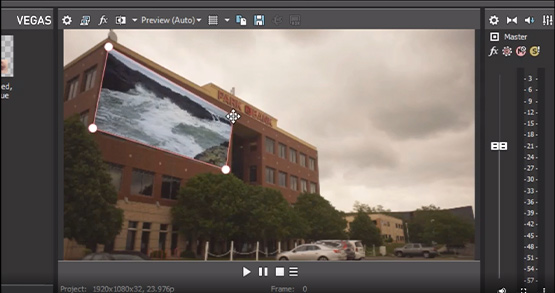
✓ Drag the corner point to the desired points on the building wall to place the image convincingly, making it look like a poster hanging on that wall.
✓ Now, add any effects you want to make the poster image blend in – adjust the color and contrast, perhaps use a Bump Map to give it texture, whatever you need to blend the poster image more fully into the environment of the building video.
For even more seamless integration, you can use the Mesh Warp tool to achieve the same effect, or you can go even further with it. In essence, the Mesh Warp tool does generally the same thing as the Free Form mode of Picture In Picture, but it allows you many more control points within the image to manipulate, stretch, squeeze, or distort the image in many different ways. To add some "excitement", you can also add some animation for your PIP.
One of the main advantages to it in this example is that you can map the poster not only to one of the flat walls of the building, you can also map it so it wraps around the building’s corner, too.
Using the same images as before,
✓ first, remove the Picture-In-Picture effect from the poster image. Click the event FX icon, and then click the effect in the effects chain. Click on the Remove FX button to delete the effect. The poster returns to its original dimensions.
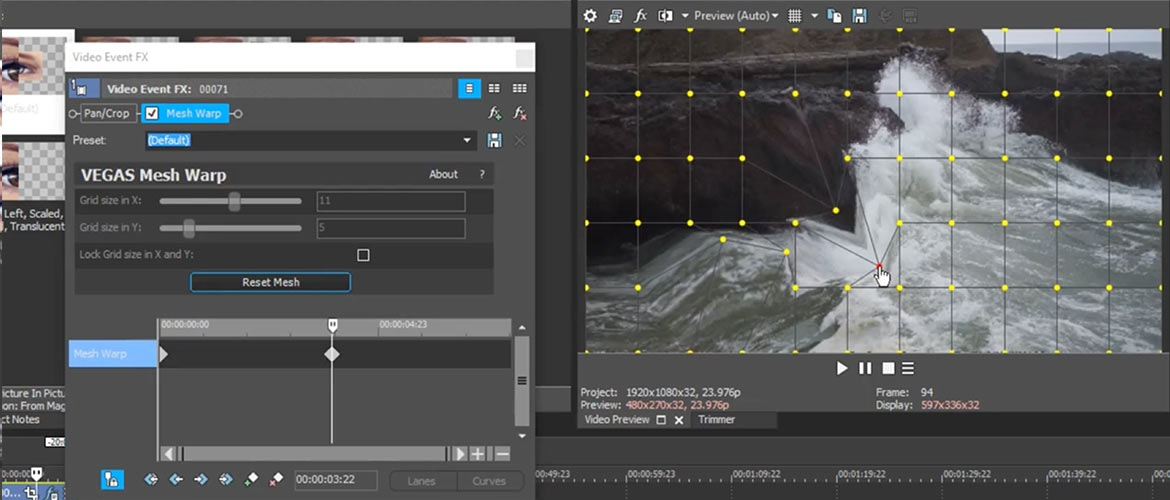
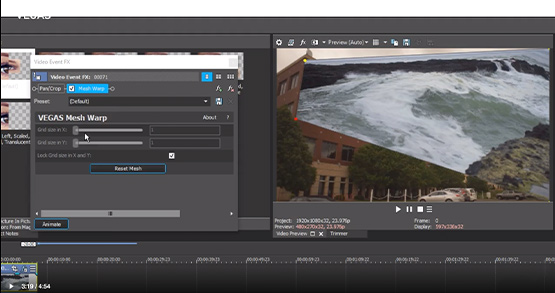
✓ Click the Add FX button. Now, choose the Mesh Warp effect from the Video FX Plug-In Chooser and click Add, then click OK.
The Video Event FX window opens, and an array of control points appear on the poster image, not only at the corners, but evenly throughout the image as well, forming a grid with control points at each intersection.
Moving any control point will stretch the area of the image around the control point, resulting in stretches and squeezes of the image, local to the control point.
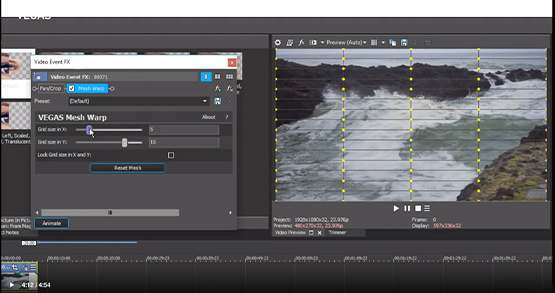
✓ Move the Grid Size sliders in the Video Event FX window to change the number of control points in the image. The sliders control the number of grid boxes on the X and Y axes; setting them both to 1 makes the entire image a grid box, with four control points, each on a corner of the image, just like the Picture In Picture tool.
✓ You can then use the control point to map the corners to the side of the building just like you did before.
But the Mesh Warp offers a lot more control and utility, letting you map the image to the shape of objects in 3D space.
✓ Click Reset Mesh to set everything back to default. Now, we’ll wrap the poster around the corner of the building. To do so, we’ll need more control points than just the corners, but we don’t need all of the control points available at default.
✓ Set the Grid Size X slider to 2 and the Grid Size Y slider to 1. Now, you have control points on the corners, at the center of the top of the poster image, and at the center of the bottom.
✓ As before, set the points of the image to points on the building. This time, though, set the left corners to one wall of the building.
✓ Now, set the center control points to the corner edge of the building, spreading them further apart if necessary so they create the necessary perspective.
✓ Finally, place the right corners to the other wall, around the corner. You can often find the correct perspectives by lining up the edges of the poster to run parallel with windows or roof lines on the building walls.
Now you have the poster wrapped around the corner of the building. You can add FX to further blend the poster into the image, such as making part of it darker or lighter to match the shading on the building.


What's the difference between VEGAS Pro and VEGAS Pro Suite?