What you’ll learn:
Make a video collages and animate them with the track motion tool
With VEGAS Pro, you can create stunning video collages with images superimposed on each other to create a single composite image! Whether It’s for digital scrapbooking or applying inserts to illustrate a tutorial, or anything else you can imagine, these VEGAS programs make it easy to combine multiple images into one combined image for endless possibilities.
Useful Tips: Create Advanced 3D Moving Poster
We’ll show you how, using powerful tools built right into the program, Track Motion or the Picture In Picture effect plugin.
We’ll take you through the following steps:
STEP 1: Choose Your Video
STEP 2: Create a New Track
STEP 3: Place Images You Want on Upper Track
With Track Motion, we will:
STEP 4: Resize the Image
STEP 5: Move the Image
STEP 6: Keyframe Animation
Using Picture In Picture, we will:
STEP 7: Resize the Image
STEP 8: Reshape the Image
STEP 9: Move the Image
STEP 10: Keyframe Animation
Now, let’s explore how to make an exciting video collage with VEGAS Pro!
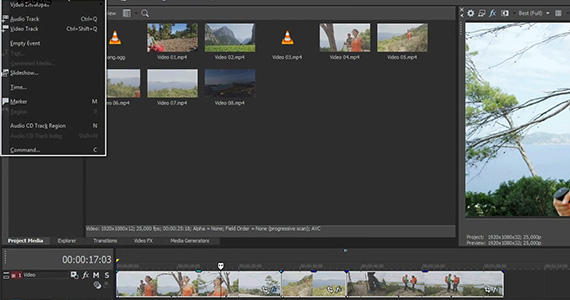
✓ In VEGAS Pro, go to Insert> Video Track to create a new track above the first track.
This track has the Picture In Picture effect already applied to it and will affect any event placed in it, so for the first example, we’ll use Track Motion on a different track, so again, to Insert>Video Track to insert a new track, and move it directly above the Video track. For the second example, using Picture In Picture, you can place the event in the Picture In Picture track.
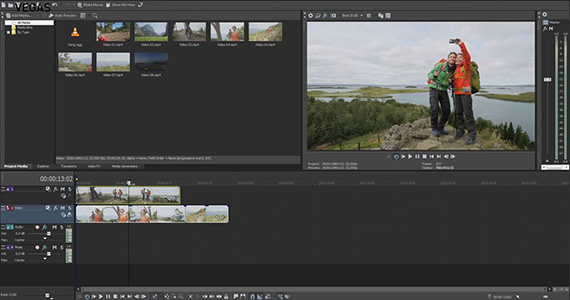
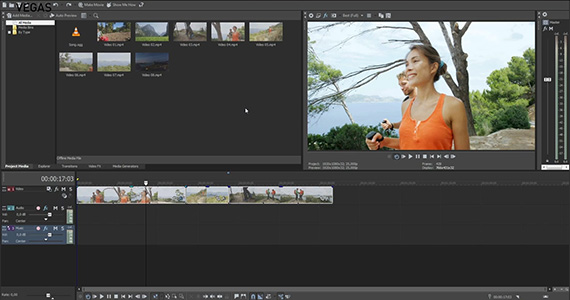
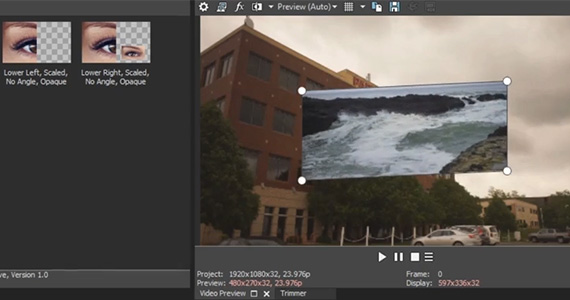
✓ Drag the event containing the image you want to superimpose to the new track, directly above the event you want to use as background. You will now only see the upper image in the Video Preview window, because any image on an upper track overlays the images on tracks below it.
✓ To achieve the picture in picture effect for our effect, we must now resize and move the upper image. We’ll do it using either Track Motion or the Picture In Picture effect.
First, we’ll use Track Motion. Track Motion affects the entire track the event sits in without using any effects plugins. Track Motion also gives you a larger set of controls and features than the Picture In Picture plugin, allowing you to do more with the image than simply manipulating its size and location.
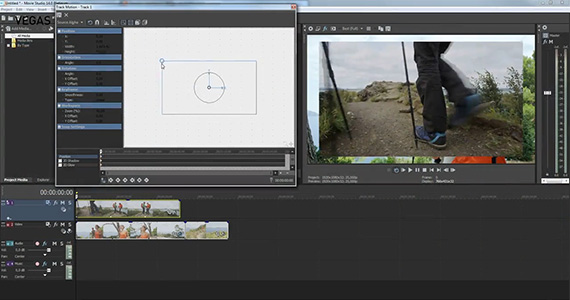
✓ On the upper track, click the hamburger menu on the left side of the track header. Choose Track Motion. The Track Motion window with the Track Motion controls appears.
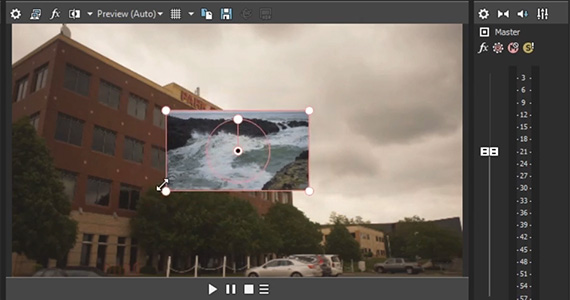
✓ Grab any corner of the box in the Track Motion window and drag it to resize. The image changes size proportionally, centered on the center of the image and the center of the Video Preview window. Resize to whatever size you prefer.
You don’t necessarily want the image superimposed in the center of the screen, though.
✓ In the Track Motion window, grab somewhere inside the box and move it, such as to the upper left corner of the screen. Grab a corner to resize the image again, if necessary.
The superimposed image might be a little hard to see against the background image, and if so, it could be confusing, so let’s do something about that.
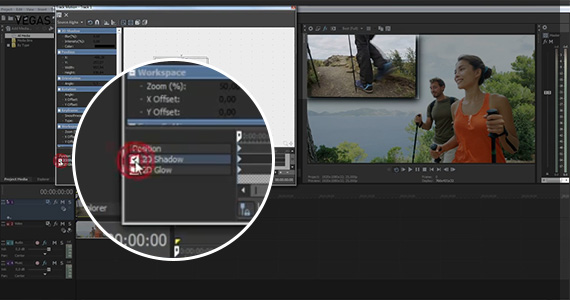
✓ Click the 2D Shadow box to create a drop shadow under the image, giving a sense of depth, like the image is floating above the background. A new box appears in your control box; use it to resize or reposition the shadow, and use the values controls to the left to change its color or opacity.
✓ Grab and turn the circle inside the control box to rotate the image. Note that you can change the size and rotation of the shadow independently from the image itself. To have the shadow change along with the image, be sure you select the Position keyframe and not the 2D Shadow keyframe lane.

You’ve now superimposed one image over another and created a collage, but this is video, not just a still image, so you might want to add some movement for more excitement.
✓ In the Track Motion window, find the timeline at the bottom. In the Position track, click on a frame a few seconds to the right of the beginning. The cursor moves to that location. Under the timeline, click Create Keyframe.
✓ Click Sync Cursor. The main timeline cursor jumps to the same frame, advancing the video in the Video Preview window. Click Sync Cursor again to turn it off. Now, drag the box in the Track Motion window to move your image to a new location, watching in the Video Preview window. When you’re satisfied, release the box.
✓ On the main timeline, click the left edge of your superimposed event. In the Video Preview window, your image will snap back to the original location. Play the sequence, and your image will move from the original location to the new location you set in the keyframe.
You can keyframe position, size, and rotation in the Position timeline, and also any shadow effects in the 2D Shadow timeline.
Now let’s do the same thing using the Picture In Picture effect plugin. The plugin works somewhat similarly to Track Motion, but it only affects what you apply the plugin to, such as a single event. You can apply the effect at any level – media, event, track, bus, or project – but most often, applying it at the event level makes the most sense.
In VEGAS Pro, you must apply the effect manually. For this example, drag the Picture In Picture effect from the Video FX window and drop it on your event.
When using Picture In Picture instead of Track Motion, you can directly manipulate the image in the Video Preview window instead of using a box in the effect controls, perhaps letting you control the image more intuitively.
When you apply the effect to an event, the Video Event FX window with the effects controls appears.
✓ Click Expand Track Keyframes.
✓ A small box labeled Picture In Picture appears; double-click it to open the Video Track FX window and find the Picture In Picture effect controls.
Applying the effect automatically resizes the image to ¼ size and centers the smaller image in the Video Preview window.
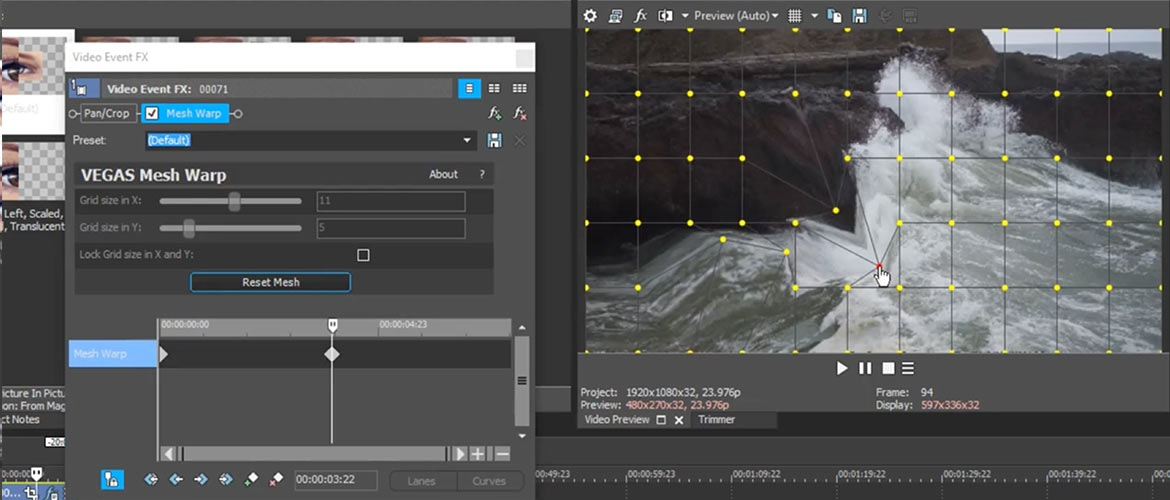
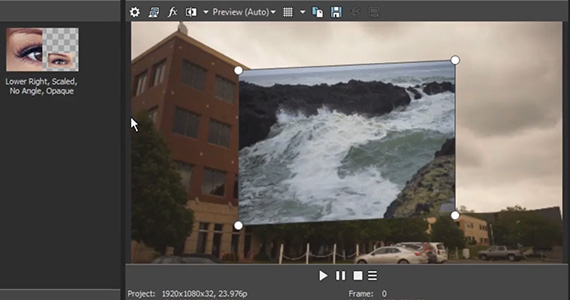
✓ In the Video Preview window, the image has corner points. Drag any point to resize the image.
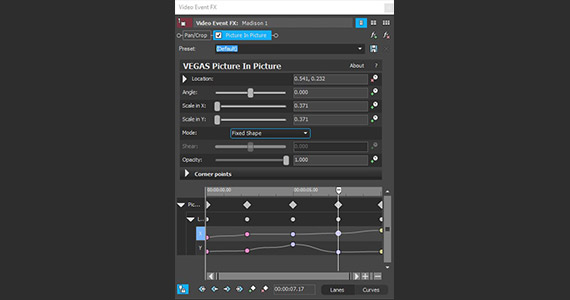
✓ In the Video Event (or Track) FX window, use sliders to resize.
✓ In VEGAS Pro, use the Scale In X and Scale In Y sliders to resize along either the X or Y axes. However, by default, the Mode is set to Fixed Shape — the sliders are therefore synced to each other and sliding either of them will affect both. The image will resize proportionally, maintaining the same shape.
✓ Choose Fixed Parallelogram in the Mode drop-down menu to adjust the X and Y axes separately.
✓ Also, the Shear slider becomes available; slide it to change the angles of the sides and corners. The image changes shape, but remains a parallelogram, i.e., opposite sides remain parallel to each other.
✓ If you choose Free Form in the Mode drop-down menu, you can grab the corner points on the image in the Video Preview window and move them independently, creating any sort of four-sided shape you want, or pinning the corners to specific pixels on the background image.
Like with Track Motion, you can keyframe your image adjustments and animate them over time.
✓ In the Video Event (or Track) FX window, click the Animate button (the little clock) to the right of the specific effect control. A timeline appears at the bottom of the window.
✓ Drag the top of the timeline up to reveal the full timeline. Clicking on the Animate button to the right of any control will add a timeline for that control’s value.
✓ As with Track Motion, you can set keyframes, synch the cursor, and animate any dynamic in the control. The possibilities are endless!


What's the difference between VEGAS Pro and VEGAS Pro Suite?