What you’ll learn:
Easy way to add visual effects and filters
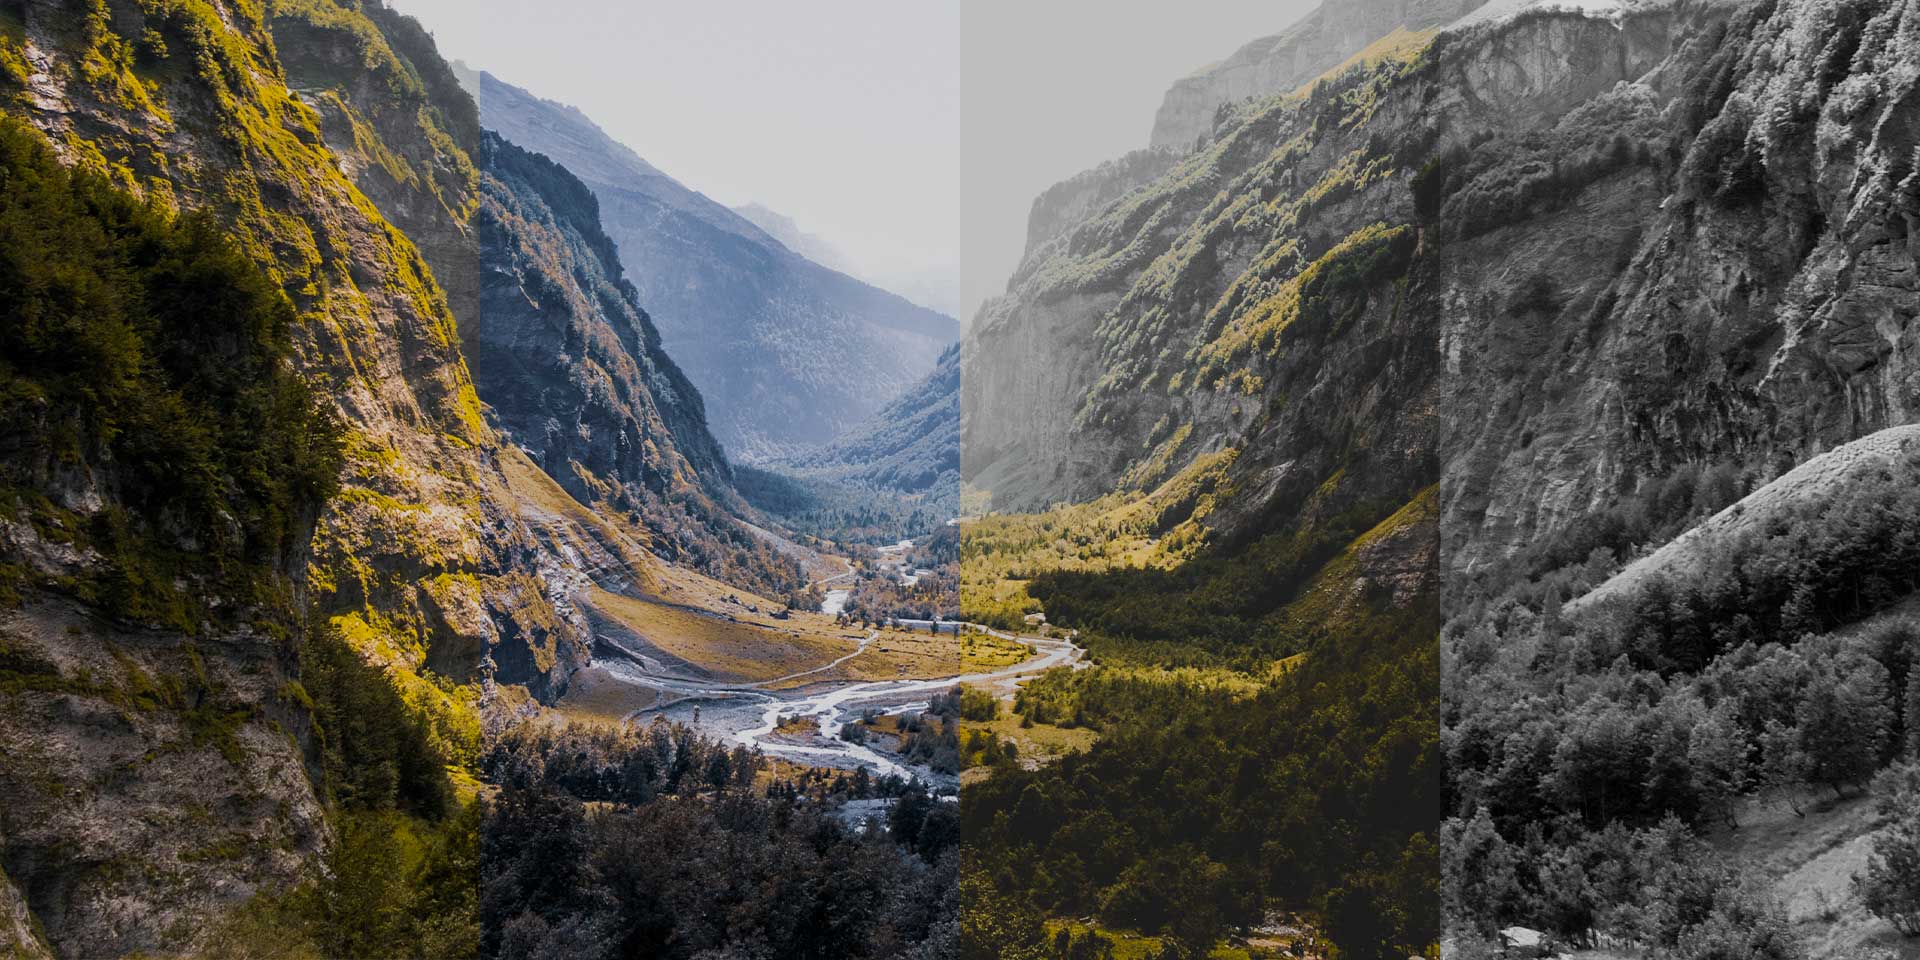
Making spectacular videos involves more than just trimming video and writing titles; adding visual effects and filters for artistic and dramatic flair is at the very heart of video and film storytelling. Apply color filters for mood and atmosphere, Add crazy warp effects to create a surreal world. Make your video look like old-time film. Introduce lens flares, light rays, and glows. It all depends on your imagination and your creative needs. VEGAS Pro offers an exciting library of visual effects and filters just waiting to be put to use in your next project. In this tutorial, we’re going to explore exactly how to add them to your video.
We’ll follow these steps:
Step 1: Import Your Media
Step 2: Drag Your Media to the Timeline
Step 3: Add Effects to the Video Event
Step 4: Add Effects to Media
Step 5: Add Effects to a Track
Step 6: Add Effects at the Project Level
Step 7: Add Effects to the Video Bus (in VEGAS Pro)
Now, let’s take a deep dive into adding effects and filters to your video in VEGAS Pro!
To find the effects and filters in VEGAS Pro, go to the Video FX window. Some effects are true filters, changing the color characteristics of video in specific and artistic ways. Others are effects which manipulate the image in other ways such as adding borders or cutting out parts of the video in specialized shapes. Still others add effects which squeeze or stretch the video. And even others do much more.
All filters are effects, so when we discuss adding effects, it includes any of the filters offered in VEGAS Pro.
Let’s explore in detail how to add effects to your video!
First, we need to import some media so you have something to apply effects to.
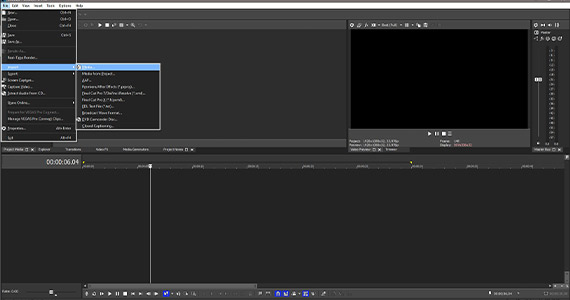
✓ Go to File>Import>Media.
The Import Media window appears.
✓ Navigate to the folder containing the media you want. Select the media file, then click Open.
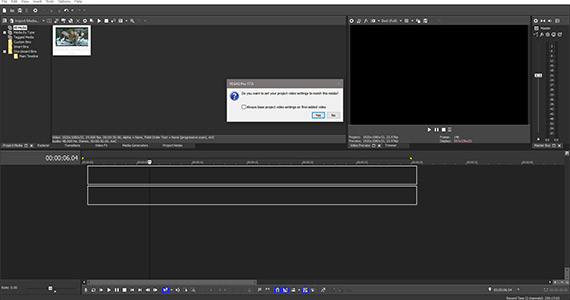
The media file now appears in the Project Media window.
Let’s start with the easiest way to apply an effect.
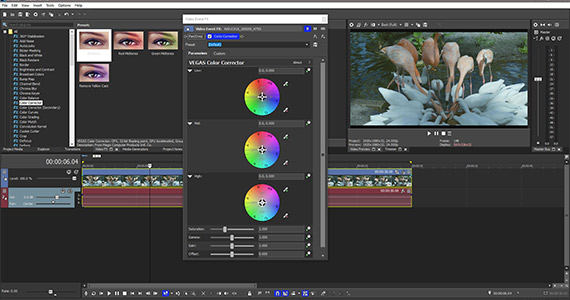
✓ Drag an effect from the Video FX window and drop it on the event in the timeline. The effect is applied and the Video Event FX window opens, displaying the effect controls. You can then choose from different templates for that effect, or you can make manual adjustments.
✓ For another way to add an effect to an event, click the Event FX button on the event. If the event has no effects applied, the Plug In Chooser – Video Event FX window opens. The window displays a list of available effects. Click on an effect, and then click Add. The effect name appears in a small box at the top of the Plug In Chooser window.
✓ Click on other effects, and click Add after each one. You can add the one effect only, or you can add more effects. The additional effects’ names appear in small boxes at the top of the window, now forming an effects chain. An effects chain is like a stack of effects, with each added effect overlaid on top of the previous effects. The order of effects can matter to your visual results, so you can slide the different effects around in the effects chain. Effects further to the right are overlaid on top of the previous effects.
✓ Once you’re satisfied with the selection of effects, click OK. The effect or effects are now applied to the event, and the Video Event FX window opens, displaying the effects controls. There is also an effects chain at the top of this window. Click on each effect in the chain to open the controls for that effect. You can also change the order of effects in the chain as desired.
We’ve added FX to an individual event on the timeline. But we can add effects at several other different levels, too.
In VEGAS Pro, you can add FX at the media, track, and project levels. Effects added at the track and project level are cumulative. If an event with effects filters applied sits in a track, and then you add effects to the track, the effects at the track level will be added on top of the effects on the event or events in the track. Likewise, if you add effects at the project level, those effects will be added on top of effects at the track and event levels.
Adding an effect at the media level applies it to the media itself and not a timeline event, track, or the project. When you apply the effect to the media, it will be applied to that media in any timeline event which contains that media. So, if you apply color correction to a certain media file, that color correction will be pre-applied to it every time you bring a separate instance of that media into the timeline. Also, if you edit or change the media FX, the changes will apply to every timeline event containing that media.
Effects added at the media level are at the lowest level of effects, so any effects applied at the event, track, or project levels are overlaid on top of the media FX.
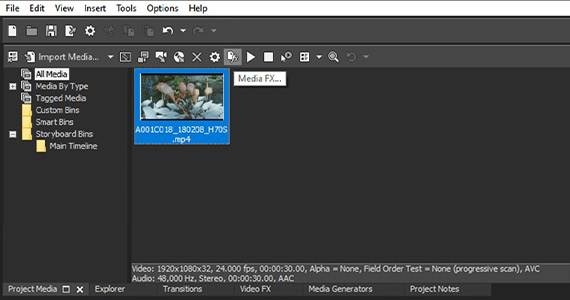
✓ To add effects at the media level, select the media file in the Project Media window.
✓ Click the Media FX button in the window toolbar. The Plug In Chooser – Media FX window opens.
✓ As with applying effects at the event level, choose your effects and click Add. When you have added your effects, click OK. The Media FX window opens, displaying the effects controls.
To view your effects, you must have an instance of that media contained in a timeline event so that you can view it in the Video Preview window. Effects applied at the media level will not be displayed if you view the media in the Trimmer window.
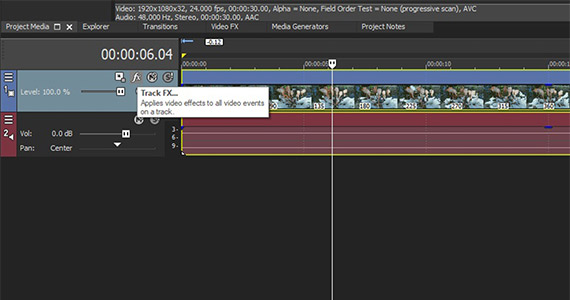
✓ Each track has a Track FX button. Click it, and the Plug In Chooser – Video Track FX window opens.
✓ As with the other levels, choose an effect or effects from the list and click Add until you have all the effects you want in the effects chain. Click OK, and the effects are added to the track. The Video Track FX window opens and the effects controls appear.
✓ Or, drag the effects you want from the Video FX window directly to the track. But make sure you drop it on either the track header or an empty portion of the track. If you drop it on an event in the track, the effect will be applied to the event instead of the track.
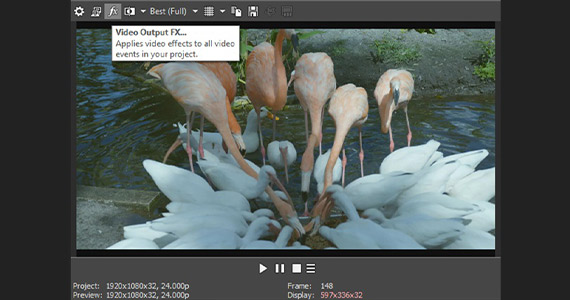
✓ To apply effects at the project level, drag the effects from the Video FX window to the Video Preview window. Or, click the Video Output FX button in the Video Preview window toolbar.
The Plug In Chooser – Video Output FX window opens.
✓ As before, choose your effects, click Add, then click OK when you’re finished. Effects applied in the Preview Window are then applied to the entire project, all tracks, all events.

In VEGAS Pro, there’s additional level where you can add effects -- the Video Bus level.
Adding effects at the video bus level works a lot like adding them at the project level; the effects will apply to all tracks and events on top of any effects added at those levels. The difference in using the video bus, though, is that you can control the entire project as you would control a video track. Not only can you add effects, you can add envelopes, fades, and track automation, which will then apply to the entire project.
✓ To add effects to the bus, go to View>Video Bus Track. When enabled, the Video Bus track appears at the bottom of the timeline. It looks very much like a video track, but with slightly different control buttons.
Unlike with other levels, you can’t simply drag an effect from the Video FX window to the Video Bus track.
✓ Click the Video Output FX button. The Plug In Chooser – Video Output FX window opens. From there, follow the same steps as you did applying effects at the project level.
Those are the many ways to apply effects and filters to your video in VEGAS Pro.
Experiment and have fun!


What's the difference between VEGAS Pro and VEGAS Pro Suite?